The Microsoft Identity Platform provides OAuth 2.0 and OpenID Connect (OIDC) standard-compliant authentication services for other Microsoft offerings including Azure and Microsoft Graph.
The Virtuoso Authentication Layer (VAL) provides access control and authentication functionality for Virtuoso. This includes authentication via Virtuoso acting as an OAuth/OIDC server in its own right or via third-party OAuth/OIDC providers. Microsoft Identity Provider Services is one of the numerous identity providers (IdPs) supported by VAL to provide third-party authentication and to obtain access tokens to utilize data and services exposed by these providers.
The notes below detail the steps for integrating Microsoft’s Identity Provider Services into VAL.
Conceptually, the process is as follows:
- Register your VAL-enabled Virtuoso instance as an OAuth/OIDC Application (the Relying Party) with Microsoft’s Identity Provider Services – this occurs via Azure
- Add Microsoft’s Identity Provider to the the collection of IdPs registered with your VAL-enabled Virtuoso instance .
Application (Relying Party) Registration Steps
Prerequisite: You must have an Active Directory instance in place that’s associated with an Azure subscription.
Register an Azure Application
- Login into the Azure portal.
- Go to the ‘App registrations’ Azure service and select the ‘New registration’ menu option.
- Register your Application, completing the ‘Name’ and ‘Redirect URI’ fields.
- For the latter, specify ‘Web’ as the platform and
https://{virtuoso_host}/val/api/thirdparty_callbackas the redirect URI. - You should register your Azure AD Application as multi-tenanted. This allows VAL to use the common authentication endpoints provided by Azure AD, instead of tenant-specific endpoints. The common endpoints all start with
https://login.microsoftonline.com/common/.... - Clicking the ‘Register’ button concludes with the generation of an App ID.
- For the latter, specify ‘Web’ as the platform and

Generate the Client Secret
At this point you should see a screen similar to that below.
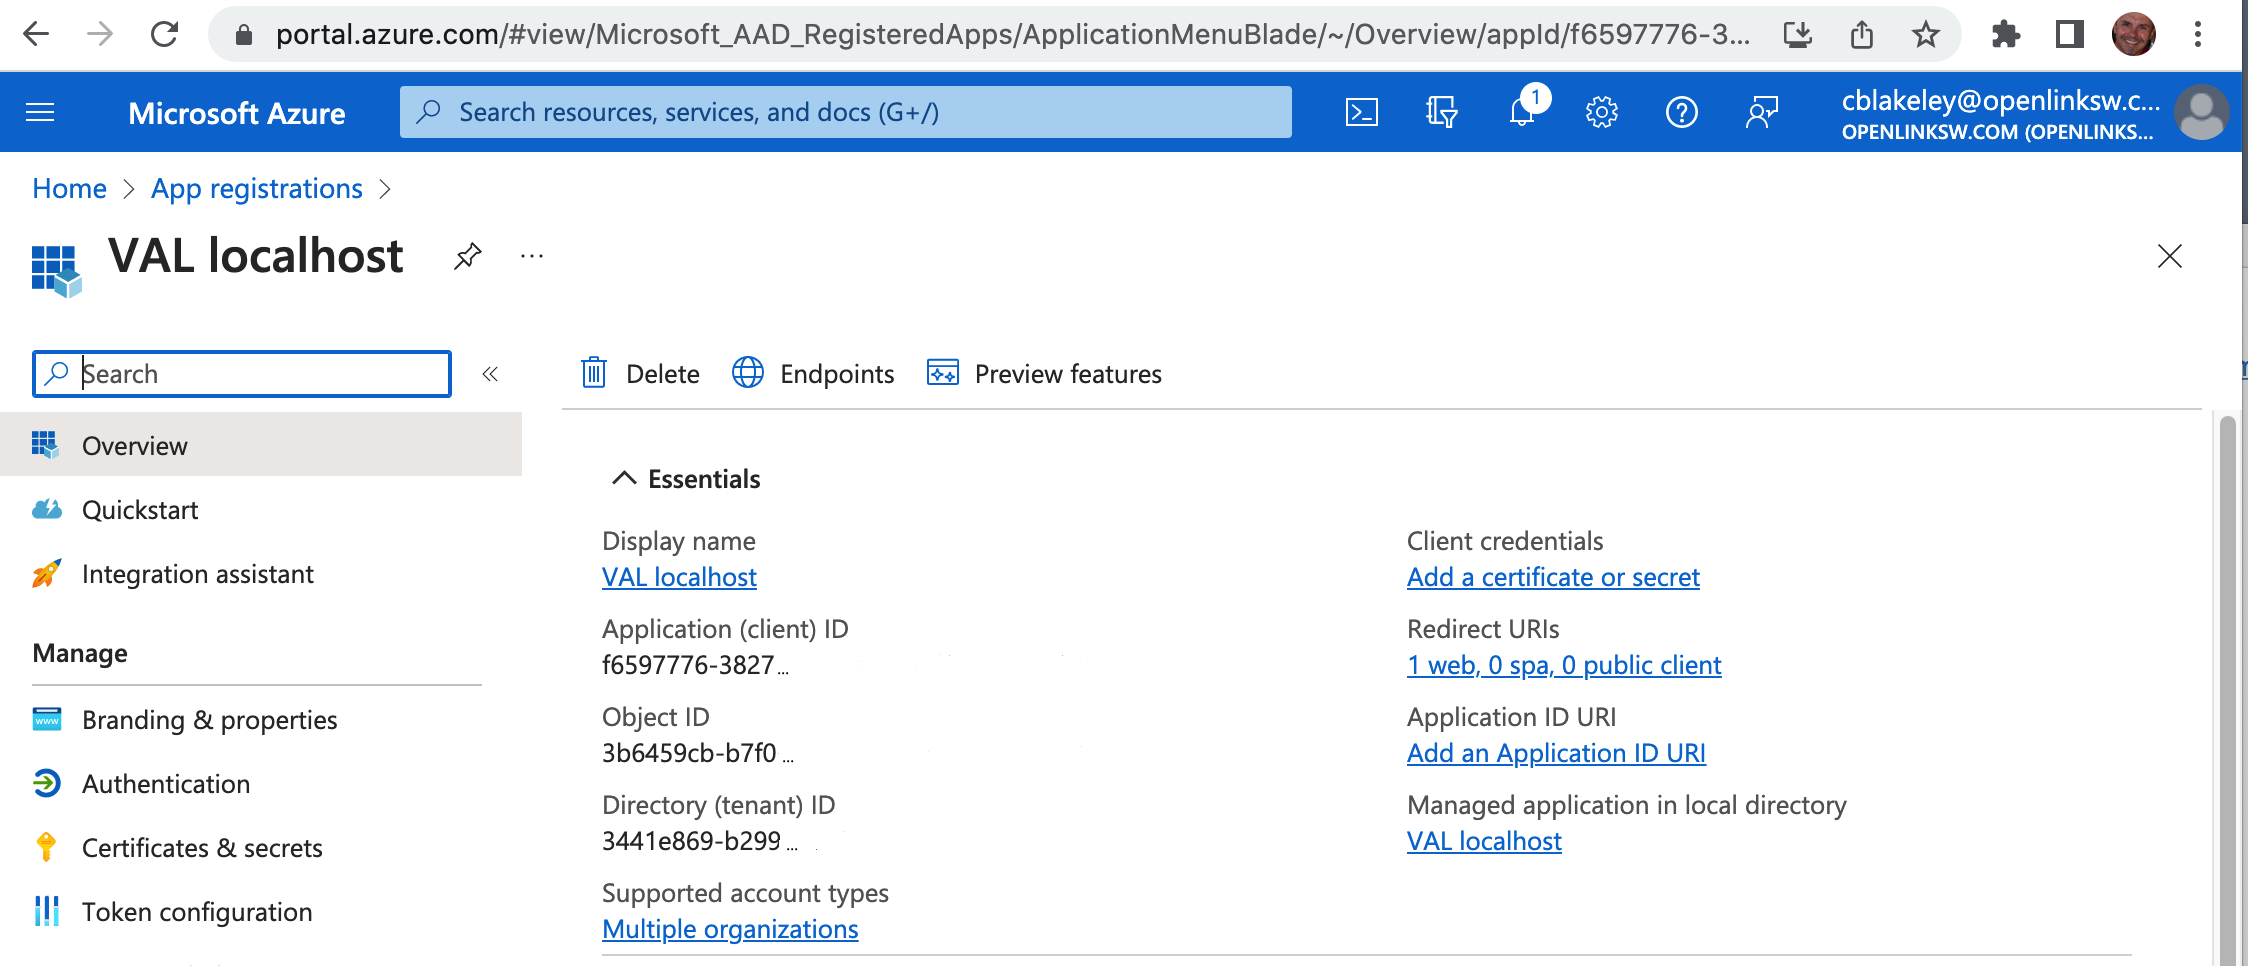
Make a note of the ‘Application (client) ID’.
The next step is to generate a client secret.
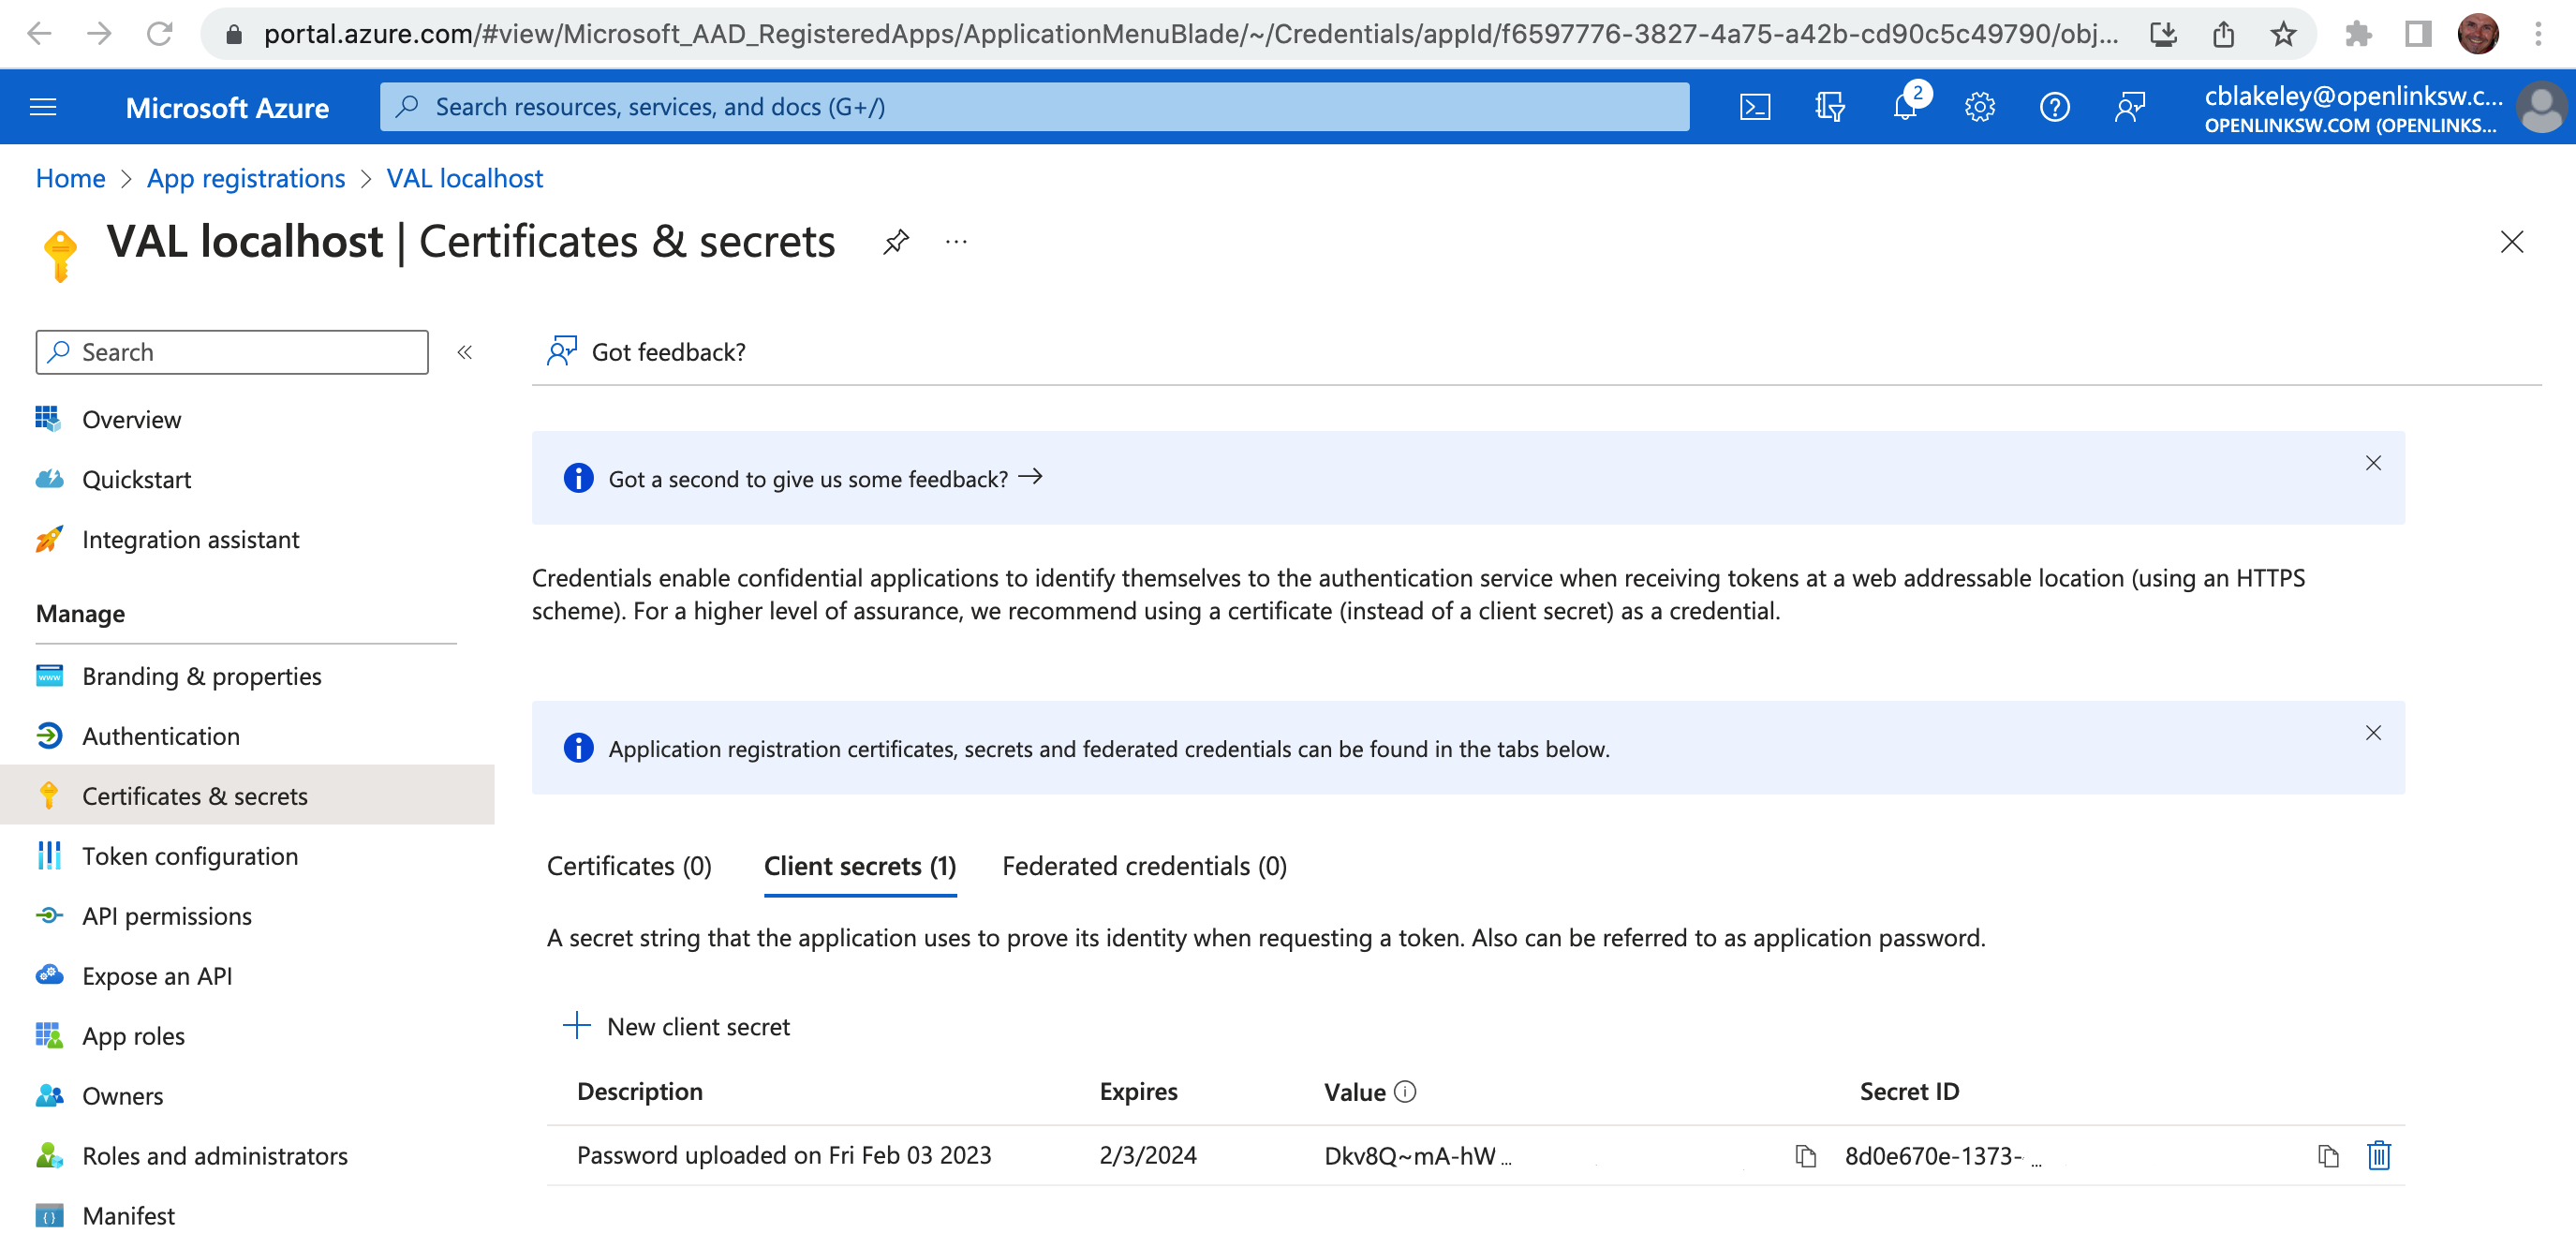
- Click on the link ‘Add a certificate or secret’.
- On the next screen under click on the ‘New client secret’ control. In the dialog box which follows add a description, select the preferred expiry time period and click ‘Add’.
Note: Because the client secret will expire, you will need to generate a new secret periodically and update your VAL Microsoft IdP binding with the new secret. The Azure portal highlights expired secrets and allows you to generate new secrets for a particular Application ID.
Client secret values cannot be viewed, except for immediately after creation. Note and save the secret before leaving the page.
At this juncture you have an App ID and its associated Client Secret in place ready to create a VAL OAuth/OIDC IdP binding.
VAL IdP Binding Setup Steps
This is achieved via the Virtuoso’s OAuth IdP Admin UI (https:/{your-instance-cname}/oauth/admin.vsp).
VAL OAuth & OIDC Binding Types
VAL supports two types of identity provider bindings:
- Predefined OAuth bindings to numerous third party services including Amazon, Google, Microsoft Graph etc.
- Custom Service Type bindings to servers supporting OpenID Connect (OIDC).
VAL’s predefined OAuth binding definitions include hardcoded authorization and token endpoint URLs. A VAL Custom Service Type defines an OIDC binding or an OAuth binding for an IdP not covered by the predefined OAuth bindings. Both types of bindings are able to bind to the Microsoft Identity Platform.
Before detailing how to create each type of binding, you need to be aware of the Microsoft OAuth and OIDC URLs to be registered with VAL.
Microsoft Identity Platform URLs Required By VAL OIDC Bindings
Token URL
https://login.microsoftonline.com/common/oauth2/v2.0/token
Authorization URL
https://login.microsoftonline.com/common/oauth2/v2.0/authorize
UserInfo URL
https://graph.microsoft.com/oidc/userinfo
JWKS URL
https://login.microsoftonline.com/common/discovery/v2.0/keys
Dynamic Provider Information Discovery Endpoint
https://login.microsoftonline.com/common/v2.0
VAL uses this URL to navigate to the OpenID Connect metadata document .../.well-known/openid-configuration through which the above URIs and other identity provider information can be determined automatically.
Creating a VAL Predefined OAuth Binding
The steps are as follows, in regards to registering a new Custom IdP:
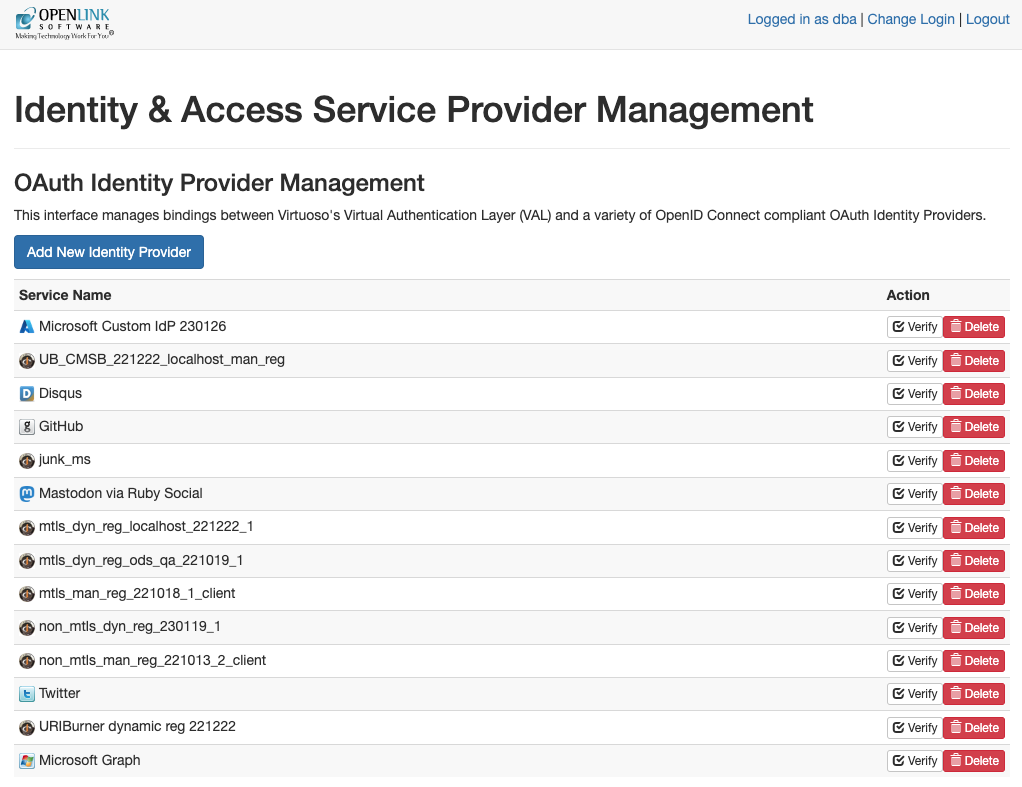
- Goto https://{cname}/oauth/admin.vsp
- Click on the “Add New Identity Provider” button, which opens the “New Identity Provider” dialog.
- Uncheck the “Custom Service Type” checkbox. VAL then switches to displaying a list of predefined OAuth bindings in the Service Name dropdown.
- Select “Microsoft Graph” from the Service Name dropdown.
- Enter your Azure “Application (client) ID” as the VAL “OAuth Client ID”.
- Enter the “Value” (not “Secret ID”) of your Azure “Client secret” as the VAL “OAuth Secret”.
- Your form should look similar to that below:
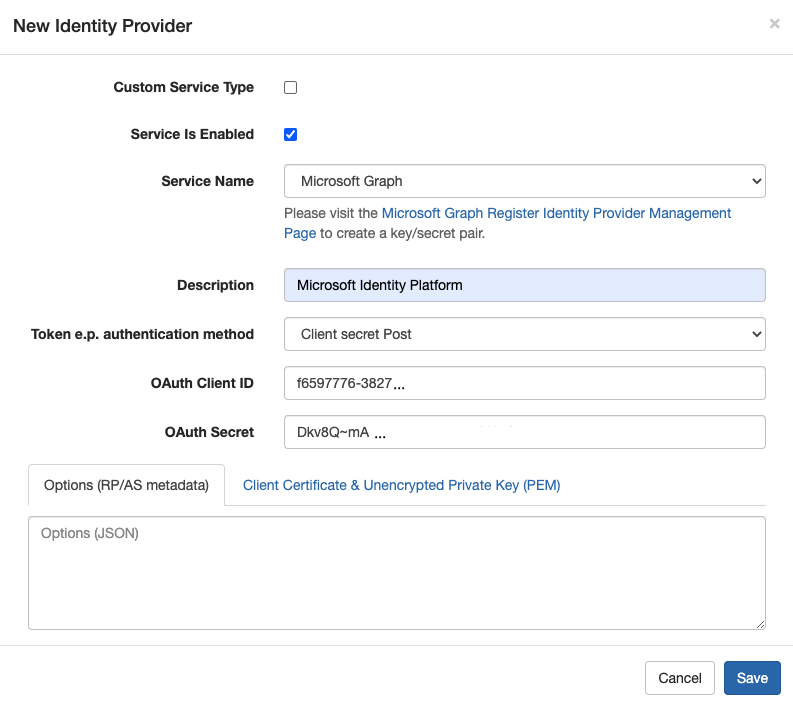
- Click “Save”.
You should now see a new “Microsoft Graph” entry in the list of “Service Names”.
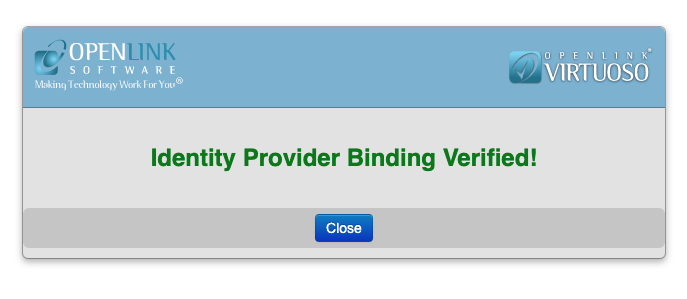
Before the binding can be used by a VAL service, it must be verified as being functional. Click the “Verify” button. Authenticate using your Microsoft login.
On successfully authenticating, you should see confirmation that the binding has been verified.
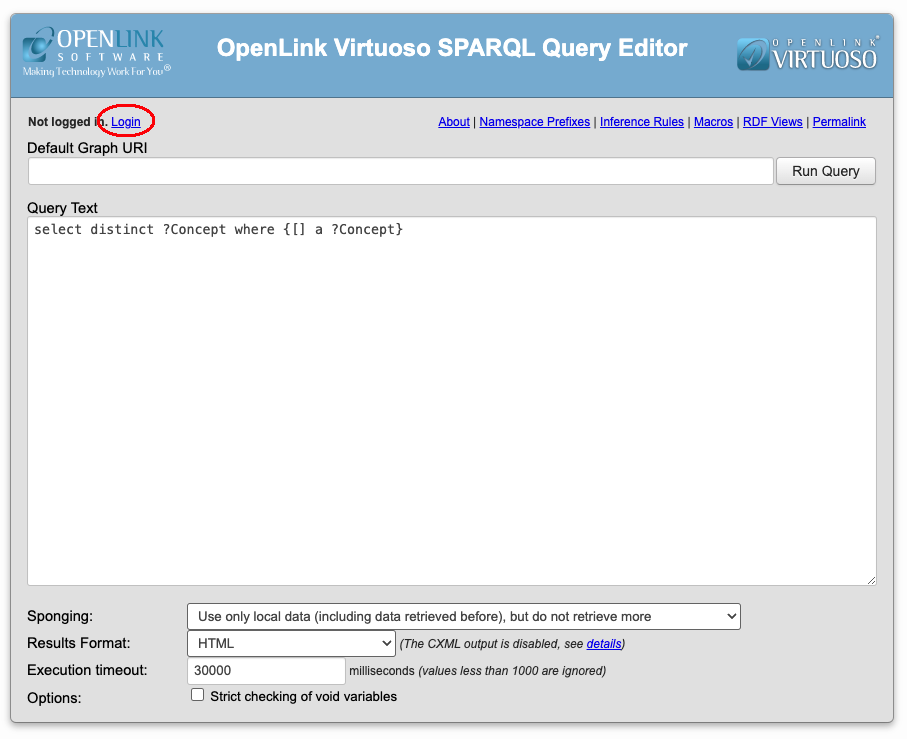
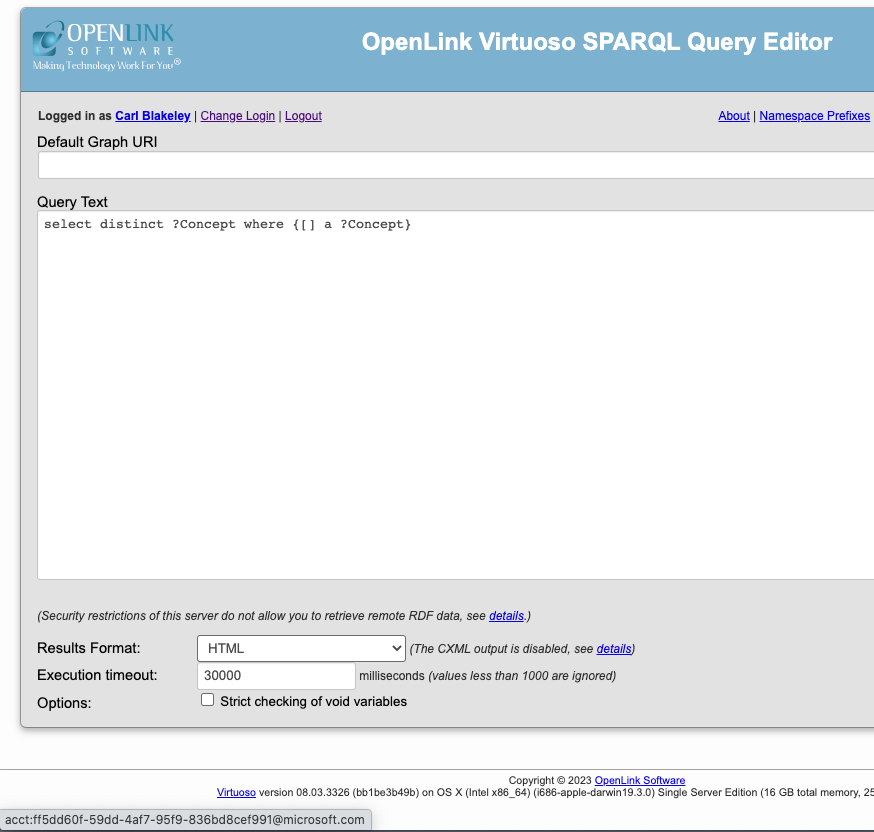
The OAuth/OIDC binding is now usable by other VAL services, for instance Virtuoso’s SPARQL Query Editor. Below, we show authentication using the SPARQL service.
Navigate to https://{cname}/sparql, then click on the ‘Login’ link.
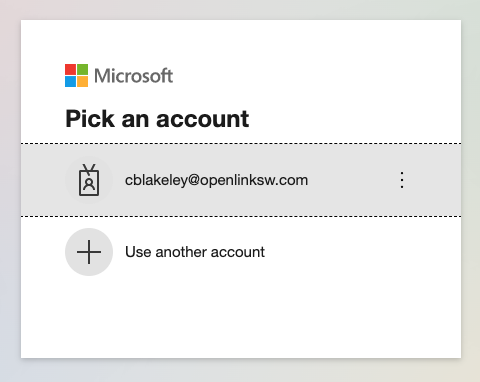
You will be prompted to authenticate.
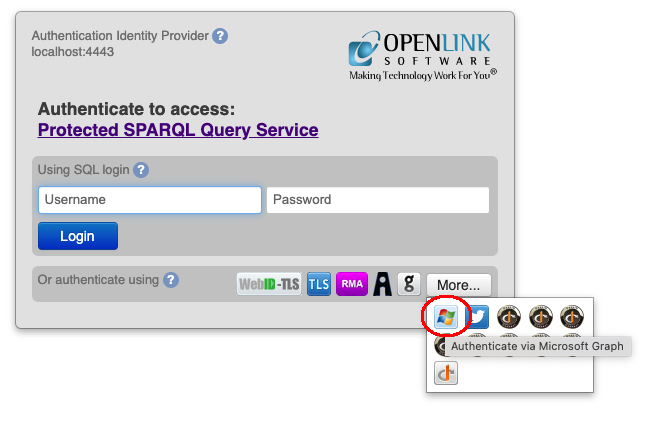
Authenticate against Azure as above.
Creating a VAL Custom OIDC Binding
In https://{cname}/oauth/admin.vsp, after clicking on the “Add New Identity Provider” button, the “New Identity Provider” dialog defaults to checking the “Custom Service Type” checkbox, so enabling you to define custom OIDC bindings.
To define a custom binding to the Microsoft Identity Platform:
- Uncheck the “Dynamic Client Registration” checkbox (since Microsoft doesn’t currently support that modality).
- Set the IdP Icon dropdown to Azure.
- Enter your Azure “Application (client) ID” as the VAL “OAuth Client ID”.
- Enter the “Value” (not “Secret ID”) of your Azure “Client secret” as the VAL “OAuth Secret”.
- Your form should look similar to that below.
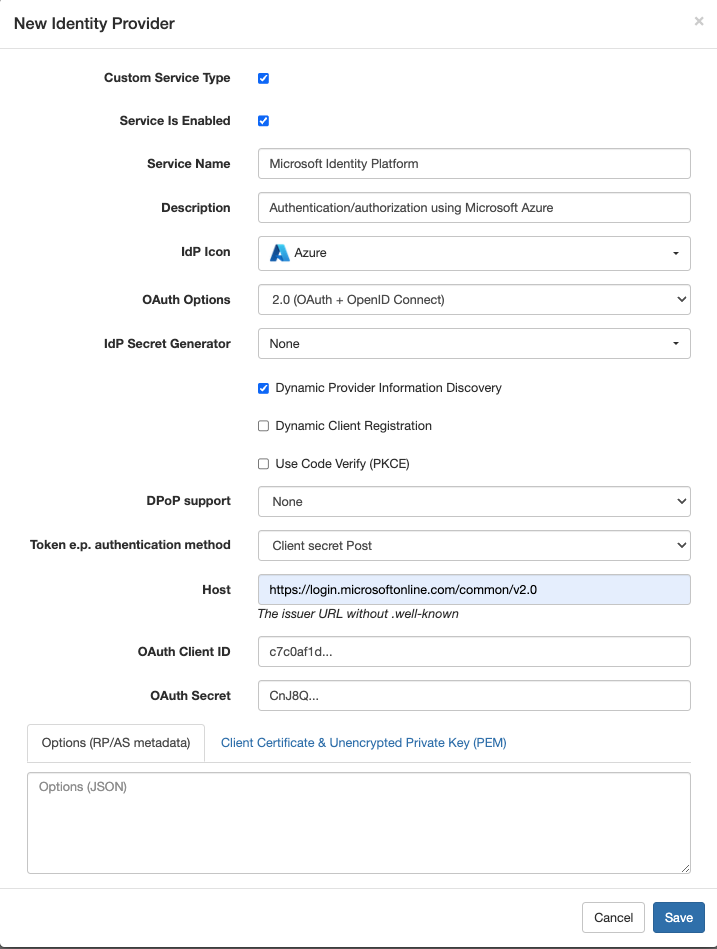
If “Dynamic Provider Information Discovery” is enabled, enter https://login.microsoftonline.com/common/v2.0 for “Host”. VAL can then discover the relevant OAuth/OIDC endpoints itself. The screenshot below shows the Identity Provider form after the binding has been saved with dynamic provider information discovery enabled. Note that the “Authentication URL”, “Token URL” and “User Info URL” fields have been filled automatically. If you create a binding with “Dynamic Provider Info Discovery” disabled, you must enter these values manually.
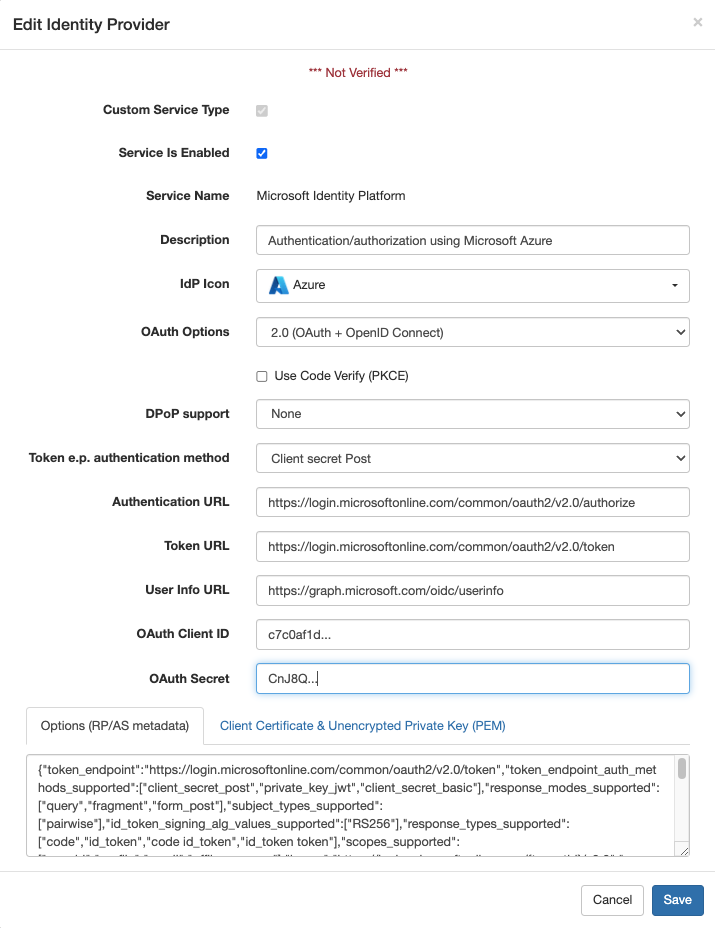
If dynamic provider information discovery is not used, you must also provide JWKS URI as part of the Options field of the binding definition form. The Options JSON value must include attribute jwks_uri.
{
  ...
  "jwks_uri":"https://login.microsoftonline.com/common/discovery/v2.0/keys",
  ...
}
VAL NetIDs for Microsoft Identity Platform Logins
When a user authenticates in VAL through the Microsoft Identity Platform, VAL associates a fixed ID, i.e. a VAL NetID (aka ServiceID), with that user. That NetID identifies the user when determining the permissions granted to them when accessing Virtuoso services protected by VAL. VAL’s predefined (OAuth) and custom (OIDC) bindings to the Microsoft Identity Platform return the same NetID for a given user.
The NetID takes the form:
acct:{microsoft-identity-claim}@microsoft.com.
where microsoft-identity-claim is the value of the oid claim contained in the ID token returned to VAL when a user authenticates via OIDC. (The claims in an ID token return by the Microsoft Identity Platform are documented here.) oid is a non-standard claim. VAL uses it in preference to the standard sub claim in order to ensure an invariant NetID. As explained in the Microsoft documentation, use of the sub claim alone cannot guarantee an invariant NetID.
Two Microsoft Identity Platform apps that request ID tokens for a given user will receive different sub claims, but the same oid claims for that user.
Microsoft’s userinfo endpoint response does not include the oid claim. Instead, VAL has to obtain oid claim from an ID token, which must be verified. This in turn requires that VAL have access to a Microsoft JWKS. Consequently the ‘Options’ in an OIDC binding to Microsoft Identity Platform must include attribute jwks_uri. This must be entered manually, as described above, if Dynamic Provider Info Discovery is not used.