Situation Analysis
You’ve installed the Virtuoso Authentication Layer (VAL) to a Virtuoso Instance that you also want to use as an OpenID Connect Identity Provider — alongside others such as Google, Twitter, Apple, etc.
How?
Simply perform the following tasks:
- Obtain Application Credentials
- Bind to Local Identity Provider using Application Credentials
Obtain Application Credentials
You achieve this objective by opening the OAuth Identity Provider application page and providing values to the input form presented for the following:
- Name — identifies your Application
- Description — a short description of your Application
- OAuth Version — a drop-down of versions for which 2.0 is the recommended default
The remaining fields are automatically populated with values generated by the Virtuoso instance, and shouldn’t be altered.
Take note of the Application Key and Application Secret, for later input.
Bind to Local Identity Provider (IdP) using Relying Party Credentials
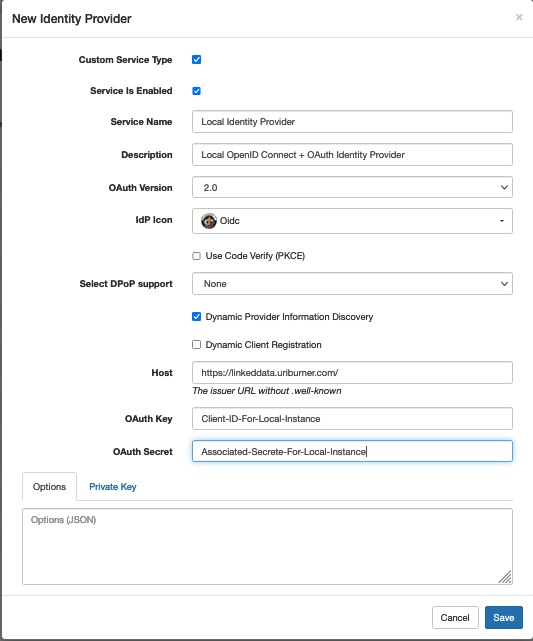
Now that your credentials are in place, open up the Identity & Access Service Provider Management page to register your Application as a Relying Party that seeks to use OpenID Connect + OAuth services via the values provided for the following:
-
Service Registration
- Service Name — used to identify the IdP
- Description — IdP Description
- OAuth Version — defaults to 2.0, which is our recommended preference
- IdP Icon — an image to be used to visually identify the IdP
- PKCSE checkbox — for enabling use of OAuth 2.0 with the PKCSE modality
- DPoP support options — for enabling DPoP using a variety of sub-options
-
Application Credentials Registration
- Dynamic Provider Information Discovery checkbox — currently disabled by default
- Dynamic Client Registration checkbox — currently disabled by default
- Application URL — using our URIBurner as an application example, this value would be
https://linkeddata.uriburner.com/OAuth2/authorize - Token URL — using our URIBurner as an application example, this value would be
https://linkeddata.uriburner.com/OAuth2/token - User Info URL — using our URIBurner as an application example, this value would be
https://linkeddata.uriburner.com/OAuth2/userinfo - OAuth Key — Application Key
- OAuth Secret — Shared Secret associated with Application Key

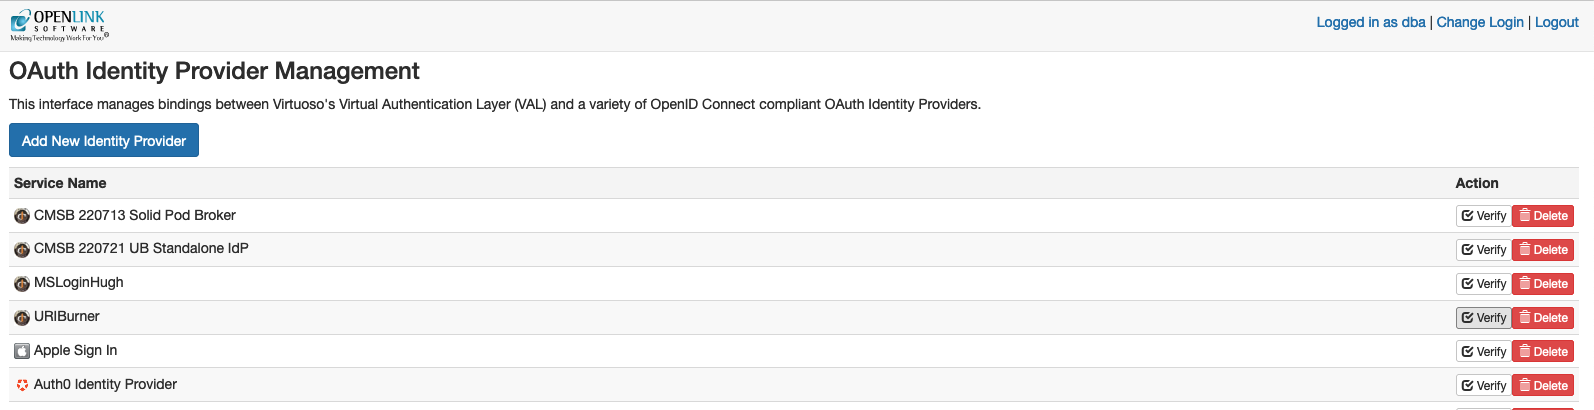
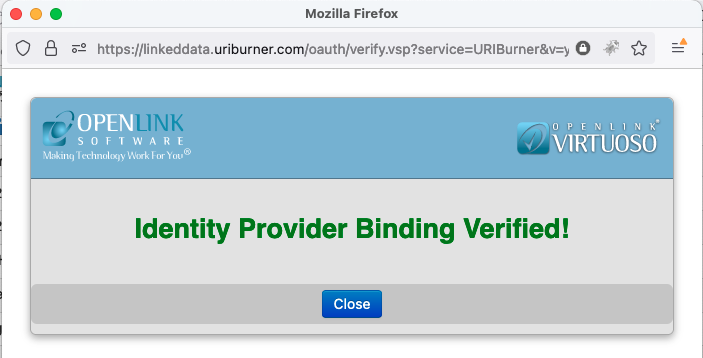
Save the values to complete registration of our Application as a Relying Party, and then verify the configuration by clicking on the “Verify” button, as per image sequence that follows.
Configured IdP List
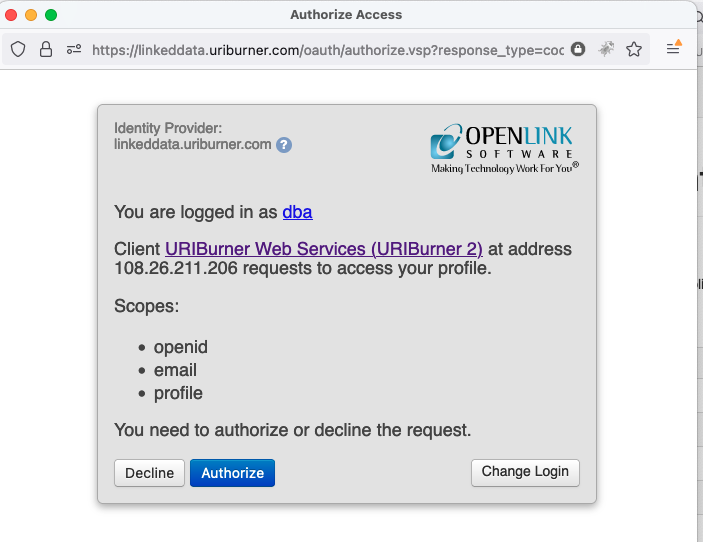
Authentication Handshake
Verification
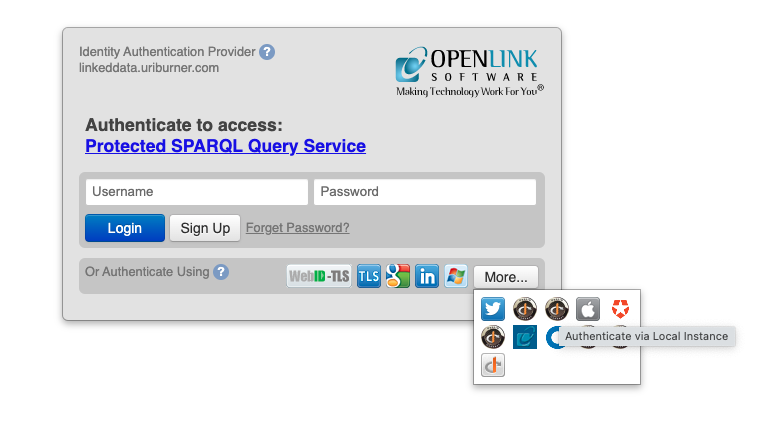
Live Usage Example – using our URIBurner Instance
- Go to the SPARQL Query Services Endpoint identified by https://linkeddata.uriburner.com/sparql. This is an Application functioning as a Relying Party to a self-hosted Identity Provider
- Click on the “Login” link
- In the “Or Authenticate Using” area, mouse over the available icon buttons, and click the one that displays “Authenticate via Local Instance” helptext
- When prompted, complete the authentication process by entering a user name and password combination for an existing SQL User Account
Related
- How To: Add Google Sign In (Identity Provider) Services to Virtuoso’s Authentication Layer (VAL) — Virtuoso Universal Server / Tips, Tricks, and HowTos — OpenLink Software Community (openlinksw.com)
- Adding Apple Identity Provider Services to VAL
- Adding Microsoft Identity Provider Services to VAL
- OpenID Connect (OIDC) and OAuth Protocol Virtualization, using Virtuoso