Situation Analysis
There is often a need to read data from Excel spreadsheets for integration with different target technologies in Data Integration projects.
The challenge is that Microsoft Excel data is only immediately accessible via ODBC connectivity (and that only on Windows), while many tools only support JDBC for SQL RDBMS data access (and may run on many operating systems).
ODI, the Oracle Data Integrator , is a Graphical Extract, Load and Transform (ELT) tool for the integration of remote data sources into warehouses, for use in business intelligent systems. ODI uses JDBC for all its connections to external data sources.
Enabling such a JDBC-consuming application or service to connect to ODBC-accessible data requires a bridge between JDBC and ODBC, e.g., the Sun JDBC-ODBC Bridge which has long been packaged with the Sun Java Development Kit (JDK) and Java Runtime Environment (JRE).
Further complicating matters, current ODI (v12.2.1) requires current Java (JDK/JRE 1.8 or higher). However, such recent releases of Java no longer include a JDBC-ODBC bridge component, and end-users and developers alike have found themselves disconnected from their desire to use ODI and other Java-based tools against existing ODBC-accessible data sources.
What Is the Solution?
The OpenLink JDBC-to-ODBC Bridge driver restores connectivity between modern JDBC-consuming applications and ODBC-accessible data sources across multiple operating systems.
OpenLink’s JDBC-to-ODBC Bridge Drivers (Enterprise and Lite Editions, in both 32- and 64-bit variants) support the latest Java, and are available for immediate download, evaluation, and purchase.
Net effect, they put an end to this problem.
Walking Through the Solution
Here we present a complete walkthrough, covering installation and configuration of both ODI and our JDBC-ODBC Bridge, en route to making a connection from ODI to Data in an Excel spreadsheet.
Preparing the Excel Data
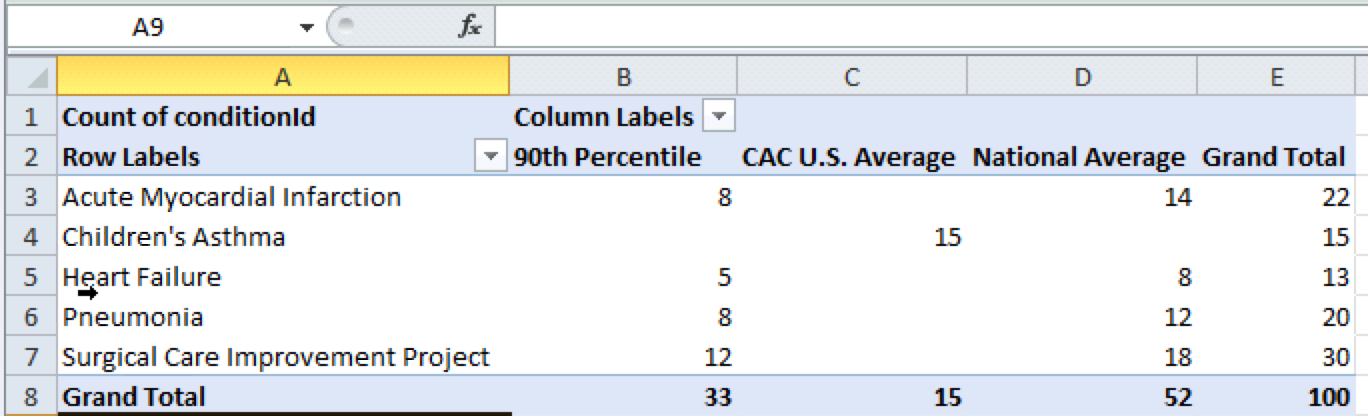
We’ll start with this sample spreadsheet:
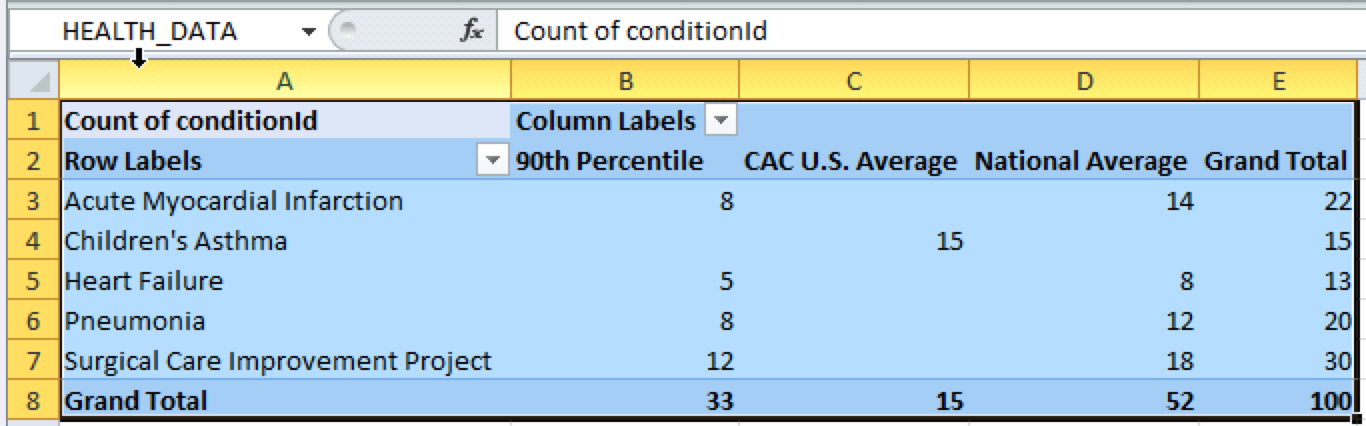
First thing, the spreadsheet needs to be prepared such that ODI can harvest its metadata, by defining a name for the cells to be accessed; in this case, we’ll call them HEALTH_DATA :
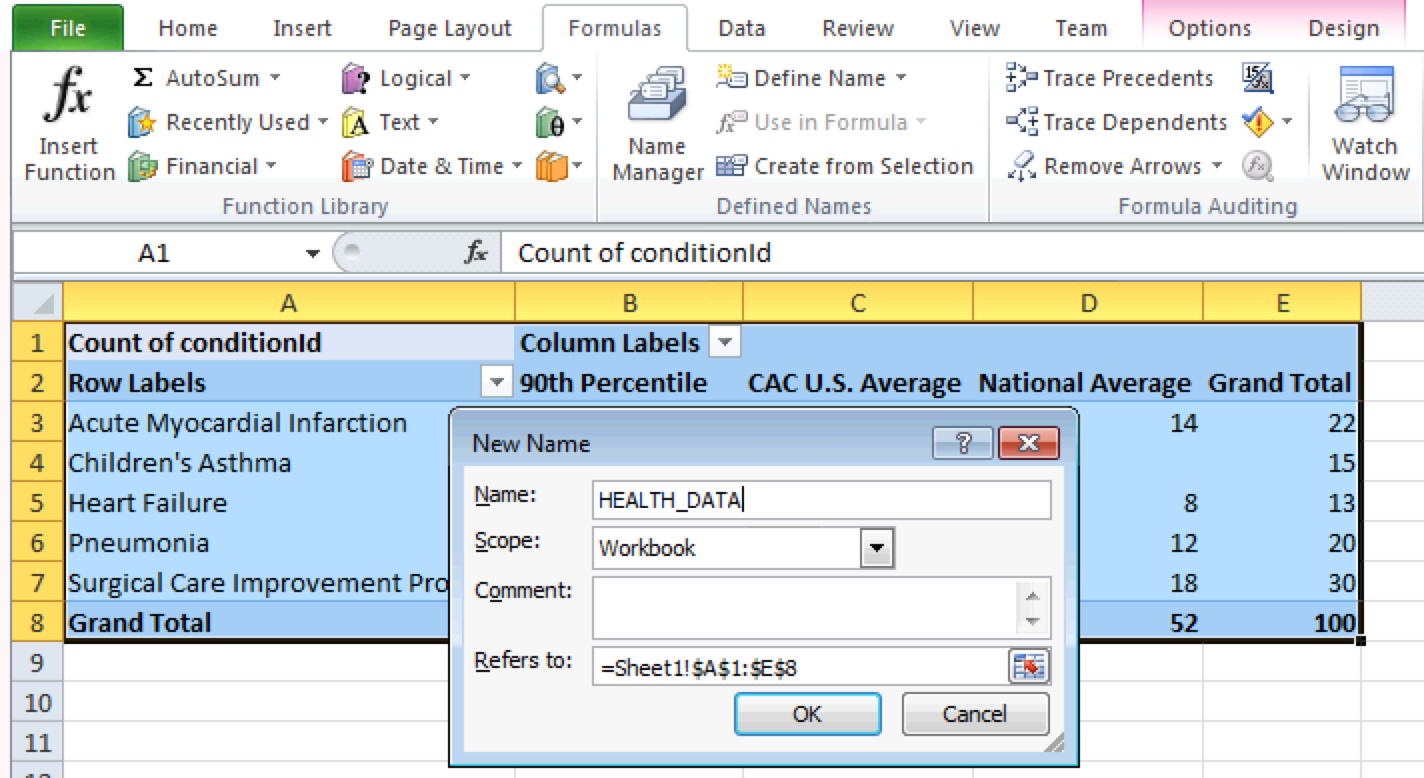
The steps are as follows:
- Select all columns
- Go to the Formulas tab
- Select the Define Name option
- Type a name (metadata) for the table, i.e.,
HEALTH_DATA - Save
Setting up the Microsoft Excel ODBC DSN
Now, an ODBC DSN needs to be set up on the Windows machine, using the Excel ODBC Driver to connect to the target Excel spreadsheet.
This is done using the Microsoft ODBC Administrator:
Note: for 64-bit ODBC Drivers, this is found at
%windir%\system32\odbcad32.exe, and for 32-bit ODBC Drivers, this is found at%windir%\SysWoW64\odbcad32.exe
We will use the 64-bit ODBC Driver in this example, but the steps are exactly the same for the 32-bit ODBC Driver.
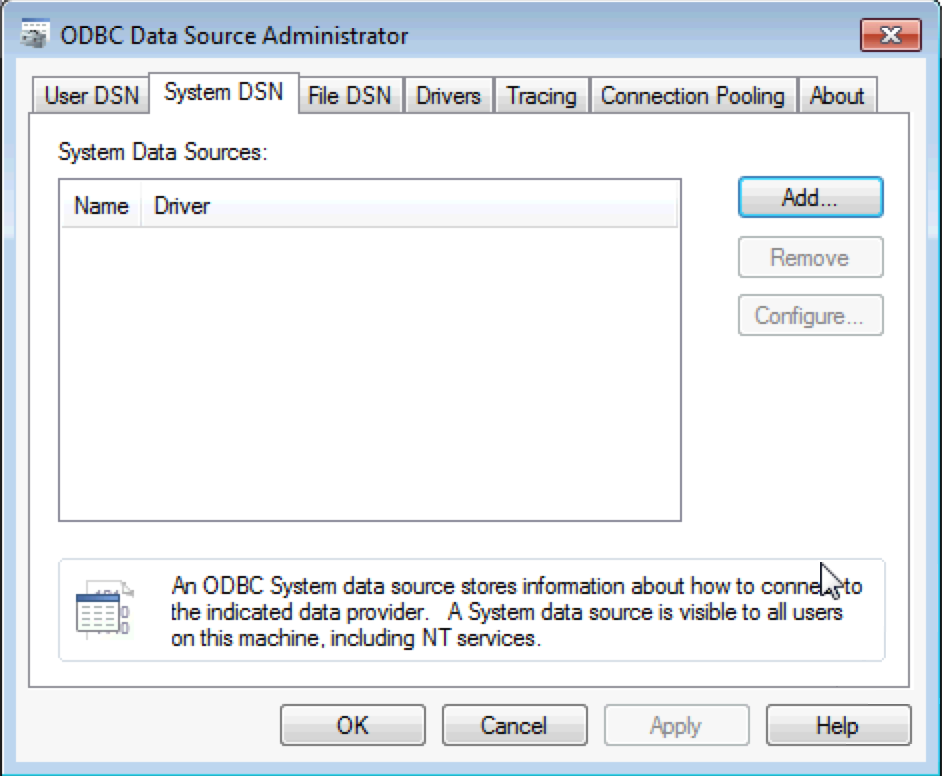
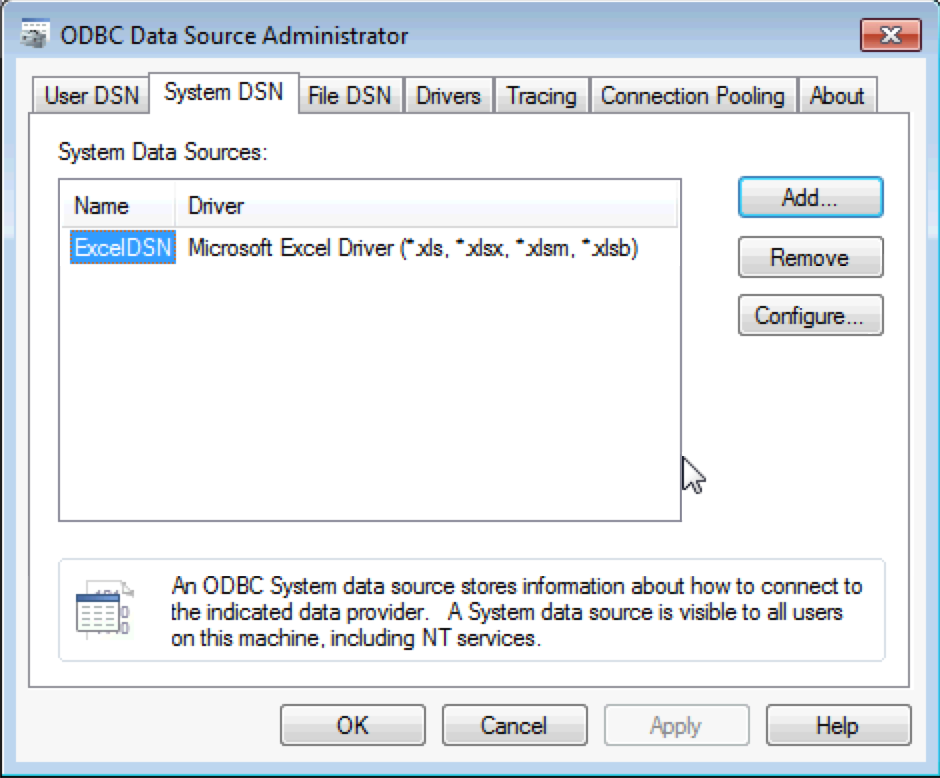
- Go to the System DSN tab of the ODBC Administrator and click on the Add button to add a new DSN:
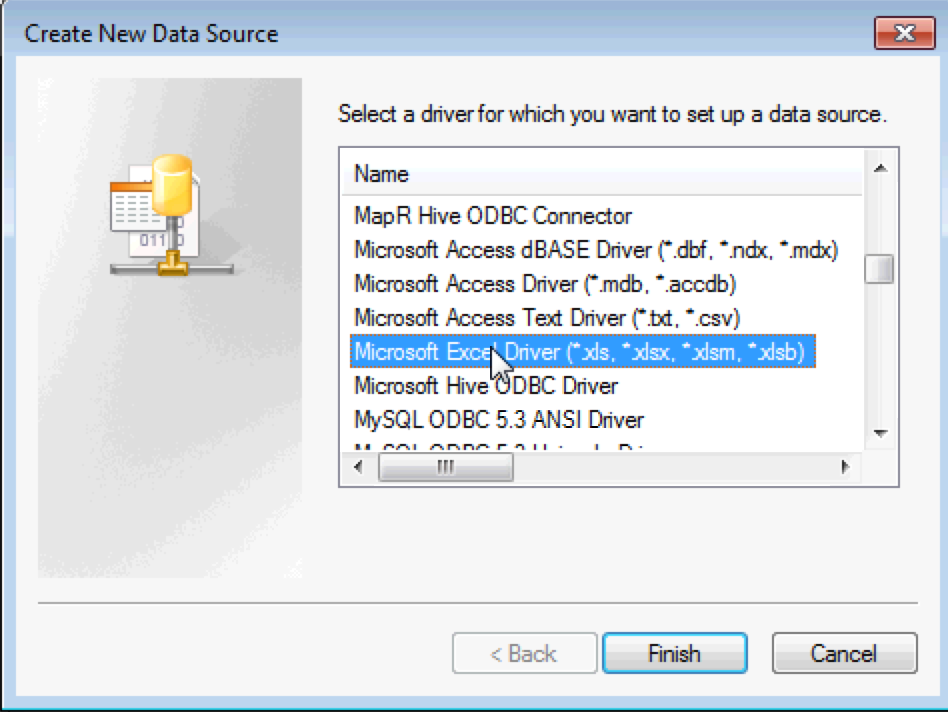
- Select the Microsoft Excel Driver from the list of ODBC Drivers presented:
- Give the DSN a name, and use the Select WorkBook button to point to the Excel Workbook to be used, i.e., the one where we just named
HEALTH_DATA:
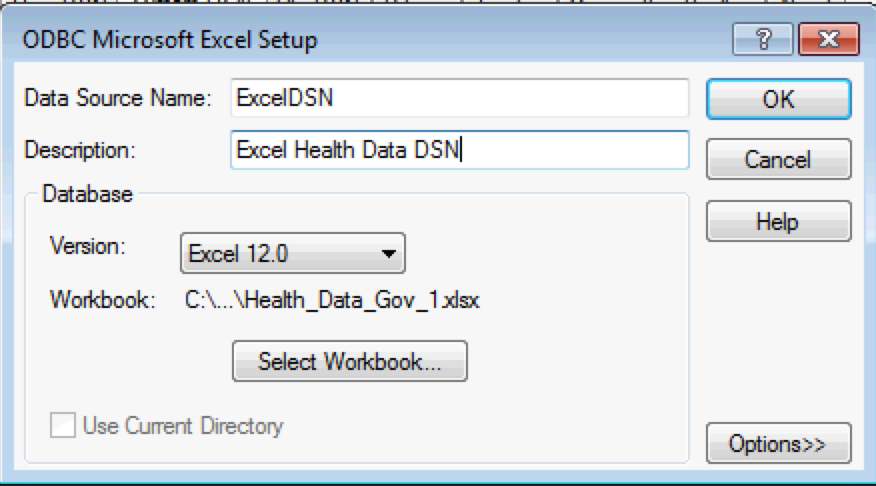
- Click the OK button to save the configured DSN:
- The Excel ODBC DSN is now ready for use.
Installing and Configuring the OpenLink JDBC-to-ODBC Bridge
As we are using the ODI Linux VM, and the target Excel spreadsheet resides on a Windows machine, the OpenLink Enterprise Edition (Multi-Tier) JDBC-to-ODBC Bridge Driver must be used to provide the required connectivity.
OpenLink Enterprise Edition (Multi-Tier) JDBC-to-ODBC Bridge Driver Architecture Diagram
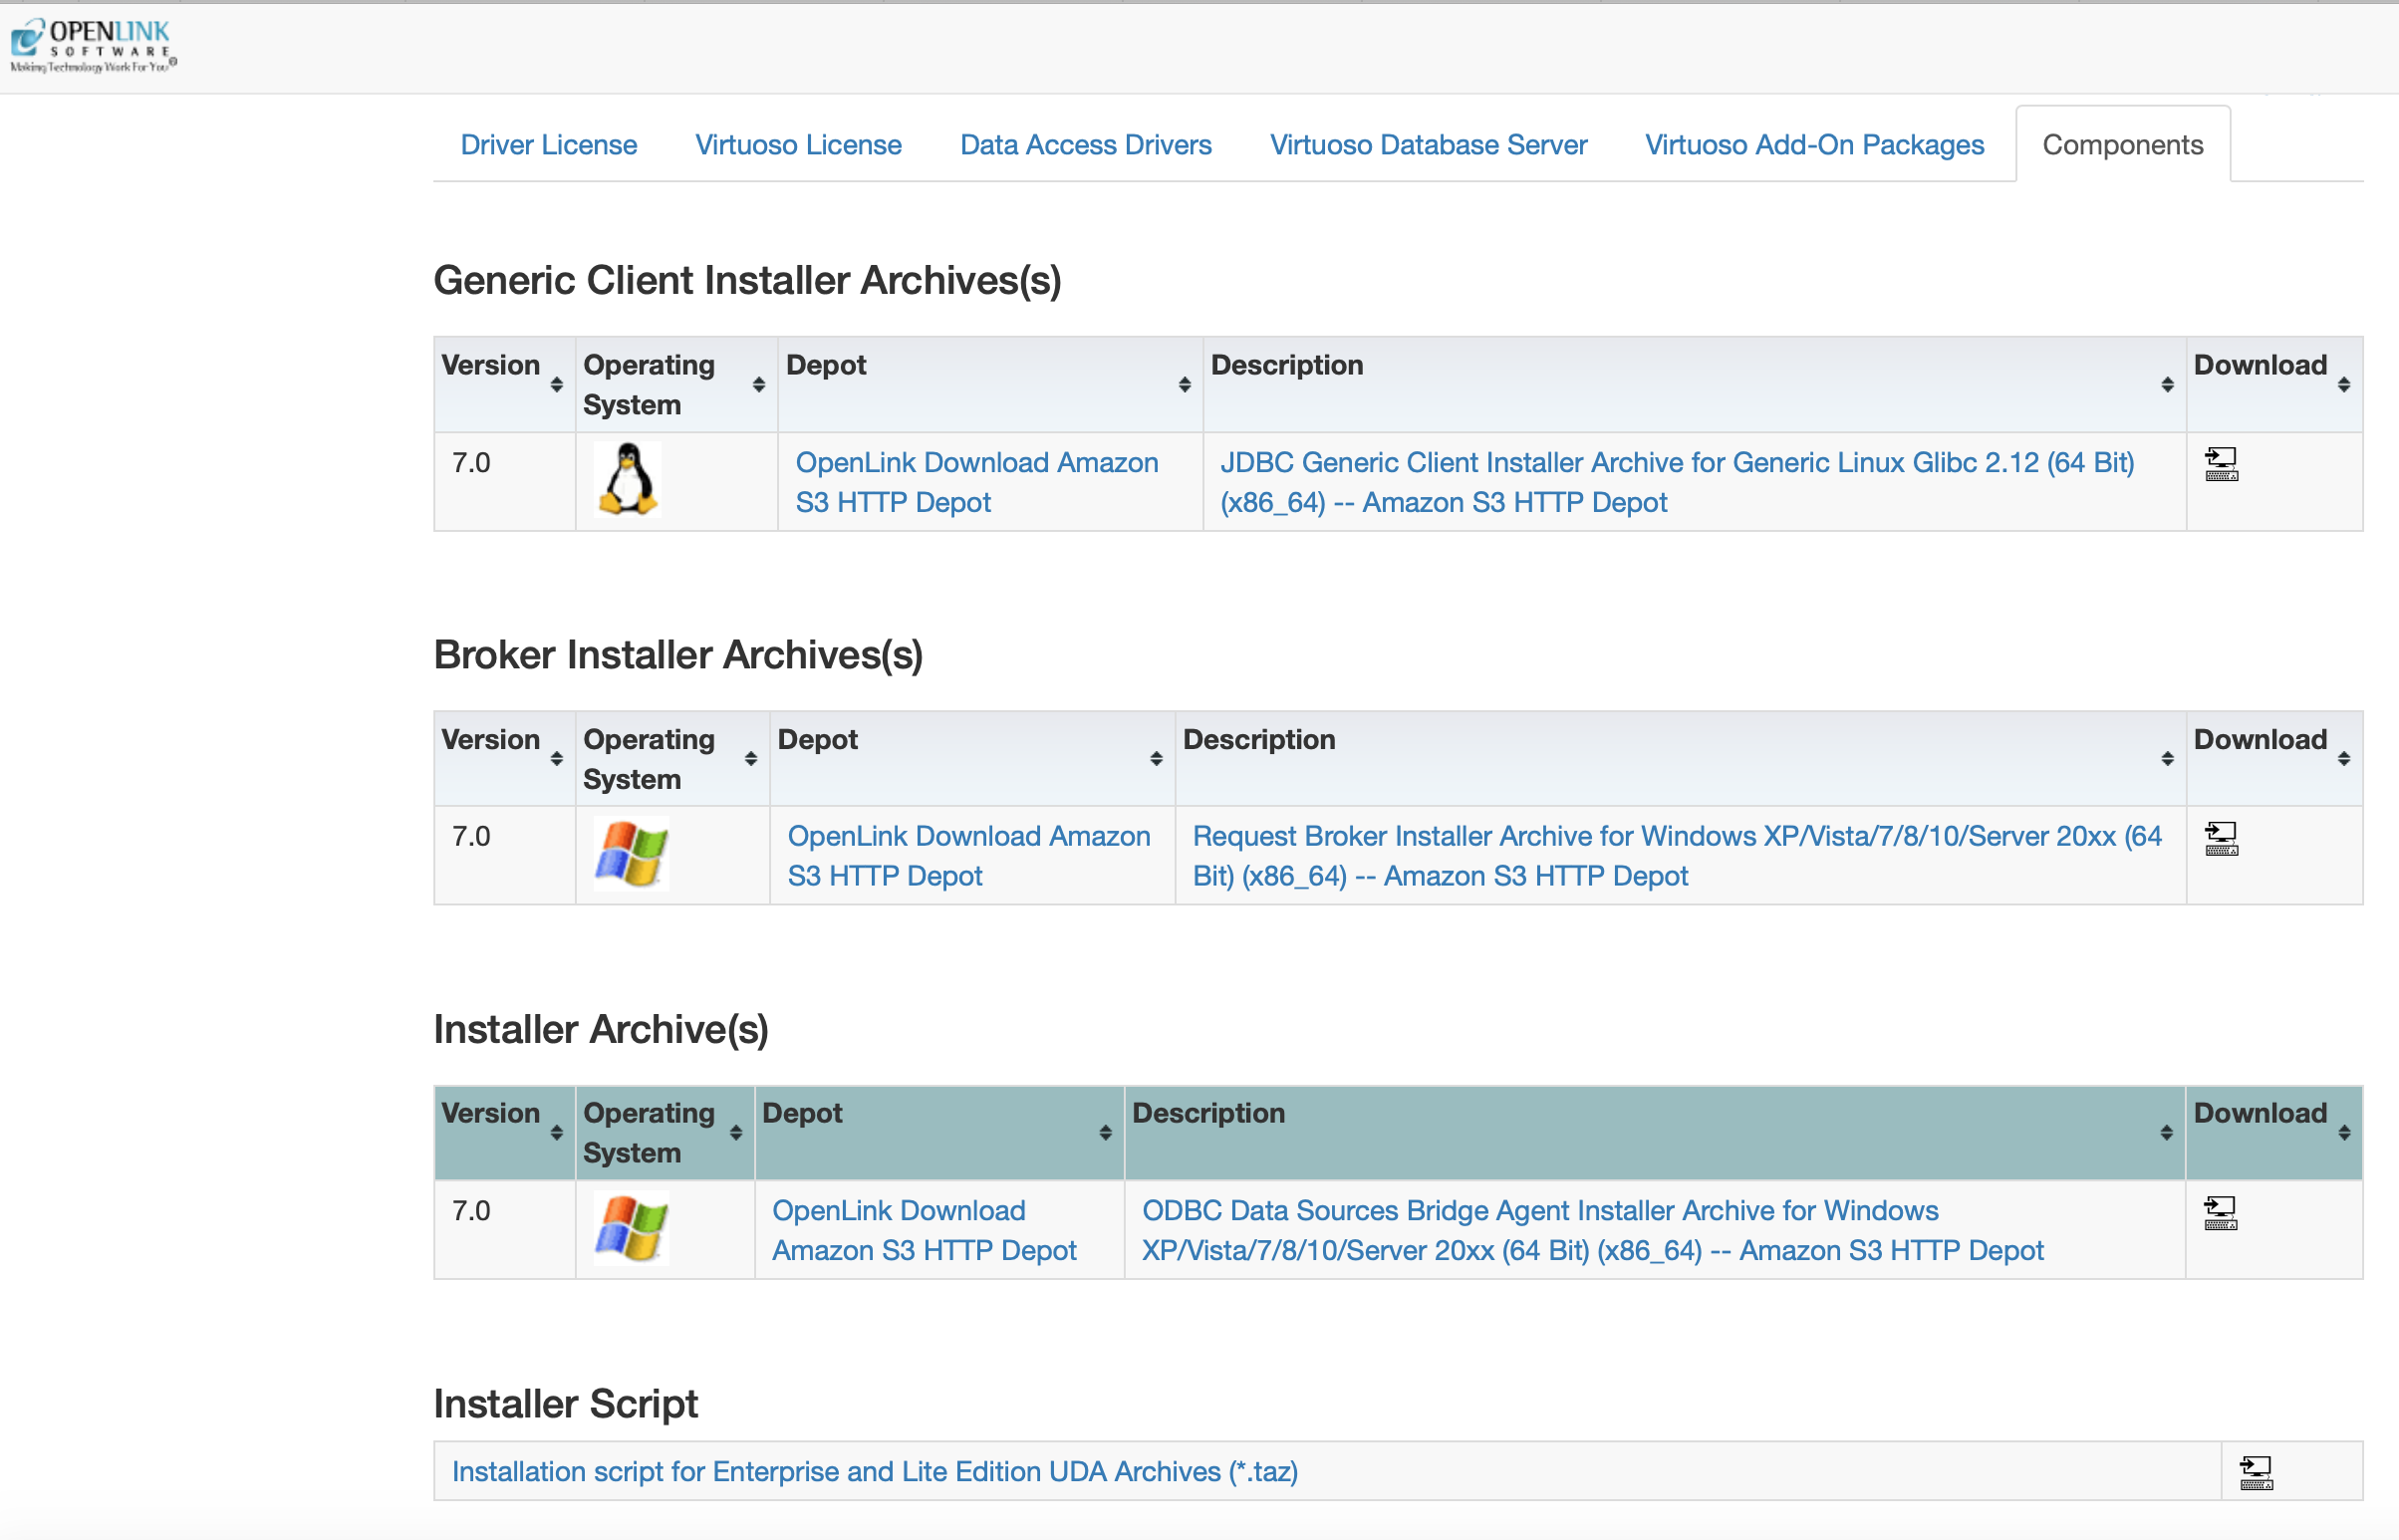
Links to download the required OpenLink JDBC-to-ODBC Bridge components, including a 15-day evaluation license, with Linux (glibc 2.12 or later) as the Bridge client OS and Windows as the Bridge server OS, are:
Note: OpenLink also offers a Lite Edition (Single-Tier) JDBC-to-ODBC Bridge Driver , which may be used if ODI is installed on the same Windows host as the Excel ODBC Driver (and spreadsheet).
Installing the OpenLink Enterprise Edition (Multi-Tier) JDBC-to-ODBC Bridge — Windows Server-side
The Enterprise Edition Bridge Agent for ODBC Data Sources needs to be installed to provide the connection to the Excel ODBC DSN we configured earlier.
This requires the OpenLink Request Broker ( wabrzzzz.msi ) and ODBC Bridge Agent ( waaozzzz.msi ) MSI installers, obtained from the download server links above:

In both cases, a Typical installation should provide all necessary components. For best results, follow the detailed instructions in the Enterprise Edition (Multi-Tier) Installation Guide for Windows , and ensure that the evaluation license provided with download is selected when prompted for it during the installation.
Once these installations are complete, the OpenLink Request Broker ( oplrqb.exe ) will be automatically running as a Windows service, and listening for incoming connection requests from OpenLink Enterprise Edition Data Access Generic Clients (i.e. JDBC, ODBC, ADO.NET, etc.):
![]()
ODI Installation & Setup
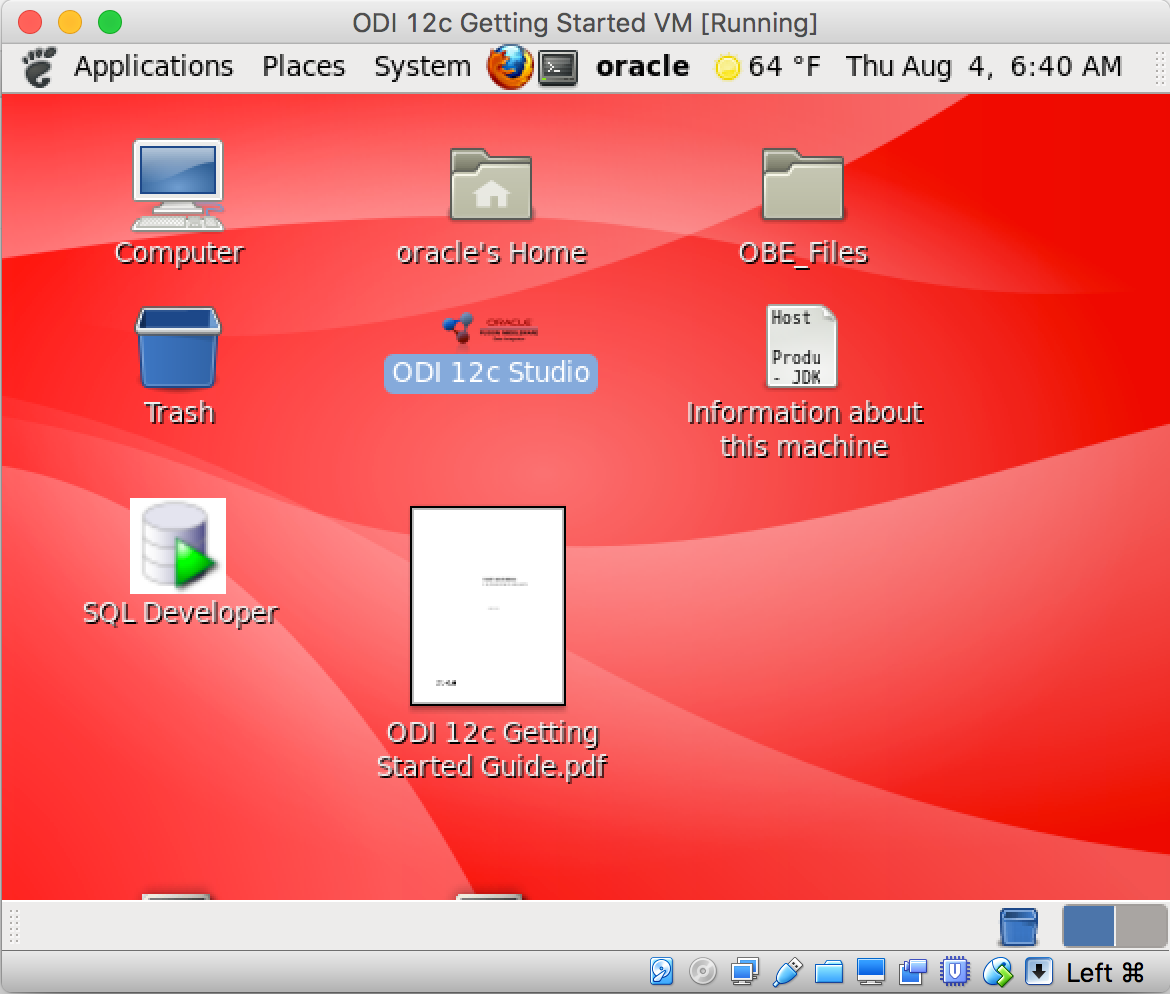
For this walk-through, we’ll use the pre-built ODI Linux VM that includes a pre-configured instance of ODI 12c running against an Oracle 12c database server instance.
Follow the instruction on the ODI 12c Linux VM Getting Started guide , to perform the installation on one of the Host OS (Windows, Linux , Mac OS X) supported by Virtual Box. Once installed, you can find the ODI 12c Studio application in the running VM.
Installing the OpenLink Enterprise Edition (Multi-Tier) JDBC-to-ODBC Bridge — Linux Client-side
The OpenLink Enterprise Edition (Multi-Tier) Generic Client JDBC Driver for Java 8 ( opljdbc4_2.jar ) is required for use with the ODI Linux VM, and can be downloaded and installed on the Linux VM following the instructions in the OpenLink Generic JDBC Driver Installation and Configuration.
Open a Linux terminal shell in the VM, and run the command sequence illustrated below, to install the JDBC Client components in your choice of directory:
[oracle@ODIGettingStarted ~]$ mkdir uda
[oracle@ODIGettingStarted ~]$ cd uda
[oracle@ODIGettingStarted ~]$ wget http://opldownload.s3.amazonaws.com/uda/components/7.0/x86_64-generic-linux-glibc212-64/opljdbc.taz
[oracle@ODIGettingStarted ~]$ wget http://opldownload.s3.amazonaws.com/uda/components/7.0/x86_64-generic-linux-glibc212-64/install.sh
[oracle@ODIGettingStarted uda]$ sh install.sh

Started installation on : ODIGettingStarted

Extracting (opljdbc.taz) …

Setting up CLASSPATH for Java connectivity.
You can choose between the following Java JDK versions:

1) JDK 1.1.x
2) JDK 1.2.x
3) JDK 1.3.x
4) JDK 1.4.x
5) JDK 1.5.x
6) JDK 1.6.x
7) JDK 1.7.x
8) JDK 1.8.x

Please enter your choice [ENTER=6] : 8
Creating scripts …
End of installation
[oracle@ODIGettingStarted uda]$ ls -ltr jdk1.8
total 428
-rw-r--r-- . 1 oracle oracle 263873 Jul 28 2015 opljdbc4_2.jar
-rw-r--r-- . 1 oracle oracle 168464 Jul 28 2015 megathin4_2.jar
[oracle@ODIGettingStarted uda]$
Since we’re working on a Unix-like OS (Linux, Mac OS X, etc.), the Generic Client JDBC Driver for Java 8 ( opljdbc4_2.jar ) must be copied to (or symlinked from) the $HOME/.odi/oracledi/userlib directory. (If ODI were running on Windows, the JDBC Driver would need to go into the ../AppData/Roaming/odi/oracledi/userlib/ directory.)
[oracle@ODIGettingStarted uda]$ cp jdk1.8/opljdbc4_2.jar $HOME/.odi/oracledi/userlib
[oracle@ODIGettingStarted uda]$ ls -ltr $HOME/.odi/oracledi/userlibtotal 272
-rw-r----- . 1 oracle oracle 332 Oct 2 2013 additional_path.txt
drwxr-x--- . 2 oracle oracle 4096 Jun 19 2014 component
drwxr-x--- . 4 oracle oracle 4096 Jul 1 19:32 pattern
-rw-r--r-- . 1 oracle oracle 263873 Aug 4 10:33 opljdbc4_2.jar
[oracle@ODIGettingStarted uda]$
The OpenLink Generic Client for Java 8 is now ready for use with ODI.
ODI Studio Setup
Start the ODI 12c Studio application by double-clicking its icon on the Linux VM desktop:
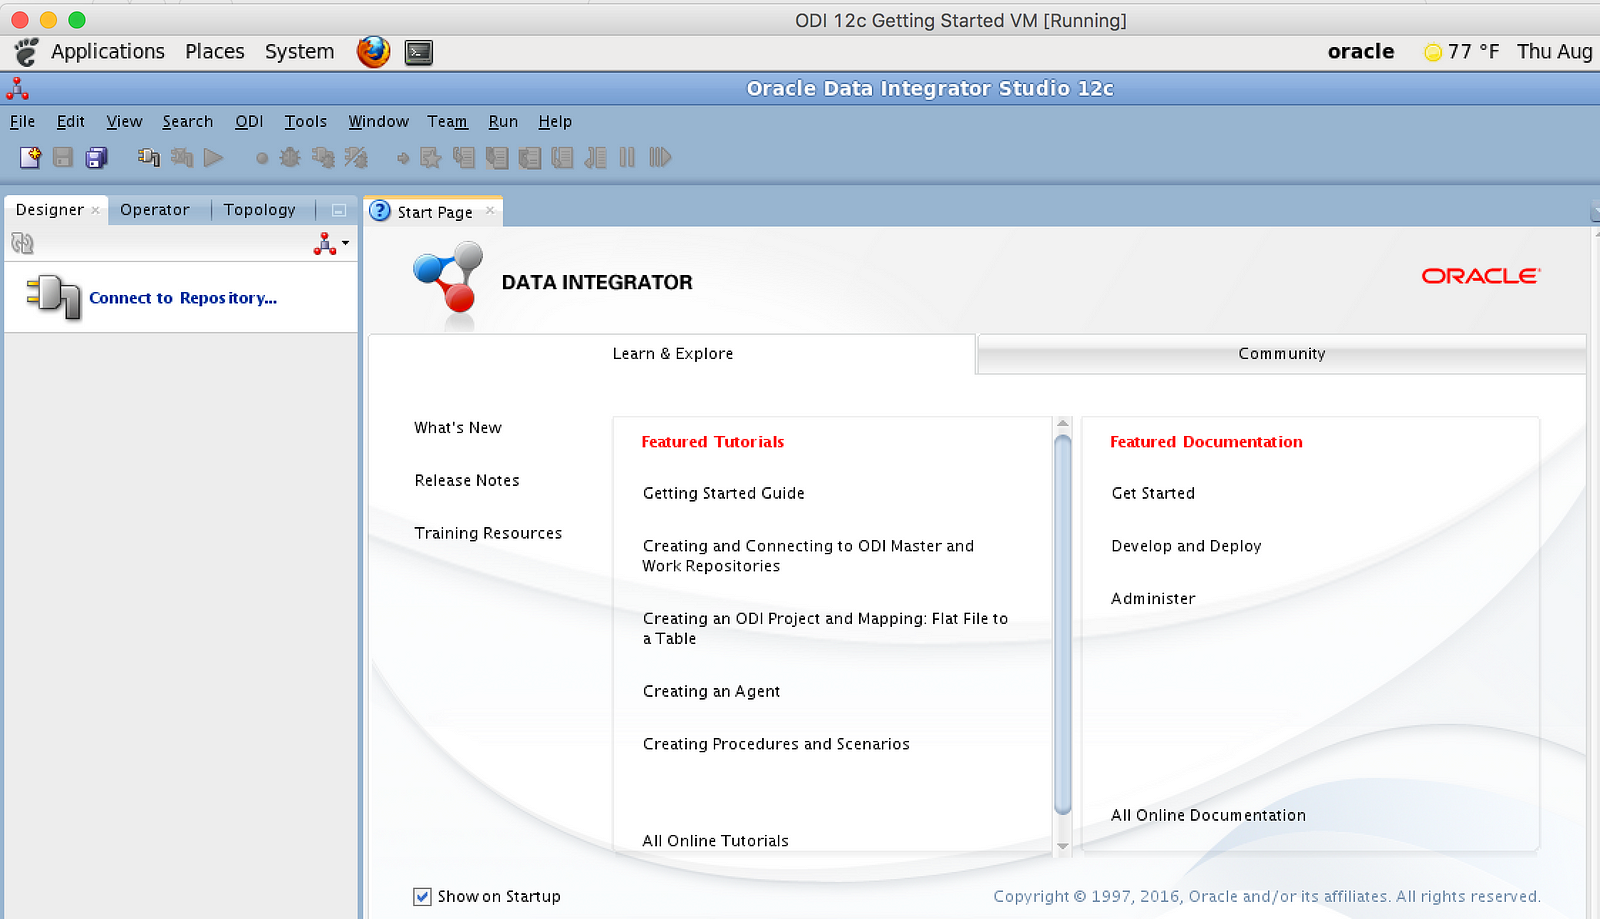
Confirm that ODI Studio is picking up the OpenLink JDBC Client ( opljdbc4_2.jar ) for use on startup, by going to the Help → About → External Components menu, and typing “ opl ” to filter the list. You should see the following:
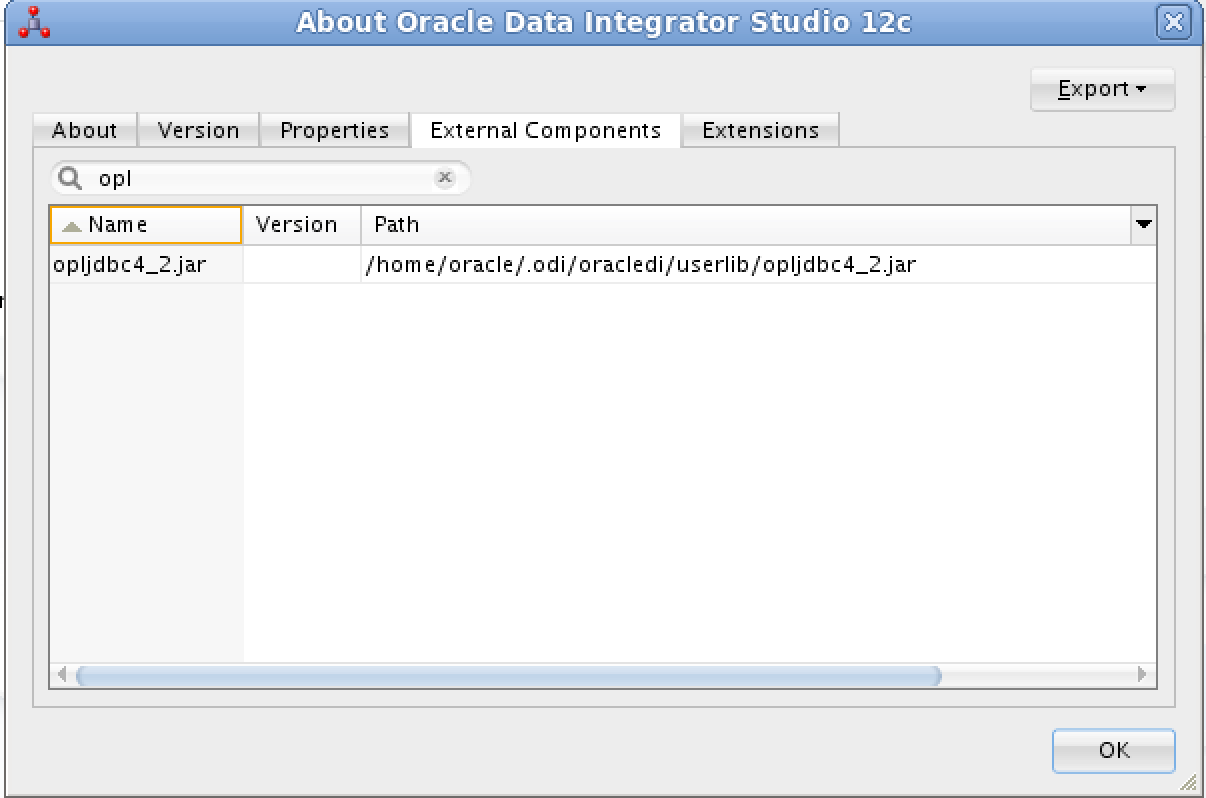
If you don’t, double-check that you have copied the jar file to the correct folder — as illustrated above.
Configuring ODI — Connection Topology
The next step is to configure the Microsoft Excel technology module in the Topology navigator, and tell it to use the OpenLink JDBC Driver ( opljdbc4_2.jar ).
This requires a connection to the ODI repository, which can be made by clicking on the Connect to Repository icon in the left-side window pane. You will first be prompted for a Wallet Password, which defaults to welcome1 , and then be prompted for the ODI Login credentials, which default to user = SUPERVISOR and Password = SUPERVISOR . ODI initialization will take place, and the connection will be completed:
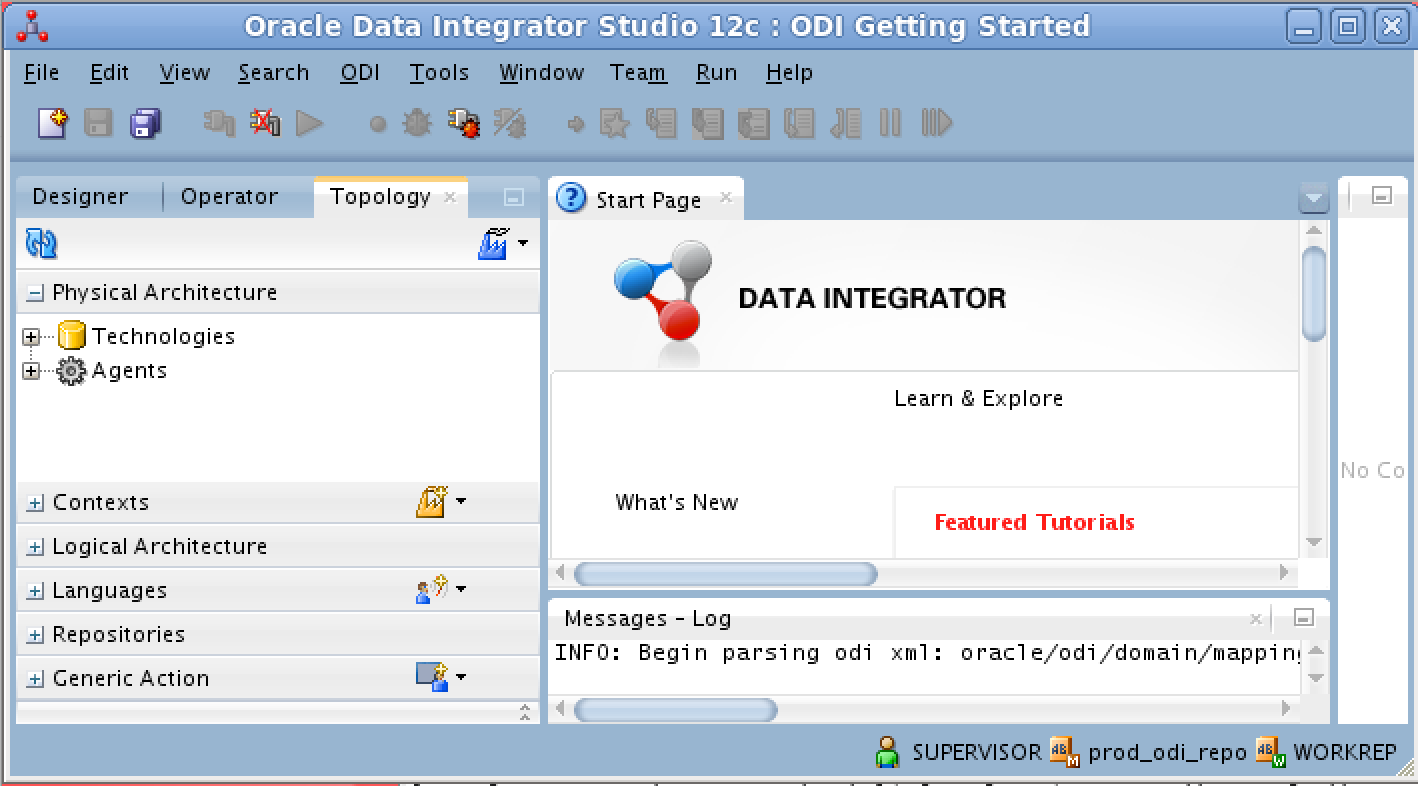
Click on the blue factory icon (at the top right of the Topology tab in the left-side window pane), and ensure that the option to Hide Unused Technologies in not checked. (If it is checked, you will not see the required Microsoft Excel technology module in the next step).

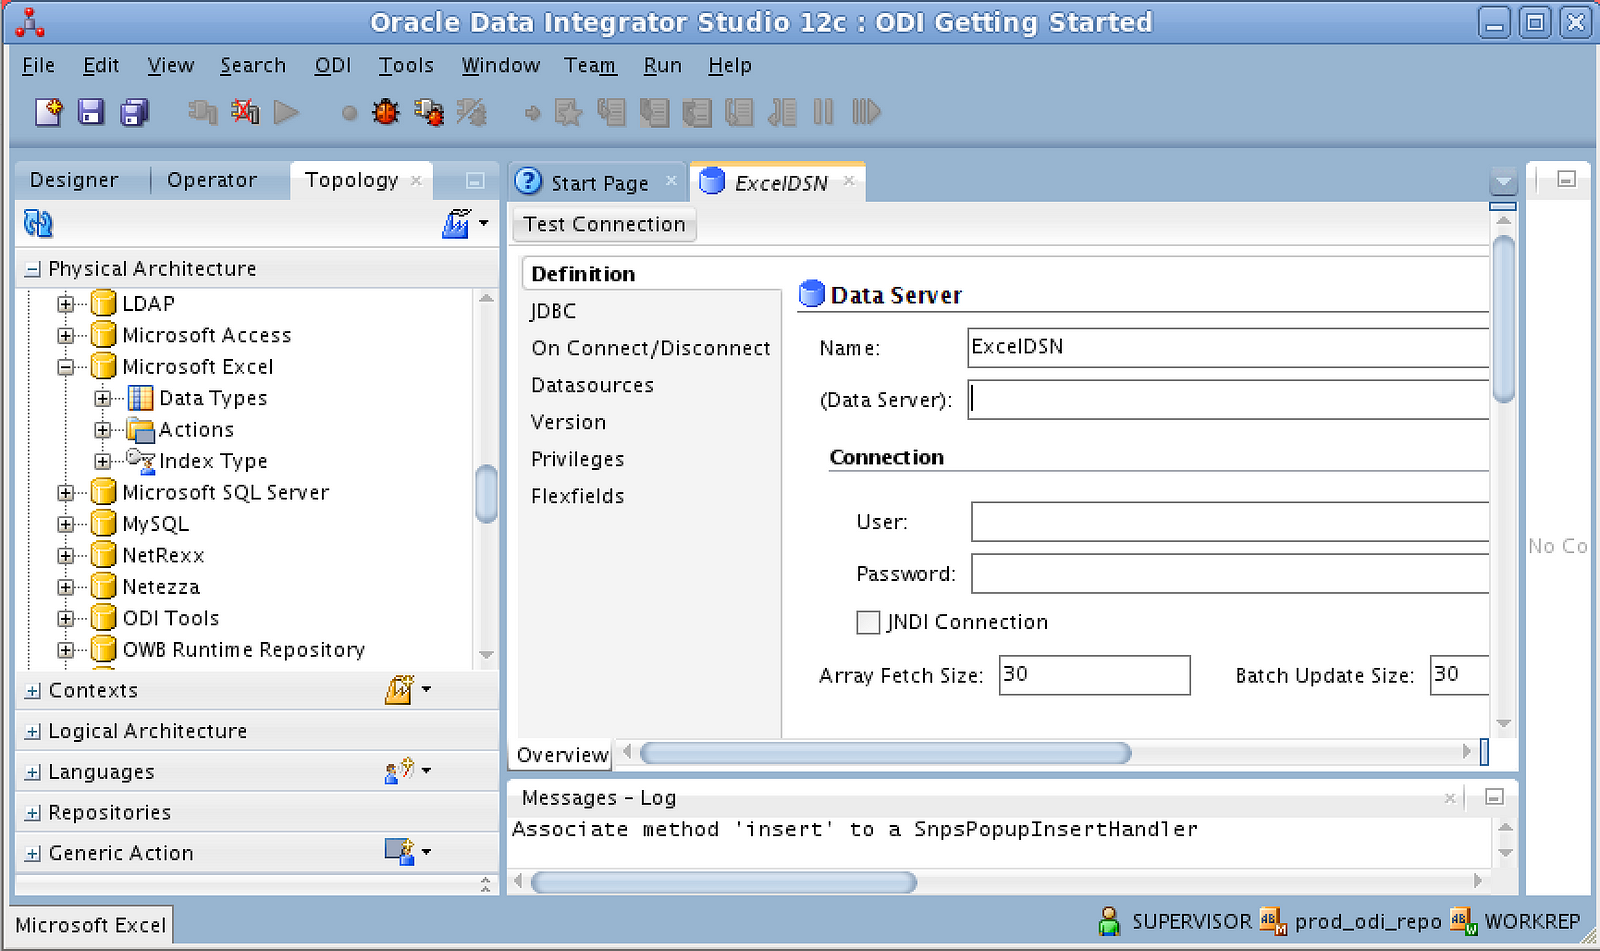
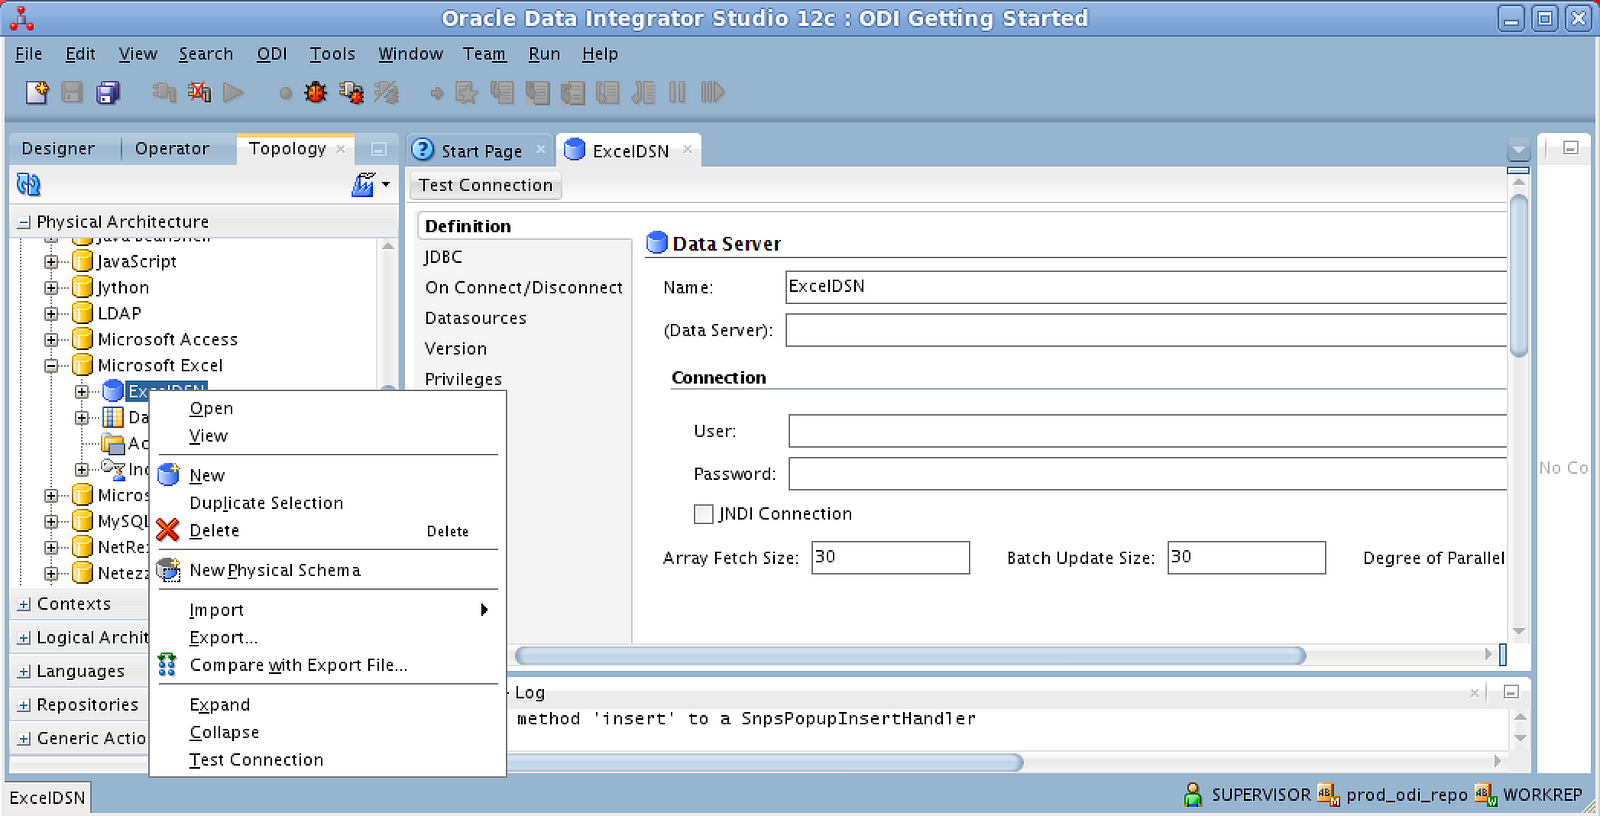
Still in the Topology tab, in the Physical Architecture section, expand the Technologies item, and right-click on Microsoft Excel. In the pop-up menu, select New Data Server, to add an Excel Data Server:

In the Definition tab, give the new Data Server a name of your choosing:
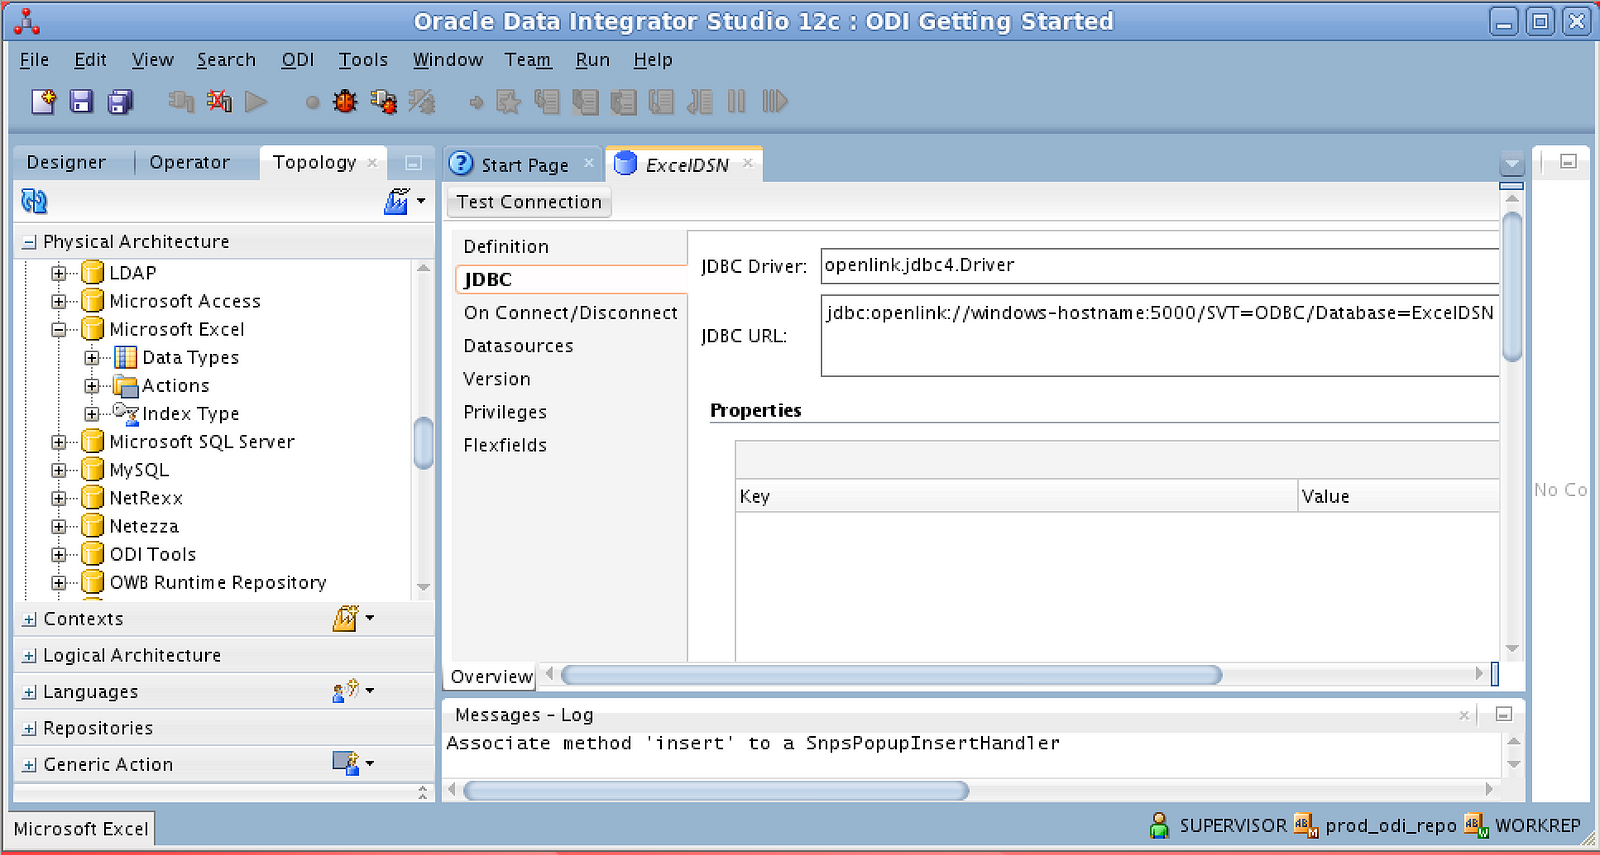
In the JDBC tab, set JDBC Driver to the the OpenLink JDBC Client class name —
openlink.jdbc4.Driver
The JDBC URL is built from connection string parameters for connecting to the OpenLink Request Broker on the Windows machine.
jdbc:openlink://{broker-hostname}:{port}/SVT={servertype}/Database={dsn-name}
The JDBC URL is built from connection string parameters for connecting to the OpenLink Request Broker on the Windows machine.
{broker-hostname}— hostname (DNS-resolvable FQDN or IP address) of the Windows machine where the Openlink Request Broker and ODBC Database Agent are running{port}— the listen port of the Request Broker (default=5000){servertype}— Server Type should be ODBC for simple connections to the ODBC Agent on the Windows machine{dsn-name}— The name of the ODBC System DSN on the Windows machine, i.e.,ExcelDSNfor this example
For example —
jdbc:openlink://winhost.example.com:5000/SVT=ODBC/Database=ExcelDSN
Use the File → Save menu item to save the Data Server. Then right-click it and select the Test Connection menu item:
Click on the Test button of the Test Connection dialog to test the connection through the OpenLink JDBC-to-ODBC Bridge to the Excel spreadsheet. The Successful Connection information dialog will be displayed if the test is successful.

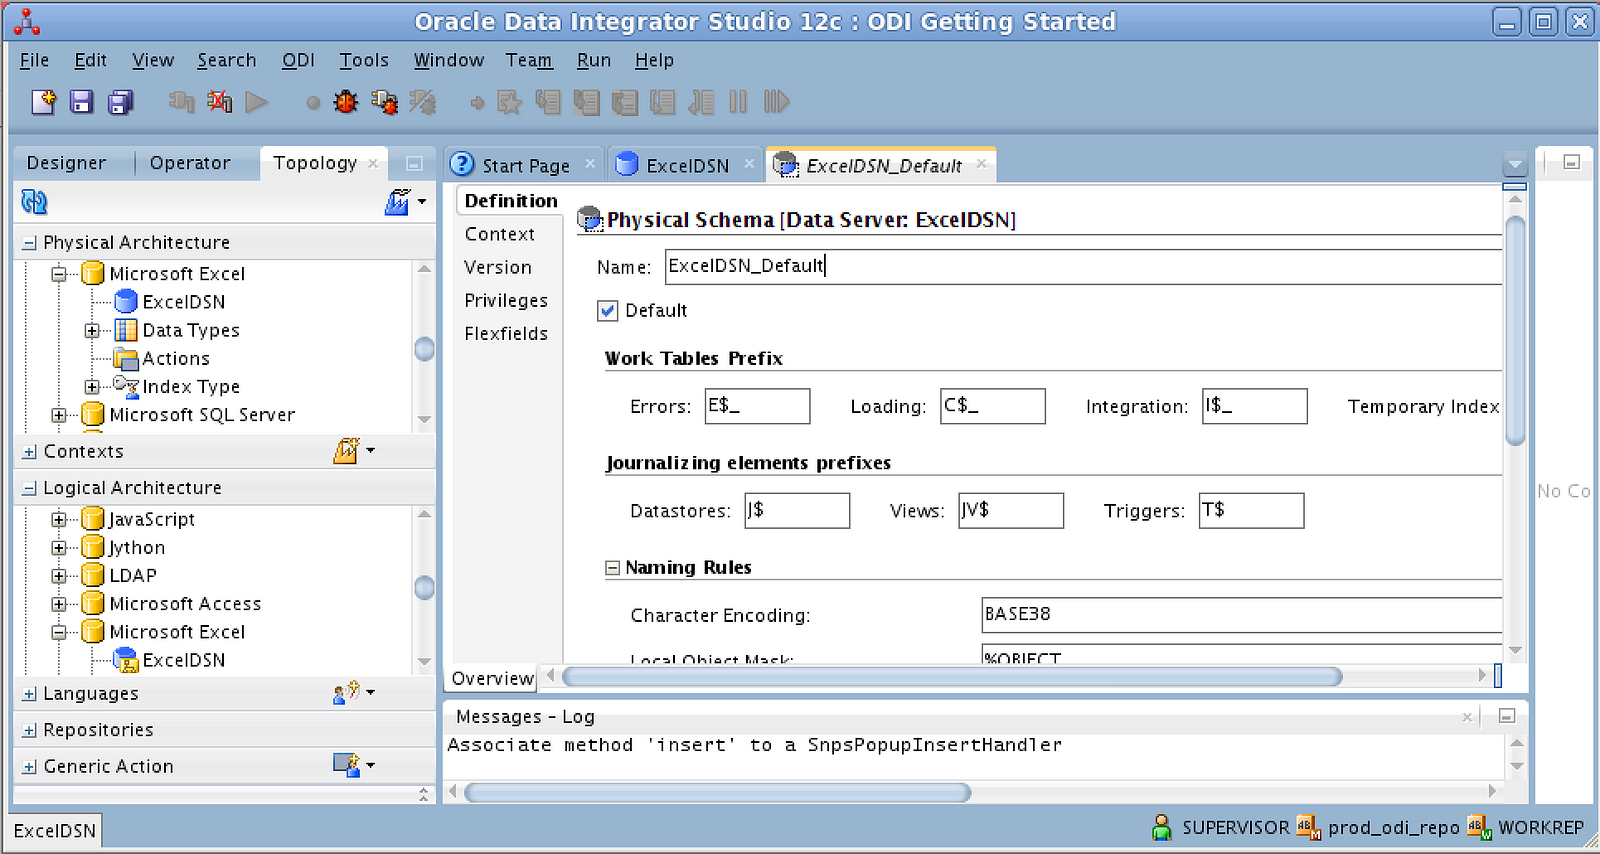
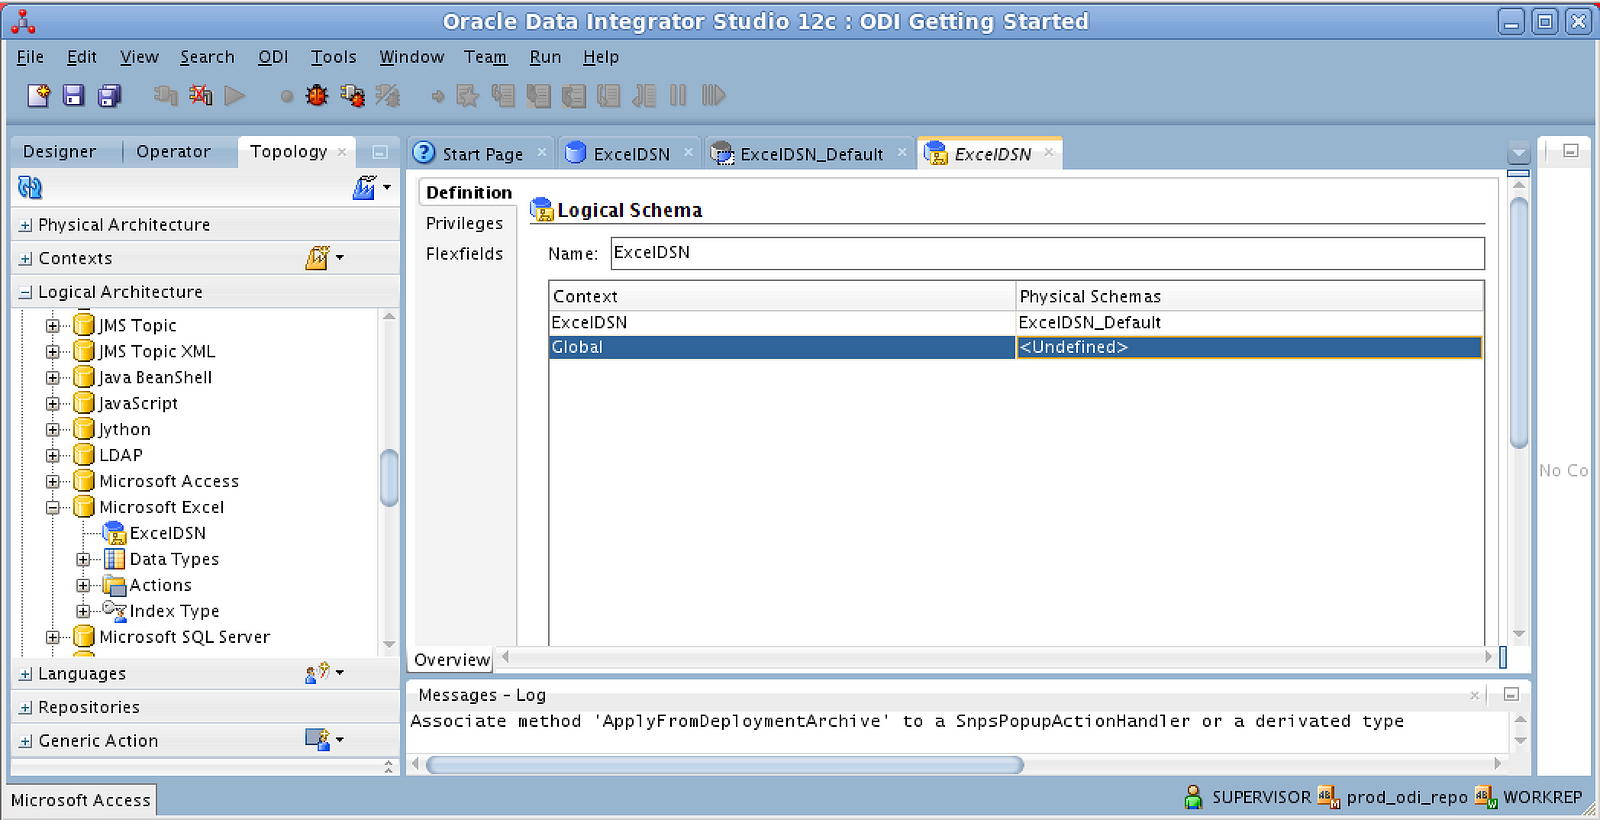
Back on the Topology tab. right click on the newly created and tested Excel Data Server, and select the New Physical Schema menu item to create a new physical schema for the Excel Data Server:
In the Definition tab, you can accept the default name given for the schema, or input a name of your choosing:
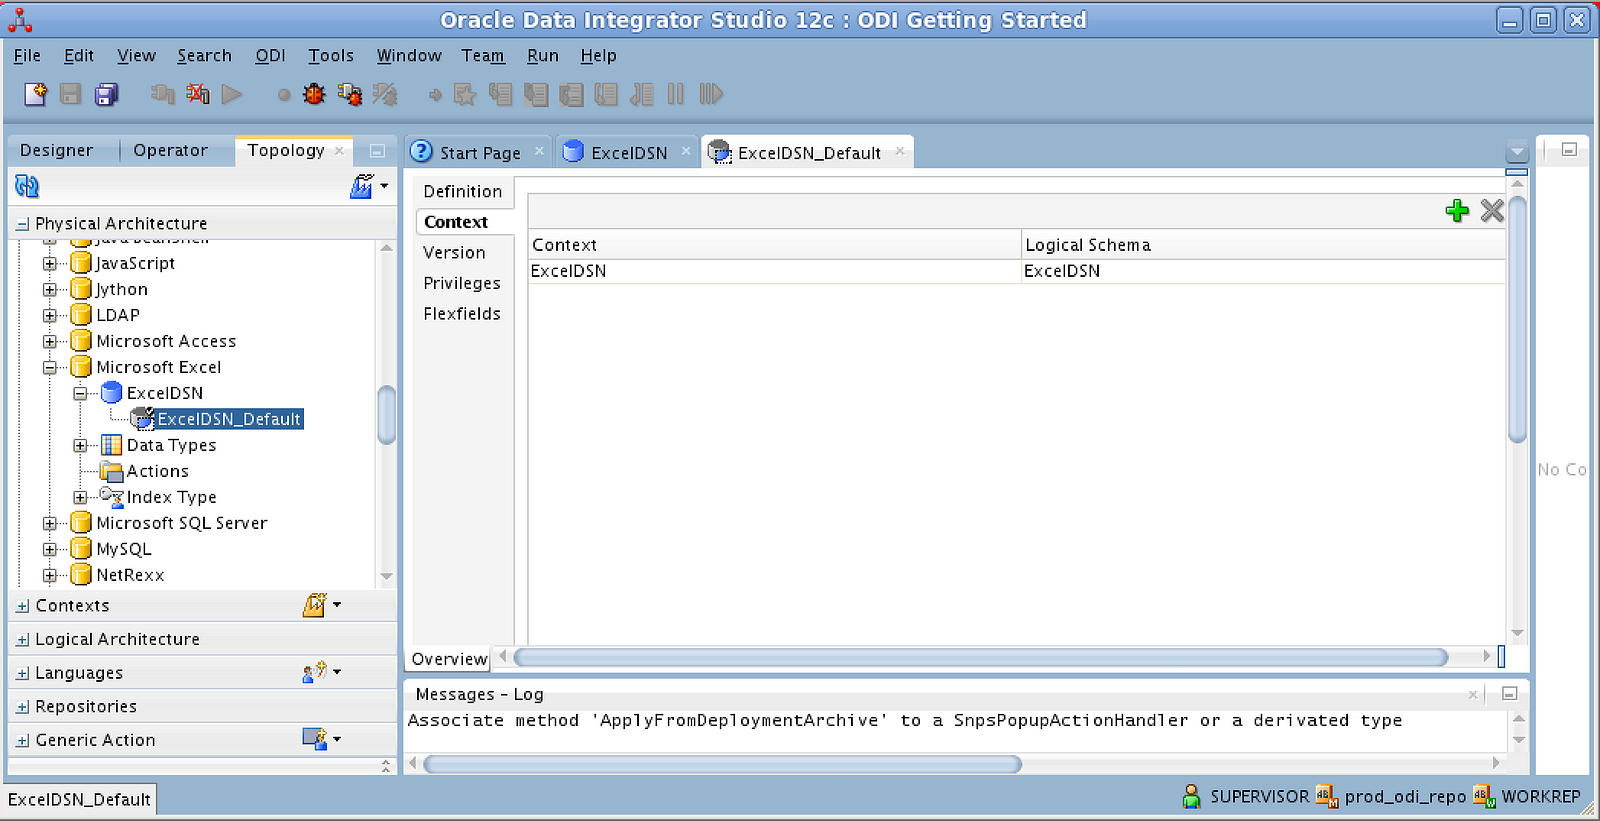
In the Context tab, click on the green + icon (at upper right) to create a context name for the Physical schema and associate it with a Logical Schema name of your choice:
In the Logical Architecture section of the left-side window pane, drill down to Microsoft Excel → your Excel Data Server ( ExcelDSN ). Right-click to create a new Logical Schema for the Excel data server, and associate it with the Physical Schema name created in the previous step:
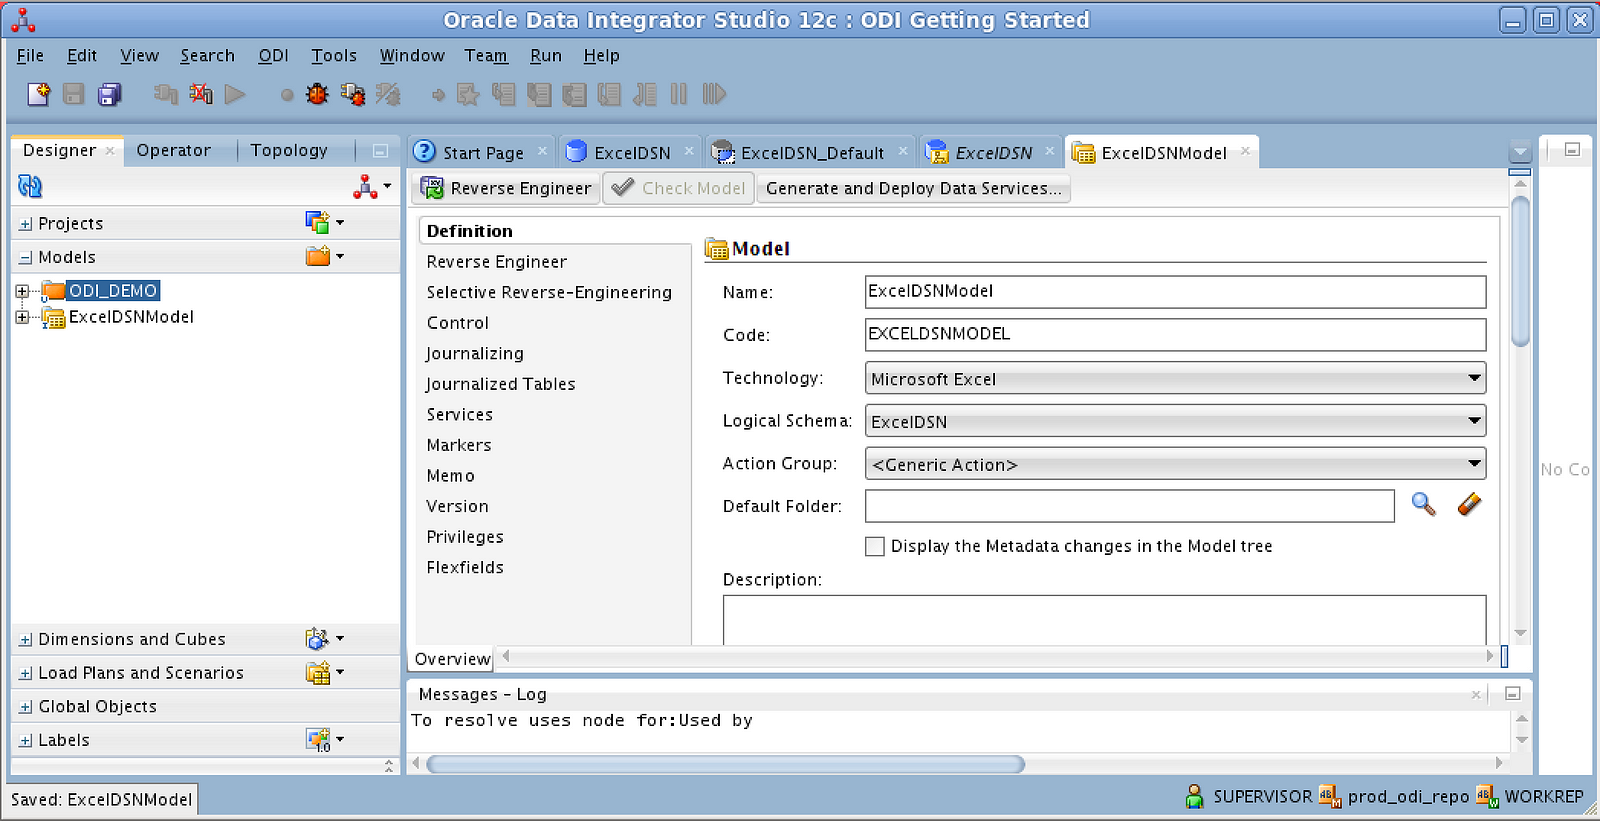
Shift to the Designer tab, and expand the Models section in the left-side window pane. Right-click on Models to add a new Model, and in the Definition tab give it a Name of your choosing. The Code is automatically generated based on the Name. From the Technology menu, select the Microsoft Excel module, and then from the Logical Schema menu, select the Logical Schema created in the previous step (i.e., ExcelDSN ). Other options should be left as their defaults.
In the Selective Reverse-Engineering tab, tick the boxes for Selective Reverse-Engineering , New Datastores , Existing Datastores, and Objects to Reverse Engineer ; then use the File → Save menu item to save the options.
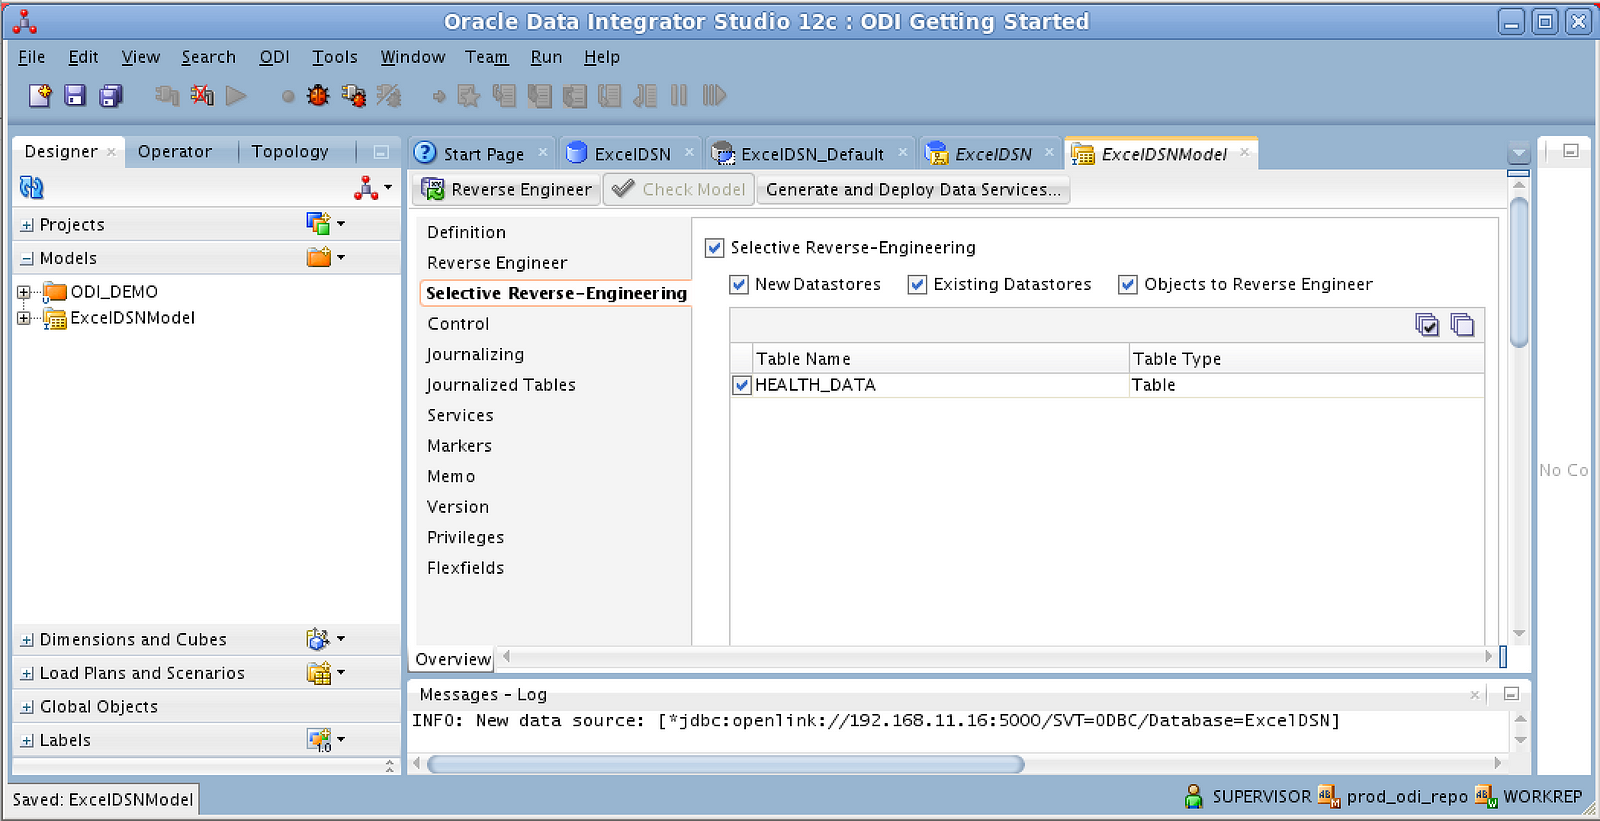
Now click on the Reverse Engineer tab in the Model toolbar menu. ODI will launch a reverse-engineering process for the selected datastore(s). A progress bar indicates the progress of the reverse-engineering process. At the end of the process, you will see that the Metadata for the Excel spreadsheet defined on Windows has been imported.
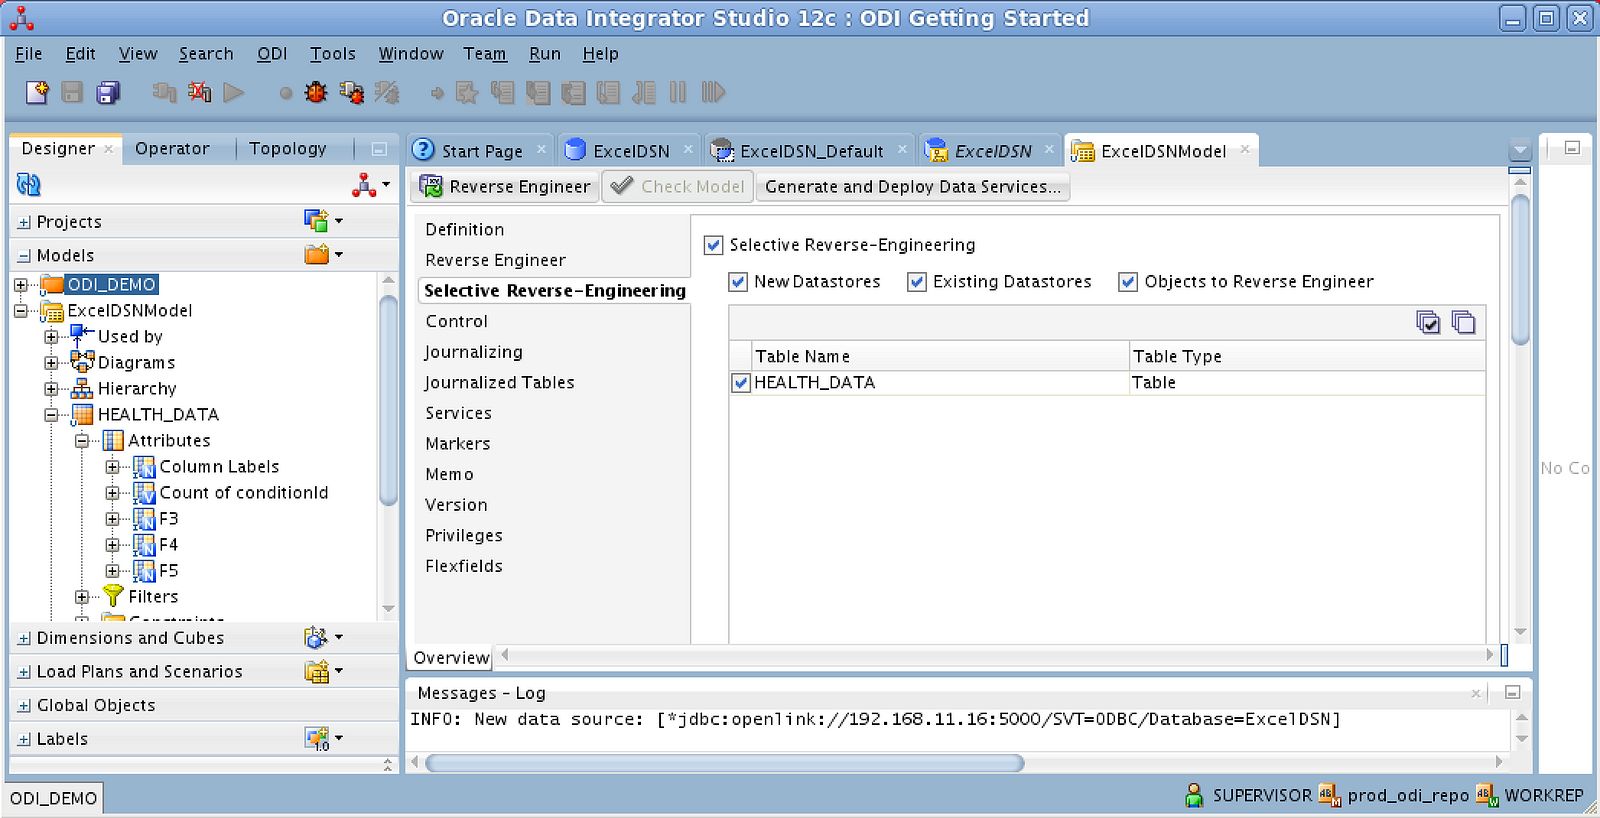
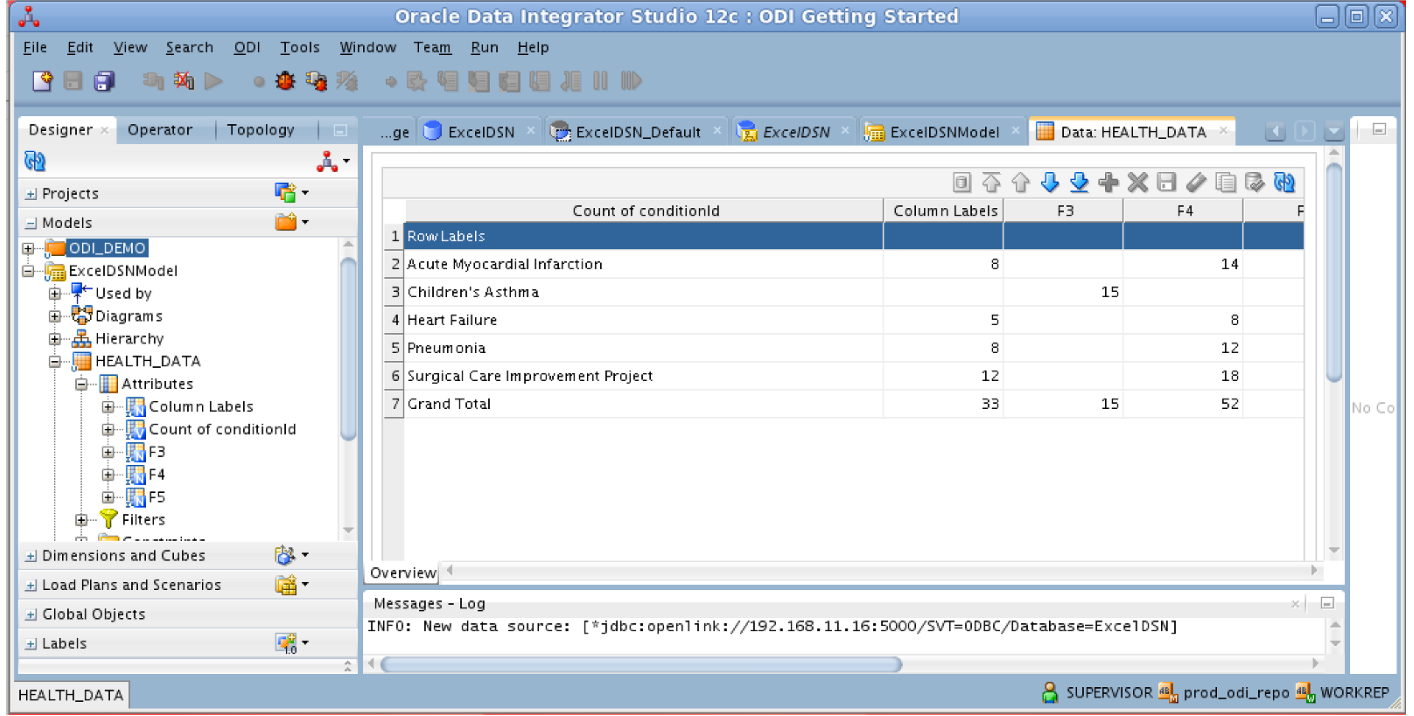
In the left-side window pane, drill down to Models → ExcelDSNModel ; right-click on the imported spreadsheet, HEALTH_DATA ; and select the View Data menu option:
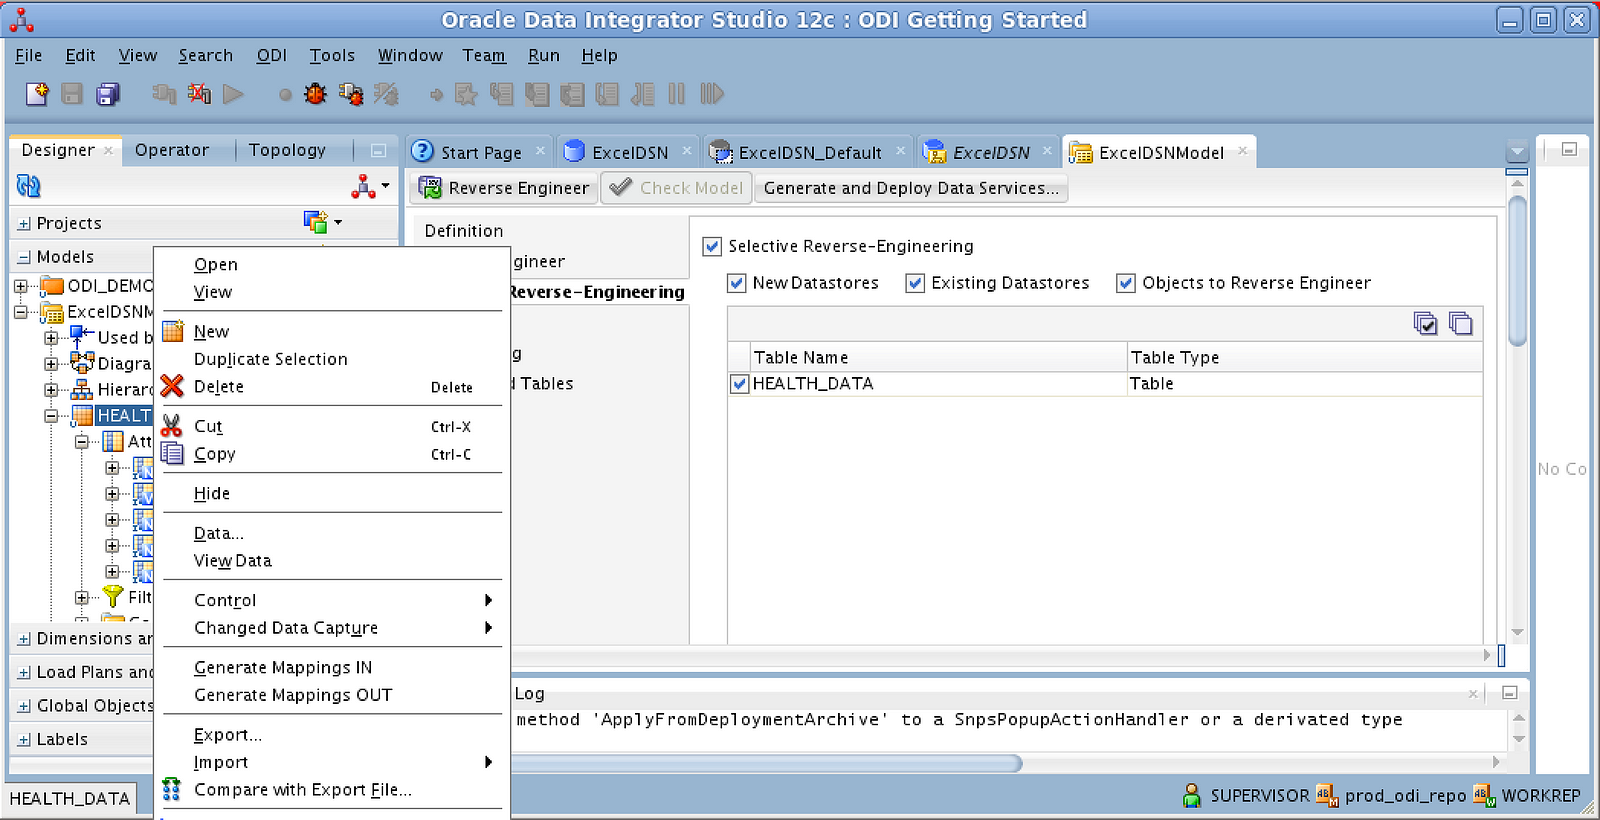
The data from the Excel HEALTH_DATA spreadsheet on Windows will now be displayed in the right-side window pane.

There you have it — your Excel spreadsheet data is now available in ODI 12c !