Prerequisites
- A functional installation of Microsoft Power BI
- A working ODBC Connection to a Virtuoso Universal Server instance (such as the public instance behind our URIBurner service) which has been configured to enable SQL access via the ODBC protocol
Getting Data from Virtuoso into Power BI
-
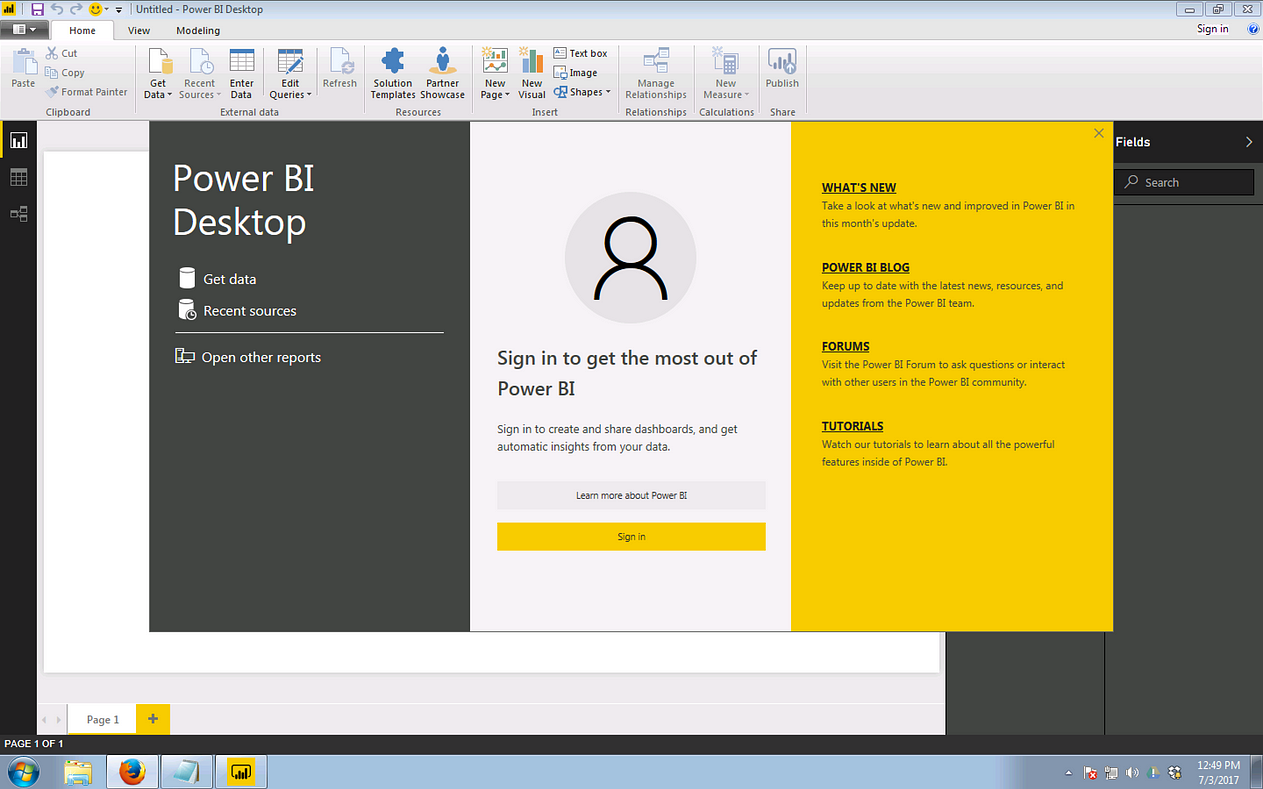
Start your Power BI instance.
-
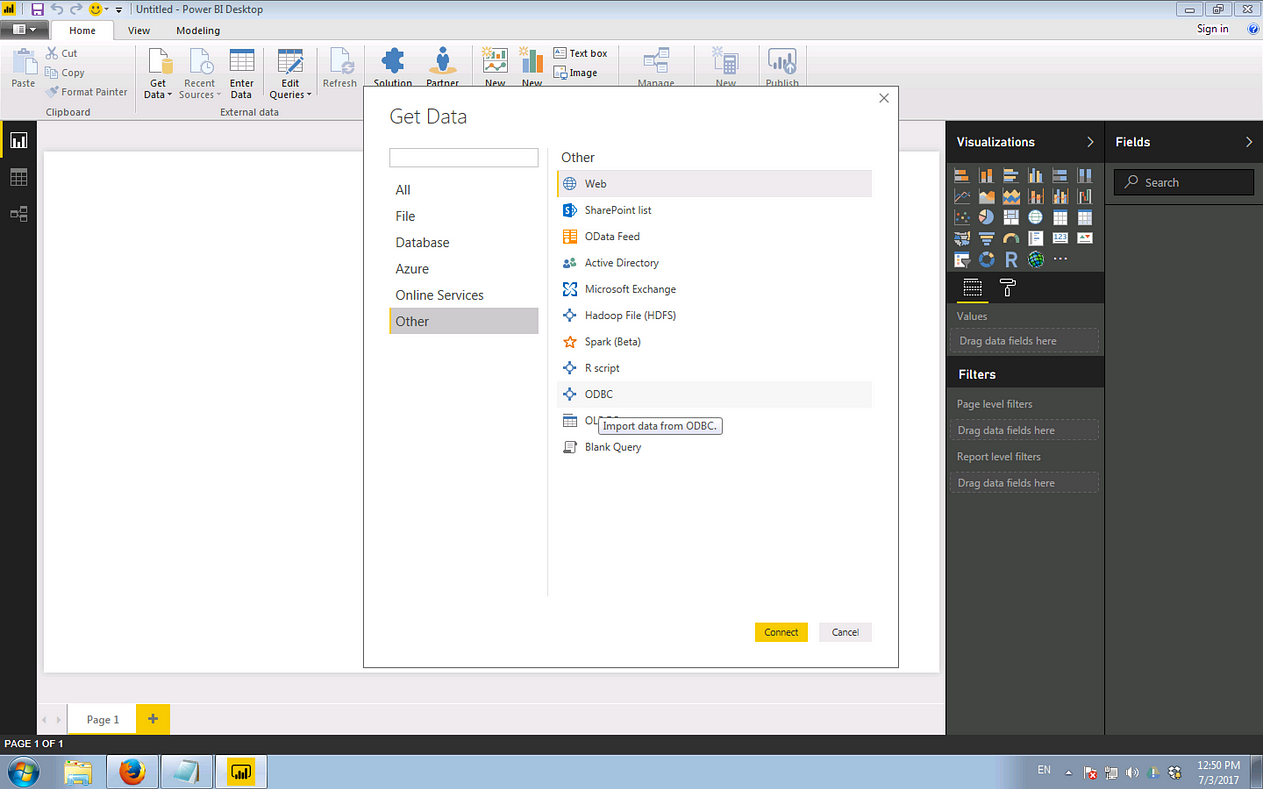
Tell Power BI to Get Data from an ODBC Data Source.
-
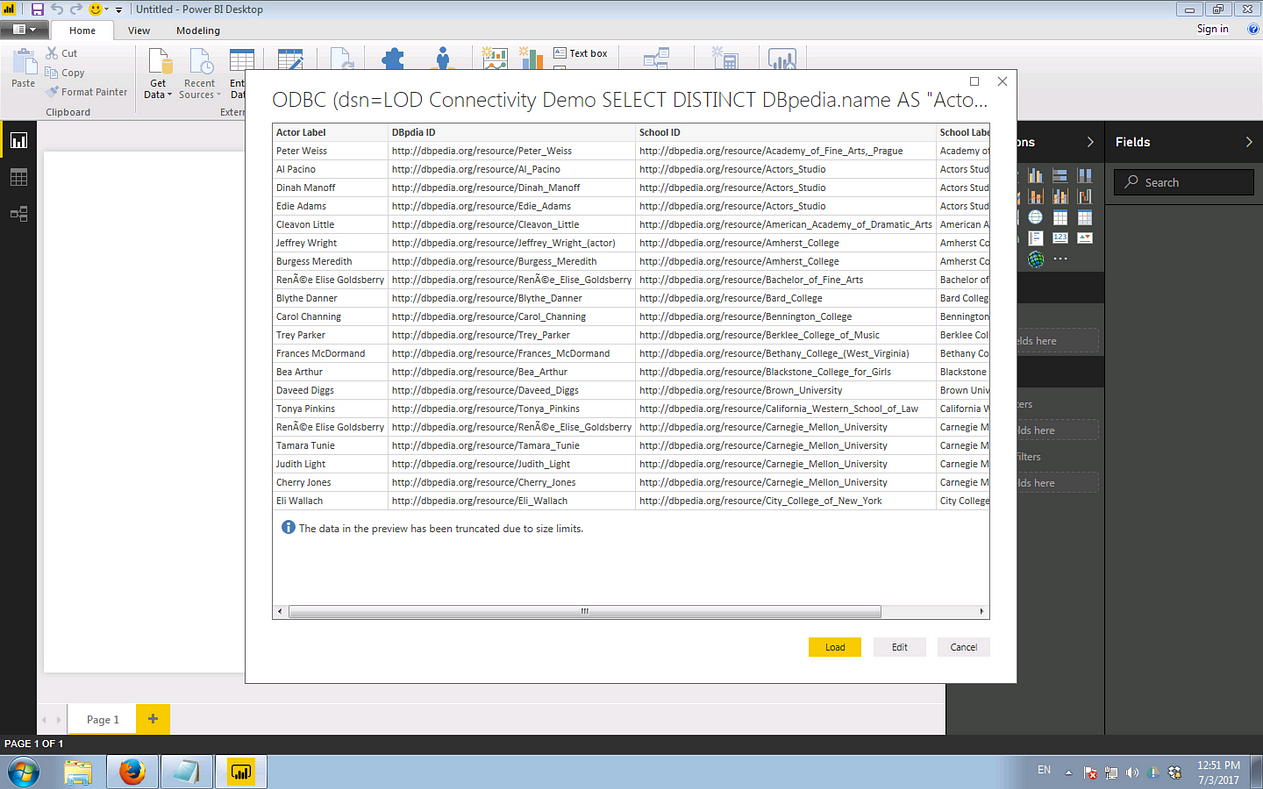
Choose your Virtuoso-targeting DSN, and input the SQL query (detailed below) that will get the data you want.
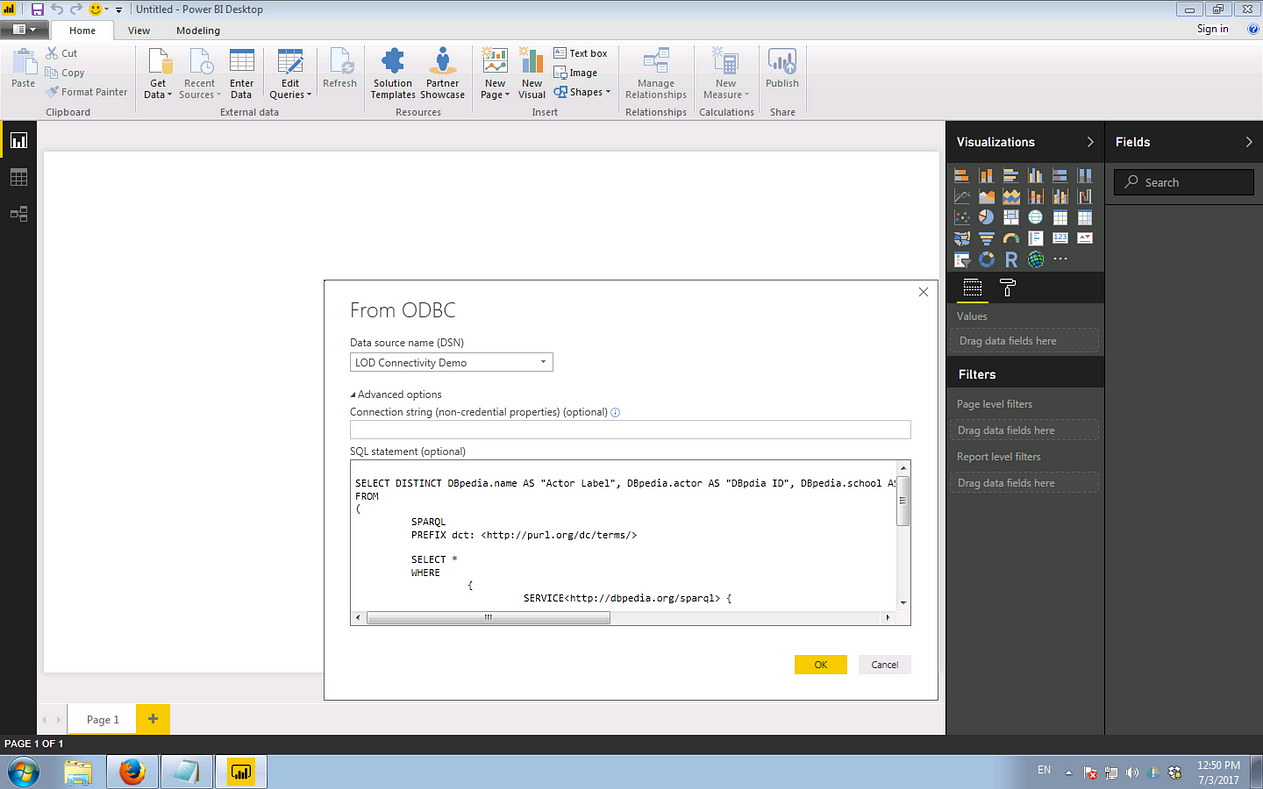
Virtuoso makes this work by extending SQL with SPARQL; in this case, by accepting SPARQL queries in the SQL
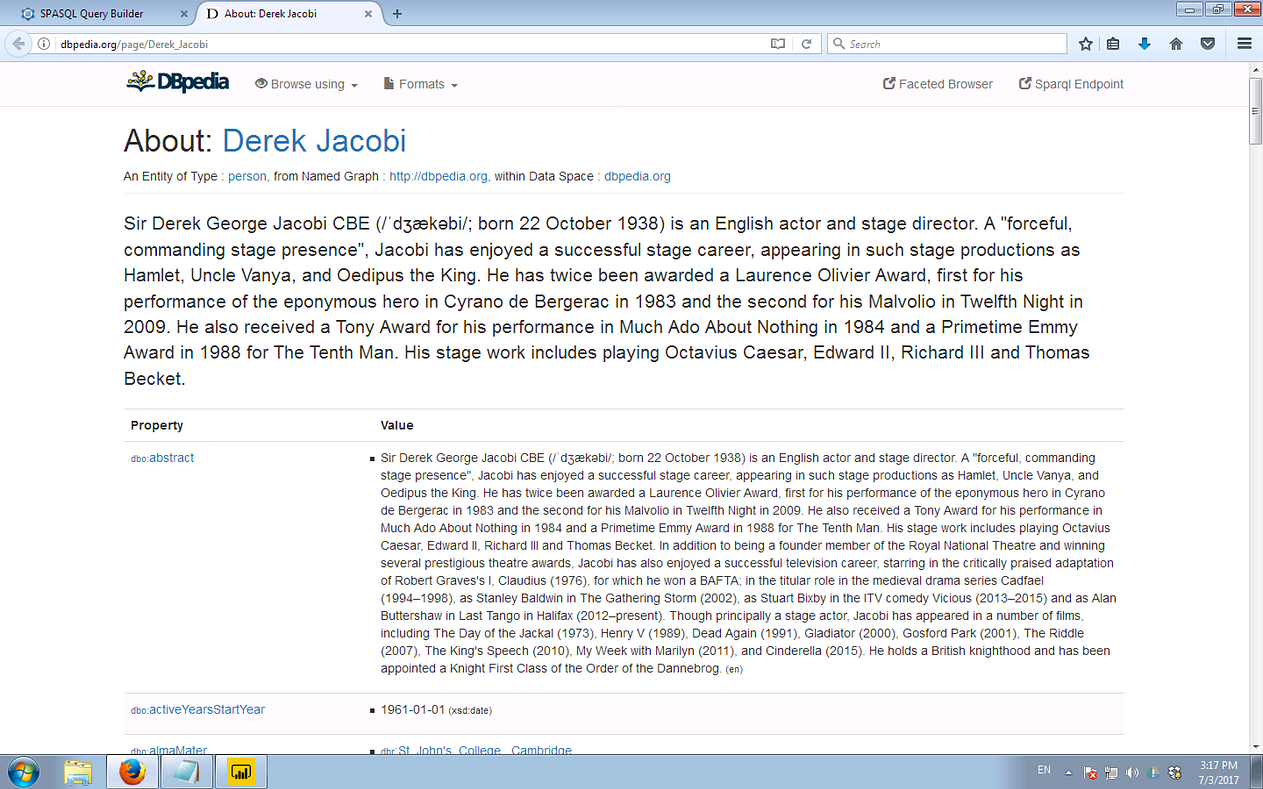
FROMclause. The effect is a blending of entity relationship types represented as “Records in a Table” (SQL) with entity relationship types represented as “RDF sentence/statement Graphs” (SPARQL).Here, we will query against DBpedia (i.e., Wikipedia content transformed to Structured Data form, and published in line with Linked Data principles).
This is the SPASQL (SQL and SPARQL fusion) query we’ll use —
SELECT DISTINCT DBpedia.name AS "Actor Label" , DBpedia.actor AS "Actor ID" , DBpedia.school AS "School ID" , DBpedia.schoolLabel AS "School Label" FROM ( SPARQL PREFIX dct: <http://purl.org/dc/terms/> SELECT ?actor ?school ?name ?schoolLabel WHERE { SERVICE <http://dbpedia.org/sparql> { ?actor dct:subject <http://dbpedia.org/resource/Category:Tony_Award_winners> ; <http://dbpedia.org/ontology/almaMater> ?school ; foaf:name ?name . ?school rdfs:label ?schoolLabel . FILTER ( LANG ( ?name ) = "en" ) FILTER ( LANG ( ?schoolLabel ) = "en" ) } } ORDER BY ASC(?school) LIMIT 100 ) AS DBpedia -
When prompted, authenticate against the ODBC Data Source.

-
Power BI will show a preview of the query result set (also known as the query solution).
-
Click the Load button to retrieve the complete result set.
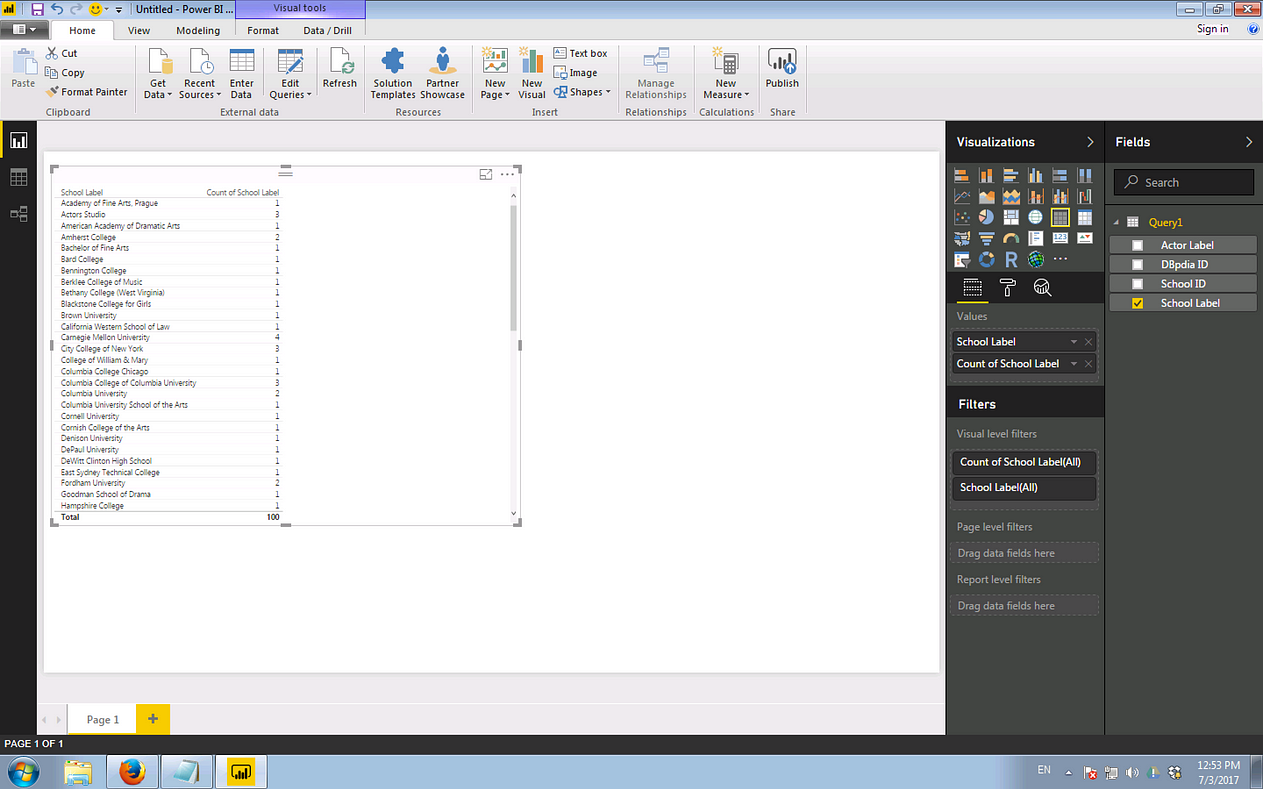
Having retrieved data from our ODBC Data Source, we can proceed to make the DBpedia URIs (hyperlinks) live — i.e., make them clickable links — en route to exposing Platform Agnostic Super Key functionality.
Enabling Ad-hoc Exploration
-
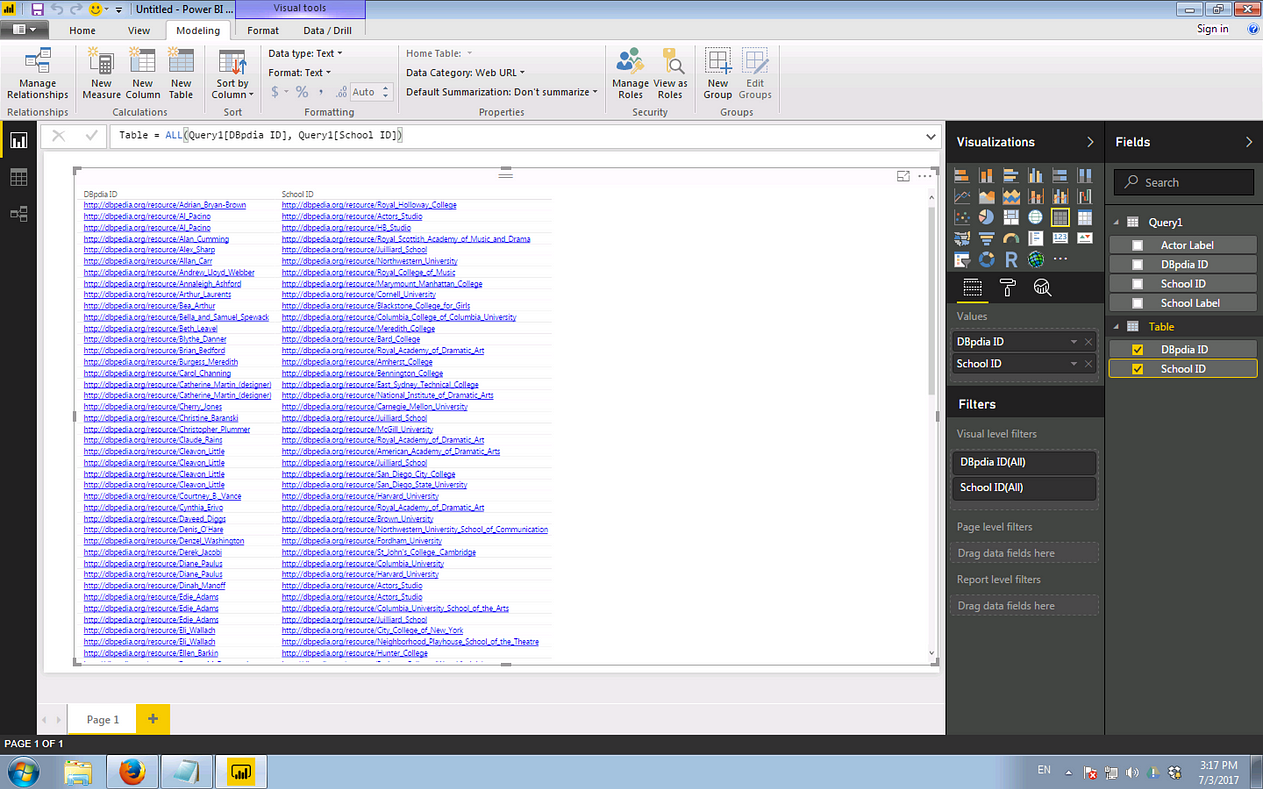
From the Modeling menu, select New Table. A pop-up menu in the formula entry box will help you select the Fields (a/k/a columns) to be displayed. We used —
Table = ALL(Query1[DBpdia ID], Query1[School ID])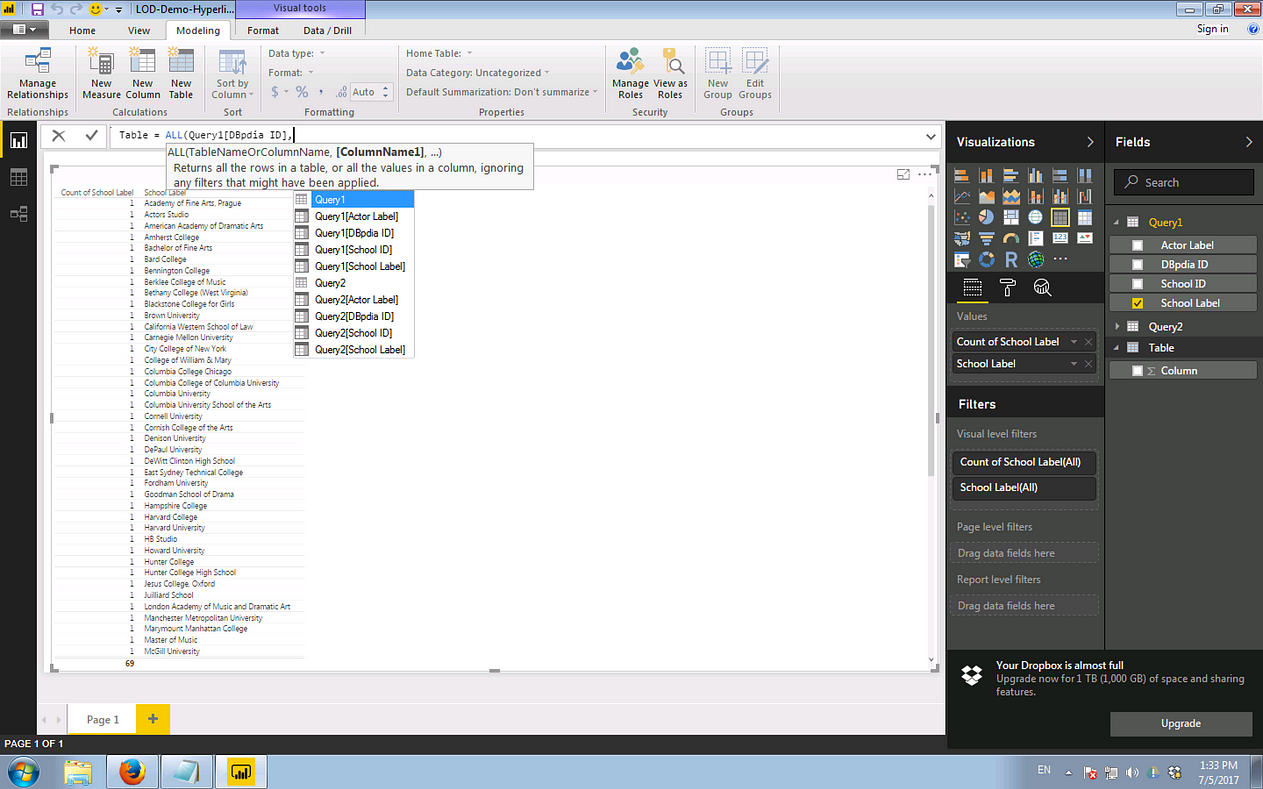
-
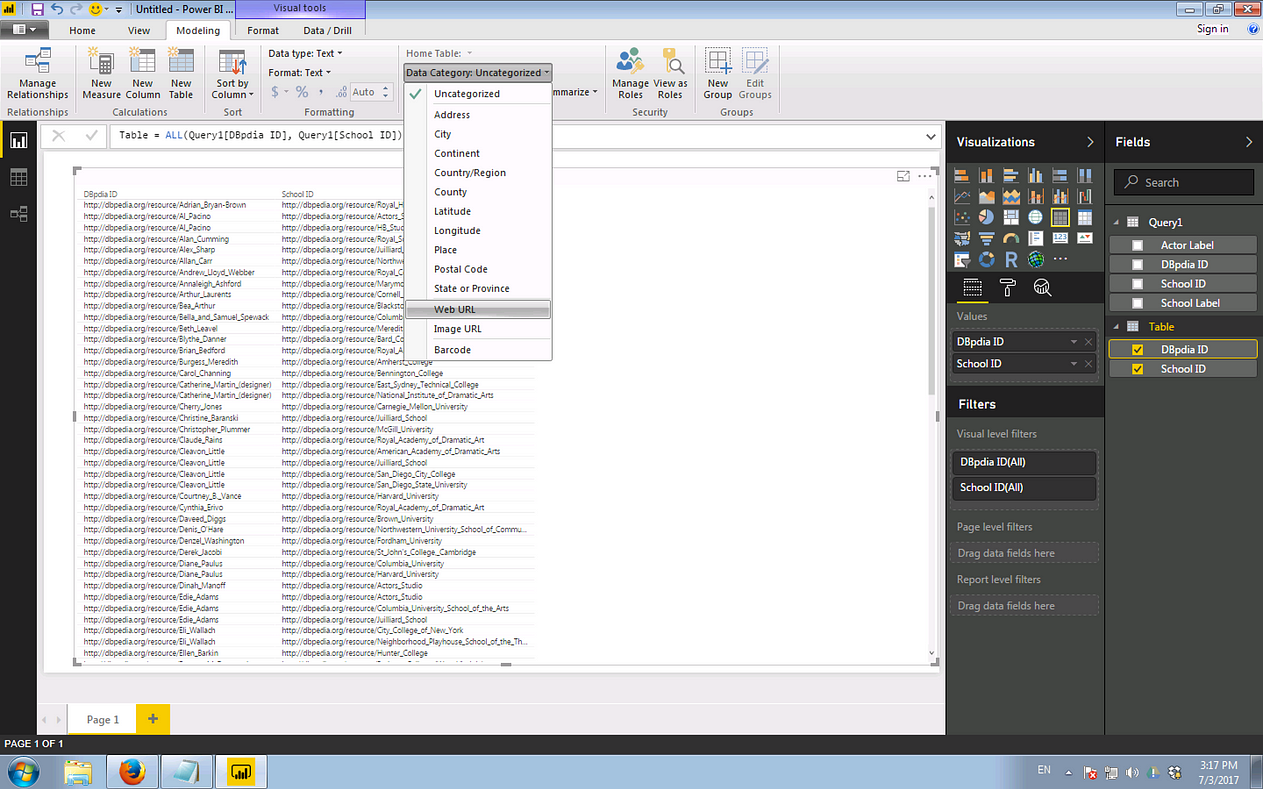
In the Home Table section of the toolbar, change Data Category: Uncategorized to Data Category: Web URL. This tells Power BI to treat the strings as links instead of literal text.
-
You now have two columns of live links.
-
Clicking on any link will result in your web browser retrieving a page (in this case from DBpedia) that describes whatever is identified by that link.