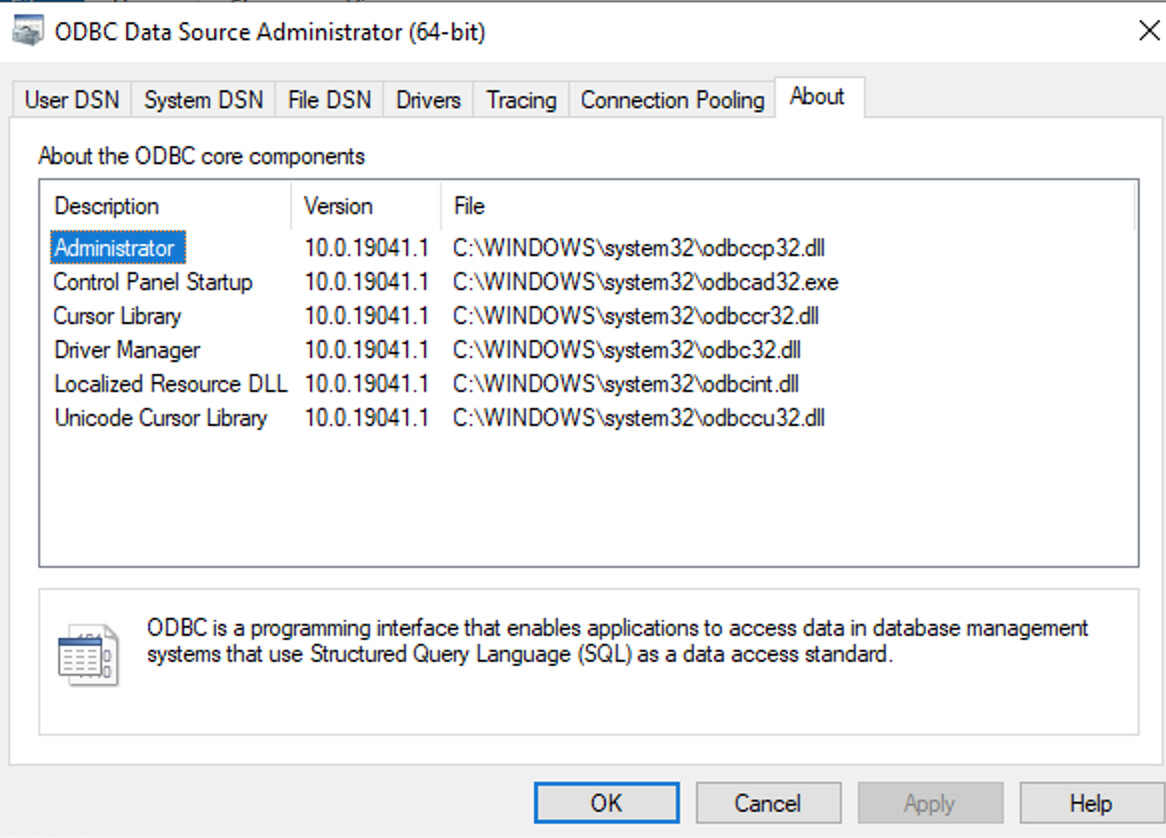
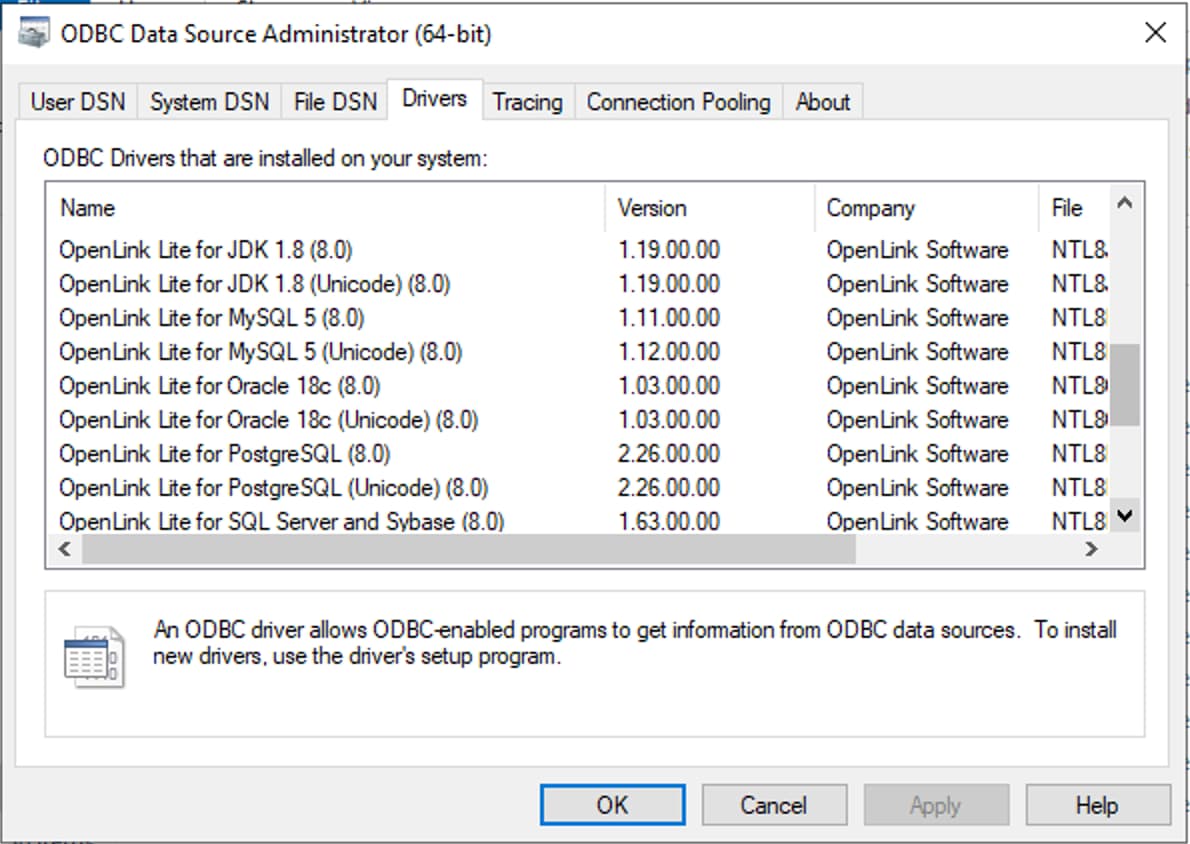
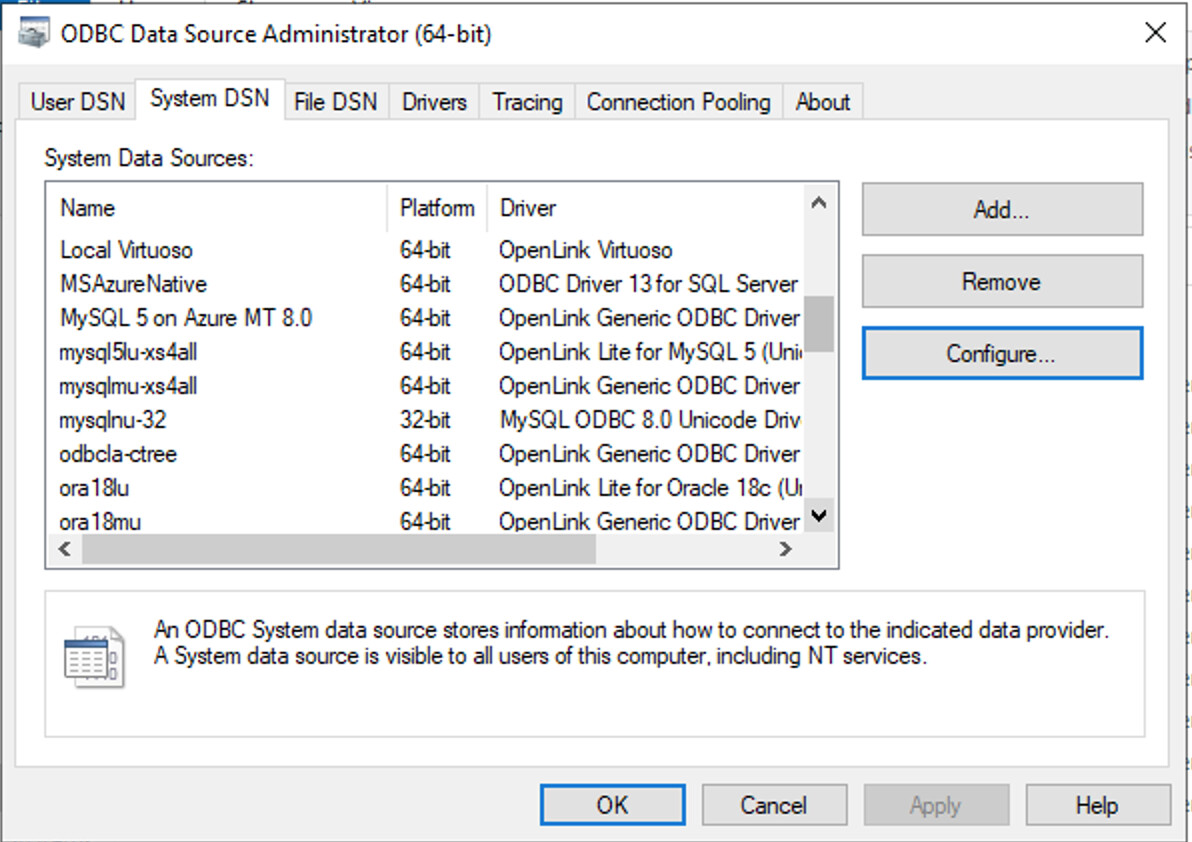
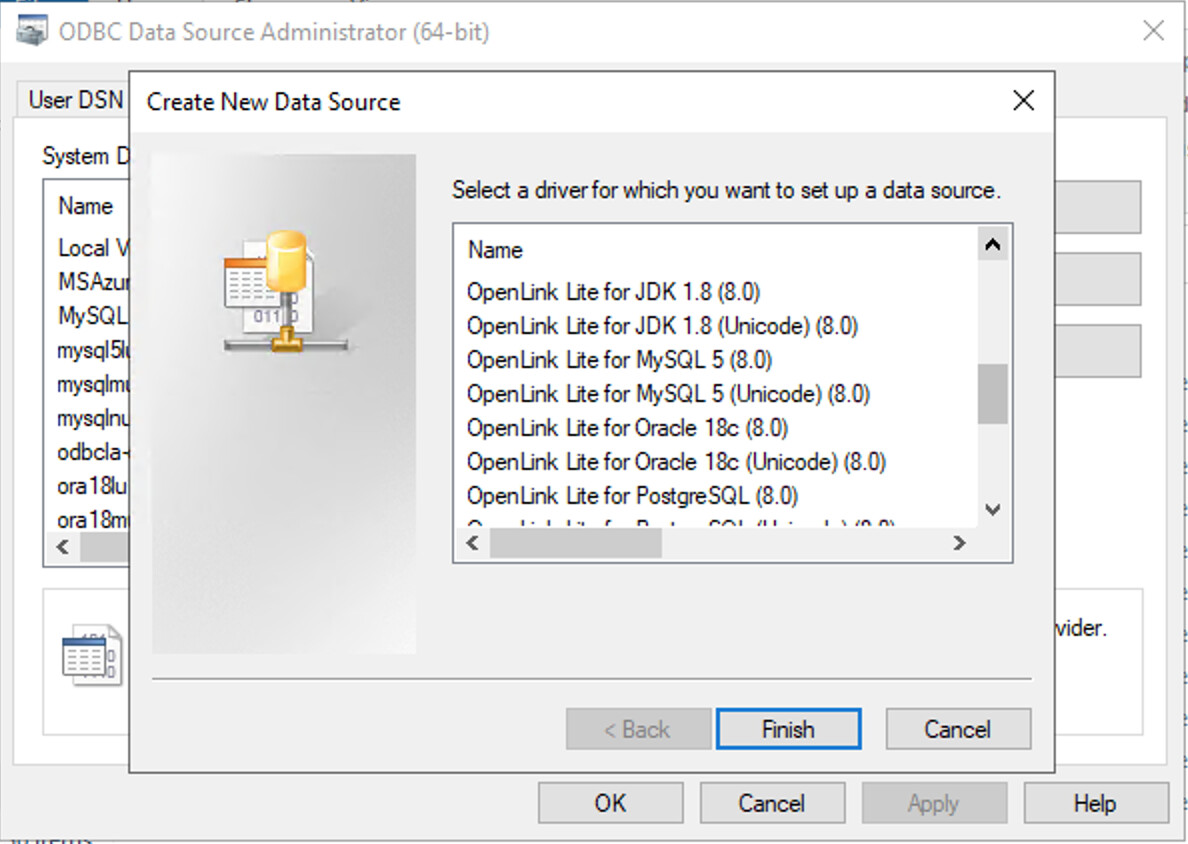
Yes, the OS is Windows. I am not receiving an error, I’m just not able to see any data or tables. The reply box will not allow any file other than an image file so here’s the information from the trace.
EXCEL 5958-4644 ENTER SQLAllocHandle
SQLSMALLINT 1 <SQL_HANDLE_ENV>
SQLHANDLE 0x0000000000000000
SQLHANDLE * 0x0000026C3AB025C8
EXCEL 5958-4644 EXIT SQLAllocHandle with return code 0 (SQL_SUCCESS)
SQLSMALLINT 1 <SQL_HANDLE_ENV>
SQLHANDLE 0x0000000000000000
SQLHANDLE * 0x0000026C3AB025C8 ( 0x0000026C1D8440E0)
EXCEL 5958-4644 ENTER SQLSetEnvAttr
SQLHENV 0x0000026C1D8440E0
SQLINTEGER 200 <SQL_ATTR_ODBC_VERSION>
SQLPOINTER 3 <SQL_OV_ODBC3>
SQLINTEGER -6
EXCEL 5958-4644 EXIT SQLSetEnvAttr with return code 0 (SQL_SUCCESS)
SQLHENV 0x0000026C1D8440E0
SQLINTEGER 200 <SQL_ATTR_ODBC_VERSION>
SQLPOINTER 3 <SQL_OV_ODBC3>
SQLINTEGER -6
EXCEL 5958-4644 ENTER SQLSetEnvAttr
SQLHENV 0x0000026C1D8440E0
SQLINTEGER 201 <SQL_ATTR_CONNECTION_POOLING>
SQLPOINTER 2 <SQL_CP_ONE_PER_HENV>
SQLINTEGER -6
EXCEL 5958-4644 EXIT SQLSetEnvAttr with return code 0 (SQL_SUCCESS)
SQLHENV 0x0000026C1D8440E0
SQLINTEGER 201 <SQL_ATTR_CONNECTION_POOLING>
SQLPOINTER 2 <SQL_CP_ONE_PER_HENV>
SQLINTEGER -6
ffc3a1f5-16bf-4 1590-3c44 ENTER SQLAllocHandle
SQLSMALLINT 1 <SQL_HANDLE_ENV>
SQLHANDLE 0x0000000000000000
SQLHANDLE * 0x000001C635B421E8
ffc3a1f5-16bf-4 1590-3c44 EXIT SQLAllocHandle with return code 0 (SQL_SUCCESS)
SQLSMALLINT 1 <SQL_HANDLE_ENV>
SQLHANDLE 0x0000000000000000
SQLHANDLE * 0x000001C635B421E8 ( 0x000001C63339A7A0)
ffc3a1f5-16bf-4 1590-3c44 ENTER SQLSetEnvAttr
SQLHENV 0x000001C63339A7A0
SQLINTEGER 200 <SQL_ATTR_ODBC_VERSION>
SQLPOINTER 3 <SQL_OV_ODBC3>
SQLINTEGER -6
ffc3a1f5-16bf-4 1590-3c44 EXIT SQLSetEnvAttr with return code 0 (SQL_SUCCESS)
SQLHENV 0x000001C63339A7A0
SQLINTEGER 200 <SQL_ATTR_ODBC_VERSION>
SQLPOINTER 3 <SQL_OV_ODBC3>
SQLINTEGER -6
ffc3a1f5-16bf-4 1590-3c44 ENTER SQLSetEnvAttr
SQLHENV 0x000001C63339A7A0
SQLINTEGER 201 <SQL_ATTR_CONNECTION_POOLING>
SQLPOINTER 2 <SQL_CP_ONE_PER_HENV>
SQLINTEGER -6
ffc3a1f5-16bf-4 1590-3c44 EXIT SQLSetEnvAttr with return code 0 (SQL_SUCCESS)
SQLHENV 0x000001C63339A7A0
SQLINTEGER 201 <SQL_ATTR_CONNECTION_POOLING>
SQLPOINTER 2 <SQL_CP_ONE_PER_HENV>
SQLINTEGER -6
ffc3a1f5-16bf-4 1590-3c44 ENTER SQLAllocHandle
SQLSMALLINT 2 <SQL_HANDLE_DBC>
SQLHANDLE 0x000001C63339A7A0
SQLHANDLE * 0x000001C635F4A188
ffc3a1f5-16bf-4 1590-3c44 EXIT SQLAllocHandle with return code 0 (SQL_SUCCESS)
SQLSMALLINT 2 <SQL_HANDLE_DBC>
SQLHANDLE 0x000001C63339A7A0
SQLHANDLE * 0x000001C635F4A188 ( 0x000001C63339A880)
ffc3a1f5-16bf-4 1590-3c44 ENTER SQLSetConnectAttrW
SQLHDBC 0x000001C63339A880
SQLINTEGER 103 <SQL_ATTR_LOGIN_TIMEOUT>
SQLPOINTER 15
SQLINTEGER -5
ffc3a1f5-16bf-4 1590-3c44 EXIT SQLSetConnectAttrW with return code 0 (SQL_SUCCESS)
SQLHDBC 0x000001C63339A880
SQLINTEGER 103 <SQL_ATTR_LOGIN_TIMEOUT>
SQLPOINTER 15
SQLINTEGER -5
ffc3a1f5-16bf-4 1590-3c44 ENTER SQLDriverConnectW
HDBC 0x000001C63339A880
HWND 0x0000000000000000
WCHAR * 0x00007FFA978DF648 [ -3] “******\ 0”
SWORD -3
WCHAR * 0x00007FFA978DF648
SWORD -3
SWORD * 0x0000000000000000
UWORD 0 <SQL_DRIVER_NOPROMPT>
ffc3a1f5-16bf-4 1590-3c44 EXIT SQLDriverConnectW with return code 0 (SQL_SUCCESS)
HDBC 0x000001C63339A880
HWND 0x0000000000000000
WCHAR * 0x00007FFA978DF648 [ -3] “******\ 0”
SWORD -3
WCHAR * 0x00007FFA978DF648 <Invalid buffer length!> [-3]
SWORD -3
SWORD * 0x0000000000000000
UWORD 0 <SQL_DRIVER_NOPROMPT>
ffc3a1f5-16bf-4 1590-3c44 ENTER SQLGetInfoW
HDBC 0x000001C63339A880
UWORD 6 <SQL_DRIVER_NAME>
PTR 0x000001C635F4A2E0
SWORD 100
SWORD * 0x000000B0FA9FDC2C
ffc3a1f5-16bf-4 1590-3c44 EXIT SQLGetInfoW with return code 0 (SQL_SUCCESS)
HDBC 0x000001C63339A880
UWORD 6 <SQL_DRIVER_NAME>
PTR 0x000001C635F4A2E0 [ 24] “ntl9j18z.dll”
SWORD 100
SWORD * 0x000000B0FA9FDC2C (24)
ffc3a1f5-16bf-4 1590-3c44 ENTER SQLGetInfoW
HDBC 0x000001C63339A880
UWORD 7 <SQL_DRIVER_VER>
PTR 0x000001C635F4A398
SWORD 100
SWORD * 0x000000B0FA9FDC2C
ffc3a1f5-16bf-4 1590-3c44 EXIT SQLGetInfoW with return code 0 (SQL_SUCCESS)
HDBC 0x000001C63339A880
UWORD 7 <SQL_DRIVER_VER>
PTR 0x000001C635F4A398 [ 8] “1.19”
SWORD 100
SWORD * 0x000000B0FA9FDC2C (8)
ffc3a1f5-16bf-4 1590-3c44 ENTER SQLGetInfoW
HDBC 0x000001C63339A880
UWORD 17 <SQL_DBMS_NAME>
PTR 0x000001C635F4A440
SWORD 100
SWORD * 0x000000B0FA9FDC2C
ffc3a1f5-16bf-4 1590-3c44 EXIT SQLGetInfoW with return code 0 (SQL_SUCCESS)
HDBC 0x000001C63339A880
UWORD 17 <SQL_DBMS_NAME>
PTR 0x000001C635F4A440 [ 30] “Infor Data Lake”
SWORD 100
SWORD * 0x000000B0FA9FDC2C (30)
ffc3a1f5-16bf-4 1590-3c44 ENTER SQLGetInfoW
HDBC 0x000001C63339A880
UWORD 18 <SQL_DBMS_VER>
PTR 0x000001C635F4A4F8
SWORD 100
SWORD * 0x000000B0FA9FDC2C
ffc3a1f5-16bf-4 1590-3c44 EXIT SQLGetInfoW with return code 0 (SQL_SUCCESS)
HDBC 0x000001C63339A880
UWORD 18 <SQL_DBMS_VER>
PTR 0x000001C635F4A4F8 [ 14] “unknown”
SWORD 100
SWORD * 0x000000B0FA9FDC2C (14)
ffc3a1f5-16bf-4 1590-3c44 ENTER SQLGetInfoW
HDBC 0x000001C63339A880
UWORD 29 <SQL_IDENTIFIER_QUOTE_CHAR>
PTR 0x000001C635F54960
SWORD 100
SWORD * 0x000000B0FA9FDD4C
ffc3a1f5-16bf-4 1590-3c44 EXIT SQLGetInfoW with return code 0 (SQL_SUCCESS)
HDBC 0x000001C63339A880
UWORD 29 <SQL_IDENTIFIER_QUOTE_CHAR>
PTR 0x000001C635F54960 [ 2] “”"
SWORD 100
SWORD * 0x000000B0FA9FDD4C (2)
ffc3a1f5-16bf-4 1590-3c44 ENTER SQLGetInfoW
HDBC 0x000001C63339A880
UWORD 91 <SQL_OWNER_USAGE>
PTR 0x000001C635F554A0
SWORD 4
SWORD * 0x000000B0FA9FDD1C
ffc3a1f5-16bf-4 1590-3c44 EXIT SQLGetInfoW with return code 0 (SQL_SUCCESS)
HDBC 0x000001C63339A880
UWORD 91 <SQL_OWNER_USAGE>
PTR 0x000001C635F554A0 ( 0x0000000000000001)
SWORD 4
SWORD * 0x000000B0FA9FDD1C (4)
ffc3a1f5-16bf-4 1590-3c44 ENTER SQLGetInfoW
HDBC 0x000001C63339A880
UWORD 92 <SQL_CATALOG_USAGE>
PTR 0x000001C635F55570
SWORD 4
SWORD * 0x000000B0FA9FDD1C
ffc3a1f5-16bf-4 1590-3c44 EXIT SQLGetInfoW with return code 0 (SQL_SUCCESS)
HDBC 0x000001C63339A880
UWORD 92 <SQL_CATALOG_USAGE>
PTR 0x000001C635F55570 ( 0x0000000000000000)
SWORD 4
SWORD * 0x000000B0FA9FDD1C (4)
ffc3a1f5-16bf-4 1590-3c44 ENTER SQLGetInfoW
HDBC 0x000001C63339A880
UWORD 41 <SQL_CATALOG_NAME_SEPARATOR>
PTR 0x000001C635F55738
SWORD 100
SWORD * 0x000000B0FA9FDCFC
ffc3a1f5-16bf-4 1590-3c44 EXIT SQLGetInfoW with return code 0 (SQL_SUCCESS)
HDBC 0x000001C63339A880
UWORD 41 <SQL_CATALOG_NAME_SEPARATOR>
PTR 0x000001C635F55738
SWORD 100
SWORD * 0x000000B0FA9FDCFC (0)
ffc3a1f5-16bf-4 1590-3c44 ENTER SQLGetInfoW
HDBC 0x000001C63339A880
UWORD 114 <SQL_CATALOG_LOCATION>
PTR 0x000001C635F55910
SWORD 4
SWORD * 0x000000B0FA9FDCDC
ffc3a1f5-16bf-4 1590-3c44 EXIT SQLGetInfoW with return code 0 (SQL_SUCCESS)
HDBC 0x000001C63339A880
UWORD 114 <SQL_CATALOG_LOCATION>
PTR 0x000001C635F55910 (2) <SQL_CL_END>
SWORD 4
SWORD * 0x000000B0FA9FDCDC (2)
ffc3a1f5-16bf-4 1590-3c44 ENTER SQLGetInfoW
HDBC 0x000001C63339A880
UWORD 118 <SQL_SQL_CONFORMANCE>
PTR 0x000001C635F559E0
SWORD 4
SWORD * 0x000000B0FA9FDD1C
ffc3a1f5-16bf-4 1590-3c44 EXIT SQLGetInfoW with return code 0 (SQL_SUCCESS)
HDBC 0x000001C63339A880
UWORD 118 <SQL_SQL_CONFORMANCE>
PTR 0x000001C635F559E0 (0)
SWORD 4
SWORD * 0x000000B0FA9FDD1C (4)
ffc3a1f5-16bf-4 1590-3c44 ENTER SQLGetInfoW
HDBC 0x000001C63339A880
UWORD 99 <SQL_MAX_COLUMNS_IN_ORDER_BY>
PTR 0x000001C635F55AB0
SWORD 4
SWORD * 0x000000B0FA9FDD1C
ffc3a1f5-16bf-4 1590-3c44 EXIT SQLGetInfoW with return code 0 (SQL_SUCCESS)
HDBC 0x000001C63339A880
UWORD 99 <SQL_MAX_COLUMNS_IN_ORDER_BY>
PTR 0x000001C635F55AB0 (0)
SWORD 4
SWORD * 0x000000B0FA9FDD1C (2)
ffc3a1f5-16bf-4 1590-3c44 ENTER SQLGetInfoW
HDBC 0x000001C63339A880
UWORD 10005 <SQL_MAX_IDENTIFIER_LEN>
PTR 0x000001C635F55D90
SWORD 4
SWORD * 0x000000B0FA9FDD1C
ffc3a1f5-16bf-4 1590-3c44 EXIT SQLGetInfoW with return code 0 (SQL_SUCCESS)
HDBC 0x000001C63339A880
UWORD 10005 <SQL_MAX_IDENTIFIER_LEN>
PTR 0x000001C635F55D90 (30)
SWORD 4
SWORD * 0x000000B0FA9FDD1C (2)
ffc3a1f5-16bf-4 1590-3c44 ENTER SQLGetInfoW
HDBC 0x000001C63339A880
UWORD 97 <SQL_MAX_COLUMNS_IN_GROUP_BY>
PTR 0x000001C635F56070
SWORD 4
SWORD * 0x000000B0FA9FDD1C
ffc3a1f5-16bf-4 1590-3c44 EXIT SQLGetInfoW with return code 0 (SQL_SUCCESS)
HDBC 0x000001C63339A880
UWORD 97 <SQL_MAX_COLUMNS_IN_GROUP_BY>
PTR 0x000001C635F56070 (0)
SWORD 4
SWORD * 0x000000B0FA9FDD1C (2)
ffc3a1f5-16bf-4 1590-3c44 ENTER SQLGetInfoW
HDBC 0x000001C63339A880
UWORD 100 <SQL_MAX_COLUMNS_IN_SELECT>
PTR 0x000001C635F56140
SWORD 4
SWORD * 0x000000B0FA9FDD1C
ffc3a1f5-16bf-4 1590-3c44 EXIT SQLGetInfoW with return code 0 (SQL_SUCCESS)
HDBC 0x000001C63339A880
UWORD 100 <SQL_MAX_COLUMNS_IN_SELECT>
PTR 0x000001C635F56140 (0)
SWORD 4
SWORD * 0x000000B0FA9FDD1C (2)
ffc3a1f5-16bf-4 1590-3c44 ENTER SQLGetInfoW
HDBC 0x000001C63339A880
UWORD 90 <SQL_ORDER_BY_COLUMNS_IN_SELECT>
PTR 0x000001C635F56658
SWORD 100
SWORD * 0x000000B0FA9FDCFC
ffc3a1f5-16bf-4 1590-3c44 EXIT SQLGetInfoW with return code 0 (SQL_SUCCESS)
HDBC 0x000001C63339A880
UWORD 90 <SQL_ORDER_BY_COLUMNS_IN_SELECT>
PTR 0x000001C635F56658 [ 2] “Y”
SWORD 100
SWORD * 0x000000B0FA9FDCFC (2)
ffc3a1f5-16bf-4 1590-3c44 ENTER SQLGetInfoW
HDBC 0x000001C63339A880
UWORD 50 <SQL_STRING_FUNCTIONS>
PTR 0x000001C635F56758
SWORD 4
SWORD * 0x000000B0FA9FDD1C
ffc3a1f5-16bf-4 1590-3c44 EXIT SQLGetInfoW with return code 0 (SQL_SUCCESS)
HDBC 0x000001C63339A880
UWORD 50 <SQL_STRING_FUNCTIONS>
PTR 0x000001C635F56758 ( 0x0000000000000000)
SWORD 4
SWORD * 0x000000B0FA9FDD1C (4)
ffc3a1f5-16bf-4 1590-3c44 ENTER SQLGetInfoW
HDBC 0x000001C63339A880
UWORD 169
PTR [Unknown attribute 169]
SWORD 4
SWORD * 0x000000B0FA9FDD1C
ffc3a1f5-16bf-4 1590-3c44 EXIT SQLGetInfoW with return code 0 (SQL_SUCCESS)
HDBC 0x000001C63339A880
UWORD 169
PTR [Unknown attribute 169]
SWORD 4
SWORD * 0x000000B0FA9FDD1C (4)
ffc3a1f5-16bf-4 1590-3c44 ENTER SQLGetInfoW
HDBC 0x000001C63339A880
UWORD 160 <SQL_SQL92_PREDICATES>
PTR 0x000001C635F568F8
SWORD 4
SWORD * 0x000000B0FA9FDD1C
ffc3a1f5-16bf-4 1590-3c44 EXIT SQLGetInfoW with return code 0 (SQL_SUCCESS)
HDBC 0x000001C63339A880
UWORD 160 <SQL_SQL92_PREDICATES>
PTR 0x000001C635F568F8 ( 0x0000000000000000)
SWORD 4
SWORD * 0x000000B0FA9FDD1C (4)
ffc3a1f5-16bf-4 1590-3c44 ENTER SQLGetInfoW
HDBC 0x000001C63339A880
UWORD 161 <SQL_SQL92_RELATIONAL_JOIN_OPERATORS>
PTR 0x000001C635F569C8
SWORD 4
SWORD * 0x000000B0FA9FDD1C
ffc3a1f5-16bf-4 1590-3c44 EXIT SQLGetInfoW with return code 0 (SQL_SUCCESS)
HDBC 0x000001C63339A880
UWORD 161 <SQL_SQL92_RELATIONAL_JOIN_OPERATORS>
PTR 0x000001C635F569C8 ( 0x0000000000000000)
SWORD 4
SWORD * 0x000000B0FA9FDD1C (4)
ffc3a1f5-16bf-4 1590-3c44 ENTER SQLGetInfoW
HDBC 0x000001C63339A880
UWORD 165 <SQL_SQL92_VALUE_EXPRESSIONS>
PTR 0x000001C635F56A98
SWORD 4
SWORD * 0x000000B0FA9FDD1C
ffc3a1f5-16bf-4 1590-3c44 EXIT SQLGetInfoW with return code 0 (SQL_SUCCESS)
HDBC 0x000001C63339A880
UWORD 165 <SQL_SQL92_VALUE_EXPRESSIONS>
PTR 0x000001C635F56A98 ( 0x0000000000000000)
SWORD 4
SWORD * 0x000000B0FA9FDD1C (4)
ffc3a1f5-16bf-4 1590-3c44 ENTER SQLGetInfoW
HDBC 0x000001C63339A880
UWORD 87 <SQL_COLUMN_ALIAS>
PTR 0x000001C635F56B68
SWORD 100
SWORD * 0x000000B0FA9FDCFC
ffc3a1f5-16bf-4 1590-3c44 EXIT SQLGetInfoW with return code 0 (SQL_SUCCESS)
HDBC 0x000001C63339A880
UWORD 87 <SQL_COLUMN_ALIAS>
PTR 0x000001C635F56B68 [ 2] “Y”
SWORD 100
SWORD * 0x000000B0FA9FDCFC (2)
ffc3a1f5-16bf-4 1590-3c44 ENTER SQLGetInfoW
HDBC 0x000001C63339A880
UWORD 88 <SQL_GROUP_BY>
PTR 0x000001C635F570C0
SWORD 4
SWORD * 0x000000B0FA9FDD1C
ffc3a1f5-16bf-4 1590-3c44 EXIT SQLGetInfoW with return code 0 (SQL_SUCCESS)
HDBC 0x000001C63339A880
UWORD 88 <SQL_GROUP_BY>
PTR 0x000001C635F570C0 (1) <SQL_GB_GROUP_BY_EQUALS_SELECT>
SWORD 4
SWORD * 0x000000B0FA9FDD1C (2)
ffc3a1f5-16bf-4 1590-3c44 ENTER SQLGetInfoW
HDBC 0x000001C63339A880
UWORD 49 <SQL_NUMERIC_FUNCTIONS>
PTR 0x000001C635F575D0
SWORD 4
SWORD * 0x000000B0FA9FDD1C
ffc3a1f5-16bf-4 1590-3c44 EXIT SQLGetInfoW with return code 0 (SQL_SUCCESS)
HDBC 0x000001C63339A880
UWORD 49 <SQL_NUMERIC_FUNCTIONS>
PTR 0x000001C635F575D0 ( 0x0000000000000000)
SWORD 4
SWORD * 0x000000B0FA9FDD1C (4)
ffc3a1f5-16bf-4 1590-3c44 ENTER SQLGetInfoW
HDBC 0x000001C63339A880
UWORD 52 <SQL_TIMEDATE_FUNCTIONS>
PTR 0x000001C635F576A0
SWORD 4
SWORD * 0x000000B0FA9FDD1C
ffc3a1f5-16bf-4 1590-3c44 EXIT SQLGetInfoW with return code 0 (SQL_SUCCESS)
HDBC 0x000001C63339A880
UWORD 52 <SQL_TIMEDATE_FUNCTIONS>
PTR 0x000001C635F576A0 ( 0x0000000000000000)
SWORD 4
SWORD * 0x000000B0FA9FDD1C (4)
ffc3a1f5-16bf-4 1590-3c44 ENTER SQLGetInfoW
HDBC 0x000001C63339A880
UWORD 51 <SQL_SYSTEM_FUNCTIONS>
PTR 0x000001C635F57770
SWORD 4
SWORD * 0x000000B0FA9FDD1C
ffc3a1f5-16bf-4 1590-3c44 EXIT SQLGetInfoW with return code 0 (SQL_SUCCESS)
HDBC 0x000001C63339A880
UWORD 51 <SQL_SYSTEM_FUNCTIONS>
PTR 0x000001C635F57770 ( 0x0000000000000000)
SWORD 4
SWORD * 0x000000B0FA9FDD1C (4)
ffc3a1f5-16bf-4 1590-3c44 ENTER SQLGetInfoW
HDBC 0x000001C63339A880
UWORD 109 <SQL_TIMEDATE_ADD_INTERVALS>
PTR 0x000001C635F57840
SWORD 4
SWORD * 0x000000B0FA9FDD1C
ffc3a1f5-16bf-4 1590-3c44 EXIT SQLGetInfoW with return code 0 (SQL_SUCCESS)
HDBC 0x000001C63339A880
UWORD 109 <SQL_TIMEDATE_ADD_INTERVALS>
PTR 0x000001C635F57840 ( 0x0000000000000000)
SWORD 4
SWORD * 0x000000B0FA9FDD1C (4)
ffc3a1f5-16bf-4 1590-3c44 ENTER SQLGetInfoW
HDBC 0x000001C63339A880
UWORD 110 <SQL_TIMEDATE_DIFF_INTERVALS>
PTR 0x000001C635F57910
SWORD 4
SWORD * 0x000000B0FA9FDD1C
ffc3a1f5-16bf-4 1590-3c44 EXIT SQLGetInfoW with return code 0 (SQL_SUCCESS)
HDBC 0x000001C63339A880
UWORD 110 <SQL_TIMEDATE_DIFF_INTERVALS>
PTR 0x000001C635F57910 ( 0x0000000000000000)
SWORD 4
SWORD * 0x000000B0FA9FDD1C (4)
ffc3a1f5-16bf-4 1590-3c44 ENTER SQLGetInfoW
HDBC 0x000001C63339A880
UWORD 22 <SQL_CONCAT_NULL_BEHAVIOR>
PTR 0x000001C635F579E0
SWORD 4
SWORD * 0x000000B0FA9FDCDC
ffc3a1f5-16bf-4 1590-3c44 EXIT SQLGetInfoW with return code 0 (SQL_SUCCESS)
HDBC 0x000001C63339A880
UWORD 22 <SQL_CONCAT_NULL_BEHAVIOR>
PTR 0x000001C635F579E0 (1) <SQL_CB_NON_NULL>
SWORD 4
SWORD * 0x000000B0FA9FDCDC (2)
ffc3a1f5-16bf-4 1590-3c44 ENTER SQLGetInfoW
HDBC 0x000001C63339A880
UWORD 10003 <SQL_CATALOG_NAME>
PTR 0x000001C635F57AB0
SWORD 100
SWORD * 0x000000B0FA9FDCFC
ffc3a1f5-16bf-4 1590-3c44 EXIT SQLGetInfoW with return code 0 (SQL_SUCCESS)
HDBC 0x000001C63339A880
UWORD 10003 <SQL_CATALOG_NAME>
PTR 0x000001C635F57AB0 [ 2] “Y”
SWORD 100
SWORD * 0x000000B0FA9FDCFC (2)
ffc3a1f5-16bf-4 1590-3c44 ENTER SQLGetInfoW
HDBC 0x000001C63339A880
UWORD 42 <SQL_CATALOG_TERM>
PTR 0x000001C635F57BB0
SWORD 100
SWORD * 0x000000B0FA9FDCFC
ffc3a1f5-16bf-4 1590-3c44 EXIT SQLGetInfoW with return code 0 (SQL_SUCCESS)
HDBC 0x000001C63339A880
UWORD 42 <SQL_CATALOG_TERM>
PTR 0x000001C635F57BB0 [ 16] “database”
SWORD 100
SWORD * 0x000000B0FA9FDCFC (16)
ffc3a1f5-16bf-4 1590-3c44 ENTER SQLGetInfoW
HDBC 0x000001C63339A880
UWORD 39 <SQL_OWNER_TERM>
PTR 0x000001C635F57CC0
SWORD 100
SWORD * 0x000000B0FA9FDCFC
ffc3a1f5-16bf-4 1590-3c44 EXIT SQLGetInfoW with return code 0 (SQL_SUCCESS)
HDBC 0x000001C63339A880
UWORD 39 <SQL_OWNER_TERM>
PTR 0x000001C635F57CC0 [ 12] “schema”
SWORD 100
SWORD * 0x000000B0FA9FDCFC (12)
ffc3a1f5-16bf-4 1590-3c44 ENTER SQLGetInfoW
HDBC 0x000001C63339A880
UWORD 152 <SQL_ODBC_INTERFACE_CONFORMANCE>
PTR 0x000001C635F58610
SWORD 4
SWORD * 0x000000B0FA9FDD1C
ffc3a1f5-16bf-4 1590-3c44 EXIT SQLGetInfoW with return code 0 (SQL_SUCCESS)
HDBC 0x000001C63339A880
UWORD 152 <SQL_ODBC_INTERFACE_CONFORMANCE>
PTR 0x000001C635F58610 (1) <SQL_OIC_CORE>
SWORD 4
SWORD * 0x000000B0FA9FDD1C (4)
ffc3a1f5-16bf-4 1590-3c44 ENTER SQLGetInfoW
HDBC 0x000001C63339A880
UWORD 14 <SQL_SEARCH_PATTERN_ESCAPE>
PTR 0x000001C635F586E0
SWORD 100
SWORD * 0x000000B0FA9FDD4C
ffc3a1f5-16bf-4 1590-3c44 EXIT SQLGetInfoW with return code 0 (SQL_SUCCESS)
HDBC 0x000001C63339A880
UWORD 14 <SQL_SEARCH_PATTERN_ESCAPE>
PTR 0x000001C635F586E0 [ 2] ""
SWORD 100
SWORD * 0x000000B0FA9FDD4C (2)
ffc3a1f5-16bf-4 1590-3c44 ENTER SQLGetInfoW
HDBC 0x000001C63339A880
UWORD 48 <SQL_CONVERT_FUNCTIONS>
PTR 0x000001C635F587E0
SWORD 4
SWORD * 0x000000B0FA9FDD1C
ffc3a1f5-16bf-4 1590-3c44 EXIT SQLGetInfoW with return code 0 (SQL_SUCCESS)
HDBC 0x000001C63339A880
UWORD 48 <SQL_CONVERT_FUNCTIONS>
PTR 0x000001C635F587E0 ( 0x0000000000000000)
SWORD 4
SWORD * 0x000000B0FA9FDD1C (4)
ffc3a1f5-16bf-4 1590-3c44 ENTER SQLGetInfoW
HDBC 0x000001C63339A880
UWORD 53 <SQL_CONVERT_BIGINT>
PTR 0x000001C635F58900
SWORD 4
SWORD * 0x000000B0FA9FDCBC
ffc3a1f5-16bf-4 1590-3c44 EXIT SQLGetInfoW with return code 0 (SQL_SUCCESS)
HDBC 0x000001C63339A880
UWORD 53 <SQL_CONVERT_BIGINT>
PTR 0x000001C635F58900 ( 0x00000000000073FF)
SWORD 4
SWORD * 0x000000B0FA9FDCBC (4)
ffc3a1f5-16bf-4 1590-3c44 ENTER SQLGetInfoW
HDBC 0x000001C63339A880
UWORD 54 <SQL_CONVERT_BINARY>
PTR 0x000001C635F58A48
SWORD 4
SWORD * 0x000000B0FA9FDCBC
ffc3a1f5-16bf-4 1590-3c44 EXIT SQLGetInfoW with return code 0 (SQL_SUCCESS)
HDBC 0x000001C63339A880
UWORD 54 <SQL_CONVERT_BINARY>
PTR 0x000001C635F58A48 ( 0x0000000000040F01)
SWORD 4
SWORD * 0x000000B0FA9FDCBC (4)
ffc3a1f5-16bf-4 1590-3c44 ENTER SQLGetInfoW
HDBC 0x000001C63339A880
UWORD 55 <SQL_CONVERT_BIT>
PTR 0x000001C635F58B20
SWORD 4
SWORD * 0x000000B0FA9FDCBC
ffc3a1f5-16bf-4 1590-3c44 EXIT SQLGetInfoW with return code 0 (SQL_SUCCESS)
HDBC 0x000001C63339A880
UWORD 55 <SQL_CONVERT_BIT>
PTR 0x000001C635F58B20 ( 0x00000000000073FF)
SWORD 4
SWORD * 0x000000B0FA9FDCBC (4)
ffc3a1f5-16bf-4 1590-3c44 ENTER SQLGetInfoW
HDBC 0x000001C63339A880
UWORD 56 <SQL_CONVERT_CHAR>
PTR 0x000001C635F58BF8
SWORD 4
SWORD * 0x000000B0FA9FDCBC
ffc3a1f5-16bf-4 1590-3c44 EXIT SQLGetInfoW with return code 0 (SQL_SUCCESS)
HDBC 0x000001C63339A880
UWORD 56 <SQL_CONVERT_CHAR>
PTR 0x000001C635F58BF8 ( 0x00000000000073FF)
SWORD 4
SWORD * 0x000000B0FA9FDCBC (4)
ffc3a1f5-16bf-4 1590-3c44 ENTER SQLGetInfoW
HDBC 0x000001C63339A880
UWORD 58 <SQL_CONVERT_DECIMAL>
PTR 0x000001C635F58D90
SWORD 4
SWORD * 0x000000B0FA9FDCBC
ffc3a1f5-16bf-4 1590-3c44 EXIT SQLGetInfoW with return code 0 (SQL_SUCCESS)
HDBC 0x000001C63339A880
UWORD 58 <SQL_CONVERT_DECIMAL>
PTR 0x000001C635F58D90 ( 0x00000000000073FF)
SWORD 4
SWORD * 0x000000B0FA9FDCBC (4)
ffc3a1f5-16bf-4 1590-3c44 ENTER SQLGetInfoW
HDBC 0x000001C63339A880
UWORD 59 <SQL_CONVERT_DOUBLE>
PTR 0x000001C635F58E68
SWORD 4
SWORD * 0x000000B0FA9FDCBC
ffc3a1f5-16bf-4 1590-3c44 EXIT SQLGetInfoW with return code 0 (SQL_SUCCESS)
HDBC 0x000001C63339A880
UWORD 59 <SQL_CONVERT_DOUBLE>
PTR 0x000001C635F58E68 ( 0x00000000000073FF)
SWORD 4
SWORD * 0x000000B0FA9FDCBC (4)
ffc3a1f5-16bf-4 1590-3c44 ENTER SQLGetInfoW
HDBC 0x000001C63339A880
UWORD 60 <SQL_CONVERT_FLOAT>
PTR 0x000001C635F58F40
SWORD 4
SWORD * 0x000000B0FA9FDCBC
ffc3a1f5-16bf-4 1590-3c44 EXIT SQLGetInfoW with return code 0 (SQL_SUCCESS)
HDBC 0x000001C63339A880
UWORD 60 <SQL_CONVERT_FLOAT>
PTR 0x000001C635F58F40 ( 0x00000000000073FF)
SWORD 4
SWORD * 0x000000B0FA9FDCBC (4)
ffc3a1f5-16bf-4 1590-3c44 ENTER SQLGetInfoW
HDBC 0x000001C63339A880
UWORD 173
PTR [Unknown attribute 173]
SWORD 4
SWORD * 0x000000B0FA9FDCBC
ffc3a1f5-16bf-4 1590-3c44 EXIT SQLGetInfoW with return code -1 (SQL_ERROR)
HDBC 0x000001C63339A880
UWORD 173
PTR [Unknown attribute 173]
SWORD 4
SWORD * 0x000000B0FA9FDCBC
DIAG [HY096] [OpenLink][ODBC][Driver]Information type out of range (0)
ffc3a1f5-16bf-4 1590-3c44 ENTER SQLGetDiagRecW
SQLSMALLINT 2 <SQL_HANDLE_DBC>
SQLHANDLE 0x000001C63339A880
SQLSMALLINT 1
SQLWCHAR * 0x000000B0FA9FDA50
SQLINTEGER * 0x000000B0FA9FDC30
SQLWCHAR * 0x000001C66CC6B720
SQLSMALLINT 1024
SQLSMALLINT * 0x000000B0FA9FDC28
ffc3a1f5-16bf-4 1590-3c44 EXIT SQLGetDiagRecW with return code 0 (SQL_SUCCESS)
SQLSMALLINT 2 <SQL_HANDLE_DBC>
SQLHANDLE 0x000001C63339A880
SQLSMALLINT 1
SQLWCHAR * 0x000000B0FA9FDA50 [ 5] “HY096”
SQLINTEGER * 0x000000B0FA9FDC30 (0)
SQLWCHAR * 0x000001C66CC6B720 [ 53] “[OpenLink][ODBC][Driver]Information type out of range”
SQLSMALLINT 1024
SQLSMALLINT * 0x000000B0FA9FDC28 (53)
ffc3a1f5-16bf-4 1590-3c44 ENTER SQLGetDiagRecW
SQLSMALLINT 2 <SQL_HANDLE_DBC>
SQLHANDLE 0x000001C63339A880
SQLSMALLINT 2
SQLWCHAR * 0x000000B0FA9FDA50
SQLINTEGER * 0x000000B0FA9FDC30
SQLWCHAR * 0x000001C66CC6A700
SQLSMALLINT 1024
SQLSMALLINT * 0x000000B0FA9FDC28
ffc3a1f5-16bf-4 1590-3c44 EXIT SQLGetDiagRecW with return code 100 (SQL_NO_DATA_FOUND)
SQLSMALLINT 2 <SQL_HANDLE_DBC>
SQLHANDLE 0x000001C63339A880
SQLSMALLINT 2
SQLWCHAR * 0x000000B0FA9FDA50
SQLINTEGER * 0x000000B0FA9FDC30
SQLWCHAR * 0x000001C66CC6A700
SQLSMALLINT 1024
SQLSMALLINT * 0x000000B0FA9FDC28
ffc3a1f5-16bf-4 1590-3c44 ENTER SQLGetInfoW
HDBC 0x000001C63339A880
UWORD 61 <SQL_CONVERT_INTEGER>
PTR 0x000001C635F5CA80
SWORD 4
SWORD * 0x000000B0FA9FDCBC
ffc3a1f5-16bf-4 1590-3c44 EXIT SQLGetInfoW with return code 0 (SQL_SUCCESS)
HDBC 0x000001C63339A880
UWORD 61 <SQL_CONVERT_INTEGER>
PTR 0x000001C635F5CA80 ( 0x00000000000073FF)
SWORD 4
SWORD * 0x000000B0FA9FDCBC (4)
ffc3a1f5-16bf-4 1590-3c44 ENTER SQLGetInfoW
HDBC 0x000001C63339A880
UWORD 71 <SQL_CONVERT_LONGVARBINARY>
PTR 0x000001C635F5CB58
SWORD 4
SWORD * 0x000000B0FA9FDCBC
ffc3a1f5-16bf-4 1590-3c44 EXIT SQLGetInfoW with return code 0 (SQL_SUCCESS)
HDBC 0x000001C63339A880
UWORD 71 <SQL_CONVERT_LONGVARBINARY>
PTR 0x000001C635F5CB58 ( 0x0000000000040F01)
SWORD 4
SWORD * 0x000000B0FA9FDCBC (4)
ffc3a1f5-16bf-4 1590-3c44 ENTER SQLGetInfoW
HDBC 0x000001C63339A880
UWORD 62 <SQL_CONVERT_LONGVARCHAR>
PTR 0x000001C635F5CC30
SWORD 4
SWORD * 0x000000B0FA9FDCBC
ffc3a1f5-16bf-4 1590-3c44 EXIT SQLGetInfoW with return code 0 (SQL_SUCCESS)
HDBC 0x000001C63339A880
UWORD 62 <SQL_CONVERT_LONGVARCHAR>
PTR 0x000001C635F5CC30 ( 0x00000000000073FF)
SWORD 4
SWORD * 0x000000B0FA9FDCBC (4)
ffc3a1f5-16bf-4 1590-3c44 ENTER SQLGetInfoW
HDBC 0x000001C63339A880
UWORD 63 <SQL_CONVERT_NUMERIC>
PTR 0x000001C635F5CD08
SWORD 4
SWORD * 0x000000B0FA9FDCBC
ffc3a1f5-16bf-4 1590-3c44 EXIT SQLGetInfoW with return code 0 (SQL_SUCCESS)
HDBC 0x000001C63339A880
UWORD 63 <SQL_CONVERT_NUMERIC>
PTR 0x000001C635F5CD08 ( 0x00000000000073FF)
SWORD 4
SWORD * 0x000000B0FA9FDCBC (4)
ffc3a1f5-16bf-4 1590-3c44 ENTER SQLGetInfoW
HDBC 0x000001C63339A880
UWORD 64 <SQL_CONVERT_REAL>
PTR 0x000001C635F5CDE0
SWORD 4
SWORD * 0x000000B0FA9FDCBC
ffc3a1f5-16bf-4 1590-3c44 EXIT SQLGetInfoW with return code 0 (SQL_SUCCESS)
HDBC 0x000001C63339A880
UWORD 64 <SQL_CONVERT_REAL>
PTR 0x000001C635F5CDE0 ( 0x00000000000073FF)
SWORD 4
SWORD * 0x000000B0FA9FDCBC (4)
ffc3a1f5-16bf-4 1590-3c44 ENTER SQLGetInfoW
HDBC 0x000001C63339A880
UWORD 65 <SQL_CONVERT_SMALLINT>
PTR 0x000001C635F5CEB8
SWORD 4
SWORD * 0x000000B0FA9FDCBC
ffc3a1f5-16bf-4 1590-3c44 EXIT SQLGetInfoW with return code 0 (SQL_SUCCESS)
HDBC 0x000001C63339A880
UWORD 65 <SQL_CONVERT_SMALLINT>
PTR 0x000001C635F5CEB8 ( 0x00000000000073FF)
SWORD 4
SWORD * 0x000000B0FA9FDCBC (4)
ffc3a1f5-16bf-4 1590-3c44 ENTER SQLGetInfoW
HDBC 0x000001C63339A880
UWORD 67 <SQL_CONVERT_TIMESTAMP>
PTR 0x000001C635F5CF90
SWORD 4
SWORD * 0x000000B0FA9FDCBC
ffc3a1f5-16bf-4 1590-3c44 EXIT SQLGetInfoW with return code 0 (SQL_SUCCESS)
HDBC 0x000001C63339A880
UWORD 67 <SQL_CONVERT_TIMESTAMP>
PTR 0x000001C635F5CF90 ( 0x0000000000000000)
SWORD 4
SWORD * 0x000000B0FA9FDCBC (4)
ffc3a1f5-16bf-4 1590-3c44 ENTER SQLGetInfoW
HDBC 0x000001C63339A880
UWORD 68 <SQL_CONVERT_TINYINT>
PTR 0x000001C635F5D078
SWORD 4
SWORD * 0x000000B0FA9FDCBC
ffc3a1f5-16bf-4 1590-3c44 EXIT SQLGetInfoW with return code 0 (SQL_SUCCESS)
HDBC 0x000001C63339A880
UWORD 68 <SQL_CONVERT_TINYINT>
PTR 0x000001C635F5D078 ( 0x00000000000073FF)
SWORD 4
SWORD * 0x000000B0FA9FDCBC (4)
ffc3a1f5-16bf-4 1590-3c44 ENTER SQLGetInfoW
HDBC 0x000001C63339A880
UWORD 57 <SQL_CONVERT_DATE>
PTR 0x000001C635F5D150
SWORD 4
SWORD * 0x000000B0FA9FDCBC
ffc3a1f5-16bf-4 1590-3c44 EXIT SQLGetInfoW with return code 0 (SQL_SUCCESS)
HDBC 0x000001C63339A880
UWORD 57 <SQL_CONVERT_DATE>
PTR 0x000001C635F5D150 ( 0x0000000000000000)
SWORD 4
SWORD * 0x000000B0FA9FDCBC (4)
ffc3a1f5-16bf-4 1590-3c44 ENTER SQLGetInfoW
HDBC 0x000001C63339A880
UWORD 66 <SQL_CONVERT_TIME>
PTR 0x000001C635F5D220
SWORD 4
SWORD * 0x000000B0FA9FDCBC
ffc3a1f5-16bf-4 1590-3c44 EXIT SQLGetInfoW with return code 0 (SQL_SUCCESS)
HDBC 0x000001C63339A880
UWORD 66 <SQL_CONVERT_TIME>
PTR 0x000001C635F5D220 ( 0x0000000000000000)
SWORD 4
SWORD * 0x000000B0FA9FDCBC (4)
ffc3a1f5-16bf-4 1590-3c44 ENTER SQLGetInfoW
HDBC 0x000001C63339A880
UWORD 69 <SQL_CONVERT_VARBINARY>
PTR 0x000001C635F5D608
SWORD 4
SWORD * 0x000000B0FA9FDCBC
ffc3a1f5-16bf-4 1590-3c44 EXIT SQLGetInfoW with return code 0 (SQL_SUCCESS)
HDBC 0x000001C63339A880
UWORD 69 <SQL_CONVERT_VARBINARY>
PTR 0x000001C635F5D608 ( 0x0000000000040F01)
SWORD 4
SWORD * 0x000000B0FA9FDCBC (4)
ffc3a1f5-16bf-4 1590-3c44 ENTER SQLGetInfoW
HDBC 0x000001C63339A880
UWORD 70 <SQL_CONVERT_VARCHAR>
PTR 0x000001C635F5D6E0
SWORD 4
SWORD * 0x000000B0FA9FDCBC
ffc3a1f5-16bf-4 1590-3c44 EXIT SQLGetInfoW with return code 0 (SQL_SUCCESS)
HDBC 0x000001C63339A880
UWORD 70 <SQL_CONVERT_VARCHAR>
PTR 0x000001C635F5D6E0 ( 0x00000000000073FF)
SWORD 4
SWORD * 0x000000B0FA9FDCBC (4)
ffc3a1f5-16bf-4 1590-3c44 ENTER SQLGetInfoW
HDBC 0x000001C63339A880
UWORD 122 <SQL_CONVERT_WCHAR>
PTR 0x000001C635F5D7B8
SWORD 4
SWORD * 0x000000B0FA9FDCBC
ffc3a1f5-16bf-4 1590-3c44 EXIT SQLGetInfoW with return code 0 (SQL_SUCCESS)
HDBC 0x000001C63339A880
UWORD 122 <SQL_CONVERT_WCHAR>
PTR 0x000001C635F5D7B8 ( 0x00000000000073FF)
SWORD 4
SWORD * 0x000000B0FA9FDCBC (4)
ffc3a1f5-16bf-4 1590-3c44 ENTER SQLGetInfoW
HDBC 0x000001C63339A880
UWORD 125 <SQL_CONVERT_WLONGVARCHAR>
PTR 0x000001C635F5D890
SWORD 4
SWORD * 0x000000B0FA9FDCBC
ffc3a1f5-16bf-4 1590-3c44 EXIT SQLGetInfoW with return code 0 (SQL_SUCCESS)
HDBC 0x000001C63339A880
UWORD 125 <SQL_CONVERT_WLONGVARCHAR>
PTR 0x000001C635F5D890 ( 0x00000000000073FF)
SWORD 4
SWORD * 0x000000B0FA9FDCBC (4)
ffc3a1f5-16bf-4 1590-3c44 ENTER SQLGetInfoW
HDBC 0x000001C63339A880
UWORD 126 <SQL_CONVERT_WVARCHAR>
PTR 0x000001C635F5D968
SWORD 4
SWORD * 0x000000B0FA9FDCBC
ffc3a1f5-16bf-4 1590-3c44 EXIT SQLGetInfoW with return code 0 (SQL_SUCCESS)
HDBC 0x000001C63339A880
UWORD 126 <SQL_CONVERT_WVARCHAR>
PTR 0x000001C635F5D968 ( 0x00000000000073FF)
SWORD 4
SWORD * 0x000000B0FA9FDCBC (4)
ffc3a1f5-16bf-4 1590-3c44 ENTER SQLGetInfoW
HDBC 0x000001C63339A880
UWORD 94 <SQL_SPECIAL_CHARACTERS>
PTR 0x000001C635F5DA40
SWORD 100
SWORD * 0x000000B0FA9FDCFC
ffc3a1f5-16bf-4 1590-3c44 EXIT SQLGetInfoW with return code 0 (SQL_SUCCESS)
HDBC 0x000001C63339A880
UWORD 94 <SQL_SPECIAL_CHARACTERS>
PTR 0x000001C635F5DA40
SWORD 100
SWORD * 0x000000B0FA9FDCFC (0)
ffc3a1f5-16bf-4 1590-3c44 ENTER SQLGetInfoW
HDBC 0x000001C63339A880
UWORD 180
PTR [Unknown attribute 180]
SWORD 4
SWORD * 0x000000B0FA9FDD1C
ffc3a1f5-16bf-4 1590-3c44 EXIT SQLGetInfoW with return code -1 (SQL_ERROR)
HDBC 0x000001C63339A880
UWORD 180
PTR [Unknown attribute 180]
SWORD 4
SWORD * 0x000000B0FA9FDD1C
DIAG [HY096] [OpenLink][ODBC][Driver]Information type out of range (0)
ffc3a1f5-16bf-4 1590-3c44 ENTER SQLGetDiagRecW
SQLSMALLINT 2 <SQL_HANDLE_DBC>
SQLHANDLE 0x000001C63339A880
SQLSMALLINT 1
SQLWCHAR * 0x000000B0FA9FDAB0
SQLINTEGER * 0x000000B0FA9FDC90
SQLWCHAR * 0x000001C66CC6CF50
SQLSMALLINT 1024
SQLSMALLINT * 0x000000B0FA9FDC88
ffc3a1f5-16bf-4 1590-3c44 EXIT SQLGetDiagRecW with return code 0 (SQL_SUCCESS)
SQLSMALLINT 2 <SQL_HANDLE_DBC>
SQLHANDLE 0x000001C63339A880
SQLSMALLINT 1
SQLWCHAR * 0x000000B0FA9FDAB0 [ 5] “HY096”
SQLINTEGER * 0x000000B0FA9FDC90 (0)
SQLWCHAR * 0x000001C66CC6CF50 [ 53] “[OpenLink][ODBC][Driver]Information type out of range”
SQLSMALLINT 1024
SQLSMALLINT * 0x000000B0FA9FDC88 (53)
ffc3a1f5-16bf-4 1590-3c44 ENTER SQLGetDiagRecW
SQLSMALLINT 2 <SQL_HANDLE_DBC>
SQLHANDLE 0x000001C63339A880
SQLSMALLINT 2
SQLWCHAR * 0x000000B0FA9FDAB0
SQLINTEGER * 0x000000B0FA9FDC90
SQLWCHAR * 0x000001C66CC6DF70
SQLSMALLINT 1024
SQLSMALLINT * 0x000000B0FA9FDC88
ffc3a1f5-16bf-4 1590-3c44 EXIT SQLGetDiagRecW with return code 100 (SQL_NO_DATA_FOUND)
SQLSMALLINT 2 <SQL_HANDLE_DBC>
SQLHANDLE 0x000001C63339A880
SQLSMALLINT 2
SQLWCHAR * 0x000000B0FA9FDAB0
SQLINTEGER * 0x000000B0FA9FDC90
SQLWCHAR * 0x000001C66CC6DF70
SQLSMALLINT 1024
SQLSMALLINT * 0x000000B0FA9FDC88
ffc3a1f5-16bf-4 1590-3c44 ENTER SQLGetInfoW
HDBC 0x000001C63339A880
UWORD 77 <SQL_DRIVER_ODBC_VER>
PTR 0x000001C635F5FC90
SWORD 100
SWORD * 0x000000B0FA9FDD4C
ffc3a1f5-16bf-4 1590-3c44 EXIT SQLGetInfoW with return code 0 (SQL_SUCCESS)
HDBC 0x000001C63339A880
UWORD 77 <SQL_DRIVER_ODBC_VER>
PTR 0x000001C635F5FC90 [ 10] “03.50”
SWORD 100
SWORD * 0x000000B0FA9FDD4C (10)
ffc3a1f5-16bf-4 1590-3c44 ENTER SQLDisconnect
HDBC 0x000001C63339A880
ffc3a1f5-16bf-4 1590-3c44 EXIT SQLDisconnect with return code 0 (SQL_SUCCESS)
HDBC 0x000001C63339A880
ffc3a1f5-16bf-4 1590-3c44 ENTER SQLFreeHandle
SQLSMALLINT 2 <SQL_HANDLE_DBC>
SQLHANDLE 0x000001C63339A880
ffc3a1f5-16bf-4 1590-3c44 EXIT SQLFreeHandle with return code 0 (SQL_SUCCESS)
SQLSMALLINT 2 <SQL_HANDLE_DBC>
SQLHANDLE 0x000001C63339A880
ffc3a1f5-16bf-4 1590-3c44 ENTER SQLAllocHandle
SQLSMALLINT 2 <SQL_HANDLE_DBC>
SQLHANDLE 0x000001C63339A7A0
SQLHANDLE * 0x000001C636133BC8
ffc3a1f5-16bf-4 1590-3c44 EXIT SQLAllocHandle with return code 0 (SQL_SUCCESS)
SQLSMALLINT 2 <SQL_HANDLE_DBC>
SQLHANDLE 0x000001C63339A7A0
SQLHANDLE * 0x000001C636133BC8 ( 0x000001C63339A880)
ffc3a1f5-16bf-4 1590-3c44 ENTER SQLSetConnectAttrW
SQLHDBC 0x000001C63339A880
SQLINTEGER 103 <SQL_ATTR_LOGIN_TIMEOUT>
SQLPOINTER 15
SQLINTEGER -5
ffc3a1f5-16bf-4 1590-3c44 EXIT SQLSetConnectAttrW with return code 0 (SQL_SUCCESS)
SQLHDBC 0x000001C63339A880
SQLINTEGER 103 <SQL_ATTR_LOGIN_TIMEOUT>
SQLPOINTER 15
SQLINTEGER -5
ffc3a1f5-16bf-4 1590-3c44 ENTER SQLDriverConnectW
HDBC 0x000001C63339A880
HWND 0x0000000000000000
WCHAR * 0x00007FFA978DF648 [ -3] “******\ 0”
SWORD -3
WCHAR * 0x00007FFA978DF648
SWORD -3
SWORD * 0x0000000000000000
UWORD 0 <SQL_DRIVER_NOPROMPT>
ffc3a1f5-16bf-4 1590-3c44 EXIT SQLDriverConnectW with return code 0 (SQL_SUCCESS)
HDBC 0x000001C63339A880
HWND 0x0000000000000000
WCHAR * 0x00007FFA978DF648 [ -3] “******\ 0”
SWORD -3
WCHAR * 0x00007FFA978DF648 <Invalid buffer length!> [-3]
SWORD -3
SWORD * 0x0000000000000000
UWORD 0 <SQL_DRIVER_NOPROMPT>
ffc3a1f5-16bf-4 1590-3c44 ENTER SQLGetInfoW
HDBC 0x000001C63339A880
UWORD 6 <SQL_DRIVER_NAME>
PTR 0x000001C636133C18
SWORD 100
SWORD * 0x000000B0FA9FE65C
ffc3a1f5-16bf-4 1590-3c44 EXIT SQLGetInfoW with return code 0 (SQL_SUCCESS)
HDBC 0x000001C63339A880
UWORD 6 <SQL_DRIVER_NAME>
PTR 0x000001C636133C18 [ 24] “ntl9j18z.dll”
SWORD 100
SWORD * 0x000000B0FA9FE65C (24)
ffc3a1f5-16bf-4 1590-3c44 ENTER SQLGetInfoW
HDBC 0x000001C63339A880
UWORD 7 <SQL_DRIVER_VER>
PTR 0x000001C636133CD0
SWORD 100
SWORD * 0x000000B0FA9FE65C
ffc3a1f5-16bf-4 1590-3c44 EXIT SQLGetInfoW with return code 0 (SQL_SUCCESS)
HDBC 0x000001C63339A880
UWORD 7 <SQL_DRIVER_VER>
PTR 0x000001C636133CD0 [ 8] “1.19”
SWORD 100
SWORD * 0x000000B0FA9FE65C (8)
ffc3a1f5-16bf-4 1590-3c44 ENTER SQLGetInfoW
HDBC 0x000001C63339A880
UWORD 17 <SQL_DBMS_NAME>
PTR 0x000001C636133D78
SWORD 100
SWORD * 0x000000B0FA9FE65C
ffc3a1f5-16bf-4 1590-3c44 EXIT SQLGetInfoW with return code 0 (SQL_SUCCESS)
HDBC 0x000001C63339A880
UWORD 17 <SQL_DBMS_NAME>
PTR 0x000001C636133D78 [ 30] “Infor Data Lake”
SWORD 100
SWORD * 0x000000B0FA9FE65C (30)
ffc3a1f5-16bf-4 1590-3c44 ENTER SQLGetInfoW
HDBC 0x000001C63339A880
UWORD 18 <SQL_DBMS_VER>
PTR 0x000001C636133E30
SWORD 100
SWORD * 0x000000B0FA9FE65C
ffc3a1f5-16bf-4 1590-3c44 EXIT SQLGetInfoW with return code 0 (SQL_SUCCESS)
HDBC 0x000001C63339A880
UWORD 18 <SQL_DBMS_VER>
PTR 0x000001C636133E30 [ 14] “unknown”
SWORD 100
SWORD * 0x000000B0FA9FE65C (14)
ffc3a1f5-16bf-4 1590-3c44 ENTER SQLAllocHandle
SQLSMALLINT 3 <SQL_HANDLE_STMT>
SQLHANDLE 0x000001C63339A880
SQLHANDLE * 0x000001C636135D88
ffc3a1f5-16bf-4 1590-3c44 EXIT SQLAllocHandle with return code 0 (SQL_SUCCESS)
SQLSMALLINT 3 <SQL_HANDLE_STMT>
SQLHANDLE 0x000001C63339A880
SQLHANDLE * 0x000001C636135D88 ( 0x000001C63339E8F0)
ffc3a1f5-16bf-4 1590-3c44 ENTER SQLGetInfoW
HDBC 0x000001C63339A880
UWORD 77 <SQL_DRIVER_ODBC_VER>
PTR 0x000001C636135DD8
SWORD 100
SWORD * 0x000000B0FA9FE62C
ffc3a1f5-16bf-4 1590-3c44 EXIT SQLGetInfoW with return code 0 (SQL_SUCCESS)
HDBC 0x000001C63339A880
UWORD 77 <SQL_DRIVER_ODBC_VER>
PTR 0x000001C636135DD8 [ 10] “03.50”
SWORD 100
SWORD * 0x000000B0FA9FE62C (10)
ffc3a1f5-16bf-4 1590-3c44 ENTER SQLGetInfoW
HDBC 0x000001C63339A880
UWORD 6 <SQL_DRIVER_NAME>
PTR 0x000001C636135ED0
SWORD 100
SWORD * 0x000000B0FA9FE66C
ffc3a1f5-16bf-4 1590-3c44 EXIT SQLGetInfoW with return code 0 (SQL_SUCCESS)
HDBC 0x000001C63339A880
UWORD 6 <SQL_DRIVER_NAME>
PTR 0x000001C636135ED0 [ 24] “ntl9j18z.dll”
SWORD 100
SWORD * 0x000000B0FA9FE66C (24)
ffc3a1f5-16bf-4 1590-3c44 ENTER SQLTablesW
HSTMT 0x000001C63339E8F0
WCHAR * 0x000001C635BC0304 [ 1] “%”
SWORD 1
WCHAR * 0x000001C6355B142C
SWORD 0
WCHAR * 0x000001C6355B142C
SWORD 0
WCHAR * 0x000001C6355B142C
SWORD 0
ffc3a1f5-16bf-4 1590-3c44 EXIT SQLTablesW with return code 0 (SQL_SUCCESS)
HSTMT 0x000001C63339E8F0
WCHAR * 0x000001C635BC0304 [ 1] “%”
SWORD 1
WCHAR * 0x000001C6355B142C
SWORD 0
WCHAR * 0x000001C6355B142C
SWORD 0
WCHAR * 0x000001C6355B142C
SWORD 0
ffc3a1f5-16bf-4 1590-3c44 ENTER SQLNumResultCols
HSTMT 0x000001C63339E8F0
SWORD * 0x000000B0FA9FE708
ffc3a1f5-16bf-4 1590-3c44 EXIT SQLNumResultCols with return code 0 (SQL_SUCCESS)
HSTMT 0x000001C63339E8F0
SWORD * 0x000000B0FA9FE708 (5)
ffc3a1f5-16bf-4 1590-3c44 ENTER SQLColAttributeW
SQLHSTMT 0x000001C63339E8F0
SQLSMALLINT 1
SQLSMALLINT 2 <SQL_DESC_CONCISE_TYPE>
SQLPOINTER 0x0000000000000000
SQLSMALLINT 0
SQLSMALLINT * 0x000000B0FA9FE650
SQLPOINTER 0x000000B0FA9FE648
ffc3a1f5-16bf-4 1590-3c44 EXIT SQLColAttributeW with return code 0 (SQL_SUCCESS)
SQLHSTMT 0x000001C63339E8F0
SQLSMALLINT 1
SQLSMALLINT 2 <SQL_DESC_CONCISE_TYPE>
SQLPOINTER 0x0000000000000000
SQLSMALLINT 0
SQLSMALLINT * 0x000000B0FA9FE650 (0)
SQLPOINTER 0x000000B0FA9FE648 (12) <SQL_VARCHAR>
ffc3a1f5-16bf-4 1590-3c44 ENTER SQLColAttributeW
SQLHSTMT 0x000001C63339E8F0
SQLSMALLINT 1
SQLSMALLINT 1011 <SQL_DESC_NAME>
SQLPOINTER 0x000001C633150090
SQLSMALLINT 4096
SQLSMALLINT * 0x000000B0FA9FE630
SQLPOINTER [Unknown attribute 1011]
ffc3a1f5-16bf-4 1590-3c44 EXIT SQLColAttributeW with return code 0 (SQL_SUCCESS)
SQLHSTMT 0x000001C63339E8F0
SQLSMALLINT 1
SQLSMALLINT 1011 <SQL_DESC_NAME>
SQLPOINTER 0x000001C633150090
SQLSMALLINT 4096
SQLSMALLINT * 0x000000B0FA9FE630 (18)
SQLPOINTER [Unknown attribute 1011]
ffc3a1f5-16bf-4 1590-3c44 ENTER SQLColAttributeW
SQLHSTMT 0x000001C63339E8F0
SQLSMALLINT 1
SQLSMALLINT 1008 <SQL_DESC_NULLABLE>
SQLPOINTER 0x0000000000000000
SQLSMALLINT 0
SQLSMALLINT * 0x000000B0FA9FE618
SQLPOINTER [Unknown attribute 1008]
ffc3a1f5-16bf-4 1590-3c44 EXIT SQLColAttributeW with return code 0 (SQL_SUCCESS)
SQLHSTMT 0x000001C63339E8F0
SQLSMALLINT 1
SQLSMALLINT 1008 <SQL_DESC_NULLABLE>
SQLPOINTER 0x0000000000000000
SQLSMALLINT 0
SQLSMALLINT * 0x000000B0FA9FE618 (0)
SQLPOINTER [Unknown attribute 1008]
ffc3a1f5-16bf-4 1590-3c44 ENTER SQLColAttributeW
SQLHSTMT 0x000001C63339E8F0
SQLSMALLINT 1
SQLSMALLINT 14 <SQL_DESC_TYPE_NAME>
SQLPOINTER 0x000001C633150090
SQLSMALLINT 4096
SQLSMALLINT * 0x000000B0FA9FE660
SQLPOINTER 0x000000B0FA9FE530 (NYI)
ffc3a1f5-16bf-4 1590-3c44 EXIT SQLColAttributeW with return code 0 (SQL_SUCCESS)
SQLHSTMT 0x000001C63339E8F0
SQLSMALLINT 1
SQLSMALLINT 14 <SQL_DESC_TYPE_NAME>
SQLPOINTER 0x000001C633150090
SQLSMALLINT 4096
SQLSMALLINT * 0x000000B0FA9FE660 (0)
SQLPOINTER 0x000000B0FA9FE530 (NYI)
ffc3a1f5-16bf-4 1590-3c44 ENTER SQLColAttributeW
SQLHSTMT 0x000001C63339E8F0
SQLSMALLINT 1
SQLSMALLINT 1003 <SQL_DESC_LENGTH>
SQLPOINTER 0x0000000000000000
SQLSMALLINT 0
SQLSMALLINT * 0x000000B0FA9FE5F8
SQLPOINTER [Unknown attribute 1003]
ffc3a1f5-16bf-4 1590-3c44 EXIT SQLColAttributeW with return code 0 (SQL_SUCCESS)
SQLHSTMT 0x000001C63339E8F0
SQLSMALLINT 1
SQLSMALLINT 1003 <SQL_DESC_LENGTH>
SQLPOINTER 0x0000000000000000
SQLSMALLINT 0
SQLSMALLINT * 0x000000B0FA9FE5F8 (4)
SQLPOINTER [Unknown attribute 1003]
ffc3a1f5-16bf-4 1590-3c44 ENTER SQLColAttributeW
SQLHSTMT 0x000001C63339E8F0
SQLSMALLINT 1
SQLSMALLINT 32
SQLPOINTER 0x0000000000000000
SQLSMALLINT 0
SQLSMALLINT * 0x000000B0FA9FE5E0
SQLPOINTER [Unknown attribute 32]
ffc3a1f5-16bf-4 1590-3c44 EXIT SQLColAttributeW with return code 0 (SQL_SUCCESS)
SQLHSTMT 0x000001C63339E8F0
SQLSMALLINT 1
SQLSMALLINT 32
SQLPOINTER 0x0000000000000000
SQLSMALLINT 0
SQLSMALLINT * 0x000000B0FA9FE5E0 (4)
SQLPOINTER [Unknown attribute 32]
ffc3a1f5-16bf-4 1590-3c44 ENTER SQLColAttributeW
SQLHSTMT 0x000001C63339E8F0
SQLSMALLINT 1
SQLSMALLINT 1006 <SQL_DESC_SCALE>
SQLPOINTER 0x0000000000000000
SQLSMALLINT 0
SQLSMALLINT * 0x000000B0FA9FE5D0
SQLPOINTER [Unknown attribute 1006]
ffc3a1f5-16bf-4 1590-3c44 EXIT SQLColAttributeW with return code 0 (SQL_SUCCESS)
SQLHSTMT 0x000001C63339E8F0
SQLSMALLINT 1
SQLSMALLINT 1006 <SQL_DESC_SCALE>
SQLPOINTER 0x0000000000000000
SQLSMALLINT 0
SQLSMALLINT * 0x000000B0FA9FE5D0 (2)
SQLPOINTER [Unknown attribute 1006]
ffc3a1f5-16bf-4 1590-3c44 ENTER SQLColAttributeW
SQLHSTMT 0x000001C63339E8F0
SQLSMALLINT 2
SQLSMALLINT 2 <SQL_DESC_CONCISE_TYPE>
SQLPOINTER 0x0000000000000000
SQLSMALLINT 0
SQLSMALLINT * 0x000000B0FA9FE650
SQLPOINTER 0x000000B0FA9FE648
ffc3a1f5-16bf-4 1590-3c44 EXIT SQLColAttributeW with return code 0 (SQL_SUCCESS)
SQLHSTMT 0x000001C63339E8F0
SQLSMALLINT 2
SQLSMALLINT 2 <SQL_DESC_CONCISE_TYPE>
SQLPOINTER 0x0000000000000000
SQLSMALLINT 0
SQLSMALLINT * 0x000000B0FA9FE650 (0)
SQLPOINTER 0x000000B0FA9FE648 (12) <SQL_VARCHAR>
ffc3a1f5-16bf-4 1590-3c44 ENTER SQLColAttributeW
SQLHSTMT 0x000001C63339E8F0
SQLSMALLINT 2
SQLSMALLINT 1011 <SQL_DESC_NAME>
SQLPOINTER 0x000001C633150090
SQLSMALLINT 4096
SQLSMALLINT * 0x000000B0FA9FE630
SQLPOINTER [Unknown attribute 1011]
ffc3a1f5-16bf-4 1590-3c44 EXIT SQLColAttributeW with return code 0 (SQL_SUCCESS)
SQLHSTMT 0x000001C63339E8F0
SQLSMALLINT 2
SQLSMALLINT 1011 <SQL_DESC_NAME>
SQLPOINTER 0x000001C633150090
SQLSMALLINT 4096
SQLSMALLINT * 0x000000B0FA9FE630 (22)
SQLPOINTER [Unknown attribute 1011]
ffc3a1f5-16bf-4 1590-3c44 ENTER SQLColAttributeW
SQLHSTMT 0x000001C63339E8F0
SQLSMALLINT 2
SQLSMALLINT 1008 <SQL_DESC_NULLABLE>
SQLPOINTER 0x0000000000000000
SQLSMALLINT 0
SQLSMALLINT * 0x000000B0FA9FE618
SQLPOINTER [Unknown attribute 1008]
ffc3a1f5-16bf-4 1590-3c44 EXIT SQLColAttributeW with return code 0 (SQL_SUCCESS)
SQLHSTMT 0x000001C63339E8F0
SQLSMALLINT 2
SQLSMALLINT 1008 <SQL_DESC_NULLABLE>
SQLPOINTER 0x0000000000000000
SQLSMALLINT 0
SQLSMALLINT * 0x000000B0FA9FE618 (0)
SQLPOINTER [Unknown attribute 1008]
ffc3a1f5-16bf-4 1590-3c44 ENTER SQLColAttributeW
SQLHSTMT 0x000001C63339E8F0
SQLSMALLINT 2
SQLSMALLINT 14 <SQL_DESC_TYPE_NAME>
SQLPOINTER 0x000001C633150090
SQLSMALLINT 4096
SQLSMALLINT * 0x000000B0FA9FE660
SQLPOINTER 0x000000B0FA9FE530 (NYI)
ffc3a1f5-16bf-4 1590-3c44 EXIT SQLColAttributeW with return code 0 (SQL_SUCCESS)
SQLHSTMT 0x000001C63339E8F0
SQLSMALLINT 2
SQLSMALLINT 14 <SQL_DESC_TYPE_NAME>
SQLPOINTER 0x000001C633150090
SQLSMALLINT 4096
SQLSMALLINT * 0x000000B0FA9FE660 (0)
SQLPOINTER 0x000000B0FA9FE530 (NYI)
ffc3a1f5-16bf-4 1590-3c44 ENTER SQLColAttributeW
SQLHSTMT 0x000001C63339E8F0
SQLSMALLINT 2
SQLSMALLINT 1003 <SQL_DESC_LENGTH>
SQLPOINTER 0x0000000000000000
SQLSMALLINT 0
SQLSMALLINT * 0x000000B0FA9FE5F8
SQLPOINTER [Unknown attribute 1003]
ffc3a1f5-16bf-4 1590-3c44 EXIT SQLColAttributeW with return code 0 (SQL_SUCCESS)
SQLHSTMT 0x000001C63339E8F0
SQLSMALLINT 2
SQLSMALLINT 1003 <SQL_DESC_LENGTH>
SQLPOINTER 0x0000000000000000
SQLSMALLINT 0
SQLSMALLINT * 0x000000B0FA9FE5F8 (4)
SQLPOINTER [Unknown attribute 1003]
ffc3a1f5-16bf-4 1590-3c44 ENTER SQLColAttributeW
SQLHSTMT 0x000001C63339E8F0
SQLSMALLINT 2
SQLSMALLINT 32
SQLPOINTER 0x0000000000000000
SQLSMALLINT 0
SQLSMALLINT * 0x000000B0FA9FE5E0
SQLPOINTER [Unknown attribute 32]
ffc3a1f5-16bf-4 1590-3c44 EXIT SQLColAttributeW with return code 0 (SQL_SUCCESS)
SQLHSTMT 0x000001C63339E8F0
SQLSMALLINT 2
SQLSMALLINT 32
SQLPOINTER 0x0000000000000000
SQLSMALLINT 0
SQLSMALLINT * 0x000000B0FA9FE5E0 (4)
SQLPOINTER [Unknown attribute 32]
ffc3a1f5-16bf-4 1590-3c44 ENTER SQLColAttributeW
SQLHSTMT 0x000001C63339E8F0
SQLSMALLINT 2
SQLSMALLINT 1006 <SQL_DESC_SCALE>
SQLPOINTER 0x0000000000000000
SQLSMALLINT 0
SQLSMALLINT * 0x000000B0FA9FE5D0
SQLPOINTER [Unknown attribute 1006]
ffc3a1f5-16bf-4 1590-3c44 EXIT SQLColAttributeW with return code 0 (SQL_SUCCESS)
SQLHSTMT 0x000001C63339E8F0
SQLSMALLINT 2
SQLSMALLINT 1006 <SQL_DESC_SCALE>
SQLPOINTER 0x0000000000000000
SQLSMALLINT 0
SQLSMALLINT * 0x000000B0FA9FE5D0 (2)
SQLPOINTER [Unknown attribute 1006]
ffc3a1f5-16bf-4 1590-3c44 ENTER SQLColAttributeW
SQLHSTMT 0x000001C63339E8F0
SQLSMALLINT 3
SQLSMALLINT 2 <SQL_DESC_CONCISE_TYPE>
SQLPOINTER 0x0000000000000000
SQLSMALLINT 0
SQLSMALLINT * 0x000000B0FA9FE650
SQLPOINTER 0x000000B0FA9FE648
ffc3a1f5-16bf-4 1590-3c44 EXIT SQLColAttributeW with return code 0 (SQL_SUCCESS)
SQLHSTMT 0x000001C63339E8F0
SQLSMALLINT 3
SQLSMALLINT 2 <SQL_DESC_CONCISE_TYPE>
SQLPOINTER 0x0000000000000000
SQLSMALLINT 0
SQLSMALLINT * 0x000000B0FA9FE650 (0)
SQLPOINTER 0x000000B0FA9FE648 (12) <SQL_VARCHAR>
ffc3a1f5-16bf-4 1590-3c44 ENTER SQLColAttributeW
SQLHSTMT 0x000001C63339E8F0
SQLSMALLINT 3
SQLSMALLINT 1011 <SQL_DESC_NAME>
SQLPOINTER 0x000001C633150090
SQLSMALLINT 4096
SQLSMALLINT * 0x000000B0FA9FE630
SQLPOINTER [Unknown attribute 1011]
ffc3a1f5-16bf-4 1590-3c44 EXIT SQLColAttributeW with return code 0 (SQL_SUCCESS)
SQLHSTMT 0x000001C63339E8F0
SQLSMALLINT 3
SQLSMALLINT 1011 <SQL_DESC_NAME>
SQLPOINTER 0x000001C633150090
SQLSMALLINT 4096
SQLSMALLINT * 0x000000B0FA9FE630 (20)
SQLPOINTER [Unknown attribute 1011]
ffc3a1f5-16bf-4 1590-3c44 ENTER SQLColAttributeW
SQLHSTMT 0x000001C63339E8F0
SQLSMALLINT 3
SQLSMALLINT 1008 <SQL_DESC_NULLABLE>
SQLPOINTER 0x0000000000000000
SQLSMALLINT 0
SQLSMALLINT * 0x000000B0FA9FE618
SQLPOINTER [Unknown attribute 1008]
ffc3a1f5-16bf-4 1590-3c44 EXIT SQLColAttributeW with return code 0 (SQL_SUCCESS)
SQLHSTMT 0x000001C63339E8F0
SQLSMALLINT 3
SQLSMALLINT 1008 <SQL_DESC_NULLABLE>
SQLPOINTER 0x0000000000000000
SQLSMALLINT 0
SQLSMALLINT * 0x000000B0FA9FE618 (0)
SQLPOINTER [Unknown attribute 1008]
ffc3a1f5-16bf-4 1590-3c44 ENTER SQLColAttributeW
SQLHSTMT 0x000001C63339E8F0
SQLSMALLINT 3
SQLSMALLINT 14 <SQL_DESC_TYPE_NAME>
SQLPOINTER 0x000001C633150090
SQLSMALLINT 4096
SQLSMALLINT * 0x000000B0FA9FE660
SQLPOINTER 0x000000B0FA9FE530 (NYI)
ffc3a1f5-16bf-4 1590-3c44 EXIT SQLColAttributeW with return code 0 (SQL_SUCCESS)
SQLHSTMT 0x000001C63339E8F0
SQLSMALLINT 3
SQLSMALLINT 14 <SQL_DESC_TYPE_NAME>
SQLPOINTER 0x000001C633150090
SQLSMALLINT 4096
SQLSMALLINT * 0x000000B0FA9FE660 (0)
SQLPOINTER 0x000000B0FA9FE530 (NYI)
ffc3a1f5-16bf-4 1590-3c44 ENTER SQLColAttributeW
SQLHSTMT 0x000001C63339E8F0
SQLSMALLINT 3
SQLSMALLINT 1003 <SQL_DESC_LENGTH>
SQLPOINTER 0x0000000000000000
SQLSMALLINT 0
SQLSMALLINT * 0x000000B0FA9FE5F8
SQLPOINTER [Unknown attribute 1003]
ffc3a1f5-16bf-4 1590-3c44 EXIT SQLColAttributeW with return code 0 (SQL_SUCCESS)
SQLHSTMT 0x000001C63339E8F0
SQLSMALLINT 3
SQLSMALLINT 1003 <SQL_DESC_LENGTH>
SQLPOINTER 0x0000000000000000
SQLSMALLINT 0
SQLSMALLINT * 0x000000B0FA9FE5F8 (4)
SQLPOINTER [Unknown attribute 1003]
ffc3a1f5-16bf-4 1590-3c44 ENTER SQLColAttributeW
SQLHSTMT 0x000001C63339E8F0
SQLSMALLINT 3
SQLSMALLINT 32
SQLPOINTER 0x0000000000000000
SQLSMALLINT 0
SQLSMALLINT * 0x000000B0FA9FE5E0
SQLPOINTER [Unknown attribute 32]
ffc3a1f5-16bf-4 1590-3c44 EXIT SQLColAttributeW with return code 0 (SQL_SUCCESS)
SQLHSTMT 0x000001C63339E8F0
SQLSMALLINT 3
SQLSMALLINT 32
SQLPOINTER 0x0000000000000000
SQLSMALLINT 0
SQLSMALLINT * 0x000000B0FA9FE5E0 (4)
SQLPOINTER [Unknown attribute 32]
ffc3a1f5-16bf-4 1590-3c44 ENTER SQLColAttributeW
SQLHSTMT 0x000001C63339E8F0
SQLSMALLINT 3
SQLSMALLINT 1006 <SQL_DESC_SCALE>
SQLPOINTER 0x0000000000000000
SQLSMALLINT 0
SQLSMALLINT * 0x000000B0FA9FE5D0
SQLPOINTER [Unknown attribute 1006]
ffc3a1f5-16bf-4 1590-3c44 EXIT SQLColAttributeW with return code 0 (SQL_SUCCESS)
SQLHSTMT 0x000001C63339E8F0
SQLSMALLINT 3
SQLSMALLINT 1006 <SQL_DESC_SCALE>
SQLPOINTER 0x0000000000000000
SQLSMALLINT 0
SQLSMALLINT * 0x000000B0FA9FE5D0 (2)
SQLPOINTER [Unknown attribute 1006]
ffc3a1f5-16bf-4 1590-3c44 ENTER SQLColAttributeW
SQLHSTMT 0x000001C63339E8F0
SQLSMALLINT 4
SQLSMALLINT 2 <SQL_DESC_CONCISE_TYPE>
SQLPOINTER 0x0000000000000000
SQLSMALLINT 0
SQLSMALLINT * 0x000000B0FA9FE650
SQLPOINTER 0x000000B0FA9FE648
ffc3a1f5-16bf-4 1590-3c44 EXIT SQLColAttributeW with return code 0 (SQL_SUCCESS)
SQLHSTMT 0x000001C63339E8F0
SQLSMALLINT 4
SQLSMALLINT 2 <SQL_DESC_CONCISE_TYPE>
SQLPOINTER 0x0000000000000000
SQLSMALLINT 0
SQLSMALLINT * 0x000000B0FA9FE650 (0)
SQLPOINTER 0x000000B0FA9FE648 (12) <SQL_VARCHAR>
ffc3a1f5-16bf-4 1590-3c44 ENTER SQLColAttributeW
SQLHSTMT 0x000001C63339E8F0
SQLSMALLINT 4
SQLSMALLINT 1011 <SQL_DESC_NAME>
SQLPOINTER 0x000001C633150090
SQLSMALLINT 4096
SQLSMALLINT * 0x000000B0FA9FE630
SQLPOINTER [Unknown attribute 1011]
ffc3a1f5-16bf-4 1590-3c44 EXIT SQLColAttributeW with return code 0 (SQL_SUCCESS)
SQLHSTMT 0x000001C63339E8F0
SQLSMALLINT 4
SQLSMALLINT 1011 <SQL_DESC_NAME>
SQLPOINTER 0x000001C633150090
SQLSMALLINT 4096
SQLSMALLINT * 0x000000B0FA9FE630 (20)
SQLPOINTER [Unknown attribute 1011]
ffc3a1f5-16bf-4 1590-3c44 ENTER SQLColAttributeW
SQLHSTMT 0x000001C63339E8F0
SQLSMALLINT 4
SQLSMALLINT 1008 <SQL_DESC_NULLABLE>
SQLPOINTER 0x0000000000000000
SQLSMALLINT 0
SQLSMALLINT * 0x000000B0FA9FE618
SQLPOINTER [Unknown attribute 1008]
ffc3a1f5-16bf-4 1590-3c44 EXIT SQLColAttributeW with return code 0 (SQL_SUCCESS)
SQLHSTMT 0x000001C63339E8F0
SQLSMALLINT 4
SQLSMALLINT 1008 <SQL_DESC_NULLABLE>
SQLPOINTER 0x0000000000000000
SQLSMALLINT 0
SQLSMALLINT * 0x000000B0FA9FE618 (0)
SQLPOINTER [Unknown attribute 1008]
ffc3a1f5-16bf-4 1590-3c44 ENTER SQLColAttributeW
SQLHSTMT 0x000001C63339E8F0
SQLSMALLINT 4
SQLSMALLINT 14 <SQL_DESC_TYPE_NAME>
SQLPOINTER 0x000001C633150090
SQLSMALLINT 4096
SQLSMALLINT * 0x000000B0FA9FE660
SQLPOINTER 0x000000B0FA9FE530 (NYI)
ffc3a1f5-16bf-4 1590-3c44 EXIT SQLColAttributeW with return code 0 (SQL_SUCCESS)
SQLHSTMT 0x000001C63339E8F0
SQLSMALLINT 4
SQLSMALLINT 14 <SQL_DESC_TYPE_NAME>
SQLPOINTER 0x000001C633150090
SQLSMALLINT 4096
SQLSMALLINT * 0x000000B0FA9FE660 (0)
SQLPOINTER 0x000000B0FA9FE530 (NYI)
ffc3a1f5-16bf-4 1590-3c44 ENTER SQLColAttributeW
SQLHSTMT 0x000001C63339E8F0
SQLSMALLINT 4
SQLSMALLINT 1003 <SQL_DESC_LENGTH>
SQLPOINTER 0x0000000000000000
SQLSMALLINT 0
SQLSMALLINT * 0x000000B0FA9FE5F8
SQLPOINTER [Unknown attribute 1003]
ffc3a1f5-16bf-4 1590-3c44 EXIT SQLColAttributeW with return code 0 (SQL_SUCCESS)
SQLHSTMT 0x000001C63339E8F0
SQLSMALLINT 4
SQLSMALLINT 1003 <SQL_DESC_LENGTH>
SQLPOINTER 0x0000000000000000
SQLSMALLINT 0
SQLSMALLINT * 0x000000B0FA9FE5F8 (4)
SQLPOINTER [Unknown attribute 1003]
ffc3a1f5-16bf-4 1590-3c44 ENTER SQLColAttributeW
SQLHSTMT 0x000001C63339E8F0
SQLSMALLINT 4
SQLSMALLINT 32
SQLPOINTER 0x0000000000000000
SQLSMALLINT 0
SQLSMALLINT * 0x000000B0FA9FE5E0
SQLPOINTER [Unknown attribute 32]
ffc3a1f5-16bf-4 1590-3c44 EXIT SQLColAttributeW with return code 0 (SQL_SUCCESS)
SQLHSTMT 0x000001C63339E8F0
SQLSMALLINT 4
SQLSMALLINT 32
SQLPOINTER 0x0000000000000000
SQLSMALLINT 0
SQLSMALLINT * 0x000000B0FA9FE5E0 (4)
SQLPOINTER [Unknown attribute 32]
ffc3a1f5-16bf-4 1590-3c44 ENTER SQLColAttributeW
SQLHSTMT 0x000001C63339E8F0
SQLSMALLINT 4
SQLSMALLINT 1006 <SQL_DESC_SCALE>
SQLPOINTER 0x0000000000000000
SQLSMALLINT 0
SQLSMALLINT * 0x000000B0FA9FE5D0
SQLPOINTER [Unknown attribute 1006]
ffc3a1f5-16bf-4 1590-3c44 EXIT SQLColAttributeW with return code 0 (SQL_SUCCESS)
SQLHSTMT 0x000001C63339E8F0
SQLSMALLINT 4
SQLSMALLINT 1006 <SQL_DESC_SCALE>
SQLPOINTER 0x0000000000000000
SQLSMALLINT 0
SQLSMALLINT * 0x000000B0FA9FE5D0 (2)
SQLPOINTER [Unknown attribute 1006]
ffc3a1f5-16bf-4 1590-3c44 ENTER SQLColAttributeW
SQLHSTMT 0x000001C63339E8F0
SQLSMALLINT 5
SQLSMALLINT 2 <SQL_DESC_CONCISE_TYPE>
SQLPOINTER 0x0000000000000000
SQLSMALLINT 0
SQLSMALLINT * 0x000000B0FA9FE650
SQLPOINTER 0x000000B0FA9FE648
ffc3a1f5-16bf-4 1590-3c44 EXIT SQLColAttributeW with return code 0 (SQL_SUCCESS)
SQLHSTMT 0x000001C63339E8F0
SQLSMALLINT 5
SQLSMALLINT 2 <SQL_DESC_CONCISE_TYPE>
SQLPOINTER 0x0000000000000000
SQLSMALLINT 0
SQLSMALLINT * 0x000000B0FA9FE650 (0)
SQLPOINTER 0x000000B0FA9FE648 (12) <SQL_VARCHAR>
ffc3a1f5-16bf-4 1590-3c44 ENTER SQLColAttributeW
SQLHSTMT 0x000001C63339E8F0
SQLSMALLINT 5
SQLSMALLINT 1011 <SQL_DESC_NAME>
SQLPOINTER 0x000001C633150090
SQLSMALLINT 4096
SQLSMALLINT * 0x000000B0FA9FE630
SQLPOINTER [Unknown attribute 1011]
ffc3a1f5-16bf-4 1590-3c44 EXIT SQLColAttributeW with return code 0 (SQL_SUCCESS)
SQLHSTMT 0x000001C63339E8F0
SQLSMALLINT 5
SQLSMALLINT 1011 <SQL_DESC_NAME>
SQLPOINTER 0x000001C633150090
SQLSMALLINT 4096
SQLSMALLINT * 0x000000B0FA9FE630 (14)
SQLPOINTER [Unknown attribute 1011]
ffc3a1f5-16bf-4 1590-3c44 ENTER SQLColAttributeW
SQLHSTMT 0x000001C63339E8F0
SQLSMALLINT 5
SQLSMALLINT 1008 <SQL_DESC_NULLABLE>
SQLPOINTER 0x0000000000000000
SQLSMALLINT 0
SQLSMALLINT * 0x000000B0FA9FE618
SQLPOINTER [Unknown attribute 1008]
ffc3a1f5-16bf-4 1590-3c44 EXIT SQLColAttributeW with return code 0 (SQL_SUCCESS)
SQLHSTMT 0x000001C63339E8F0
SQLSMALLINT 5
SQLSMALLINT 1008 <SQL_DESC_NULLABLE>
SQLPOINTER 0x0000000000000000
SQLSMALLINT 0
SQLSMALLINT * 0x000000B0FA9FE618 (0)
SQLPOINTER [Unknown attribute 1008]
ffc3a1f5-16bf-4 1590-3c44 ENTER SQLColAttributeW
SQLHSTMT 0x000001C63339E8F0
SQLSMALLINT 5
SQLSMALLINT 14 <SQL_DESC_TYPE_NAME>
SQLPOINTER 0x000001C633150090
SQLSMALLINT 4096
SQLSMALLINT * 0x000000B0FA9FE660
SQLPOINTER 0x000000B0FA9FE530 (NYI)
ffc3a1f5-16bf-4 1590-3c44 EXIT SQLColAttributeW with return code 0 (SQL_SUCCESS)
SQLHSTMT 0x000001C63339E8F0
SQLSMALLINT 5
SQLSMALLINT 14 <SQL_DESC_TYPE_NAME>
SQLPOINTER 0x000001C633150090
SQLSMALLINT 4096
SQLSMALLINT * 0x000000B0FA9FE660 (0)
SQLPOINTER 0x000000B0FA9FE530 (NYI)
ffc3a1f5-16bf-4 1590-3c44 ENTER SQLColAttributeW
SQLHSTMT 0x000001C63339E8F0
SQLSMALLINT 5
SQLSMALLINT 1003 <SQL_DESC_LENGTH>
SQLPOINTER 0x0000000000000000
SQLSMALLINT 0
SQLSMALLINT * 0x000000B0FA9FE5F8
SQLPOINTER [Unknown attribute 1003]
ffc3a1f5-16bf-4 1590-3c44 EXIT SQLColAttributeW with return code 0 (SQL_SUCCESS)
SQLHSTMT 0x000001C63339E8F0
SQLSMALLINT 5
SQLSMALLINT 1003 <SQL_DESC_LENGTH>
SQLPOINTER 0x0000000000000000
SQLSMALLINT 0
SQLSMALLINT * 0x000000B0FA9FE5F8 (4)
SQLPOINTER [Unknown attribute 1003]
ffc3a1f5-16bf-4 1590-3c44 ENTER SQLColAttributeW
SQLHSTMT 0x000001C63339E8F0
SQLSMALLINT 5
SQLSMALLINT 32
SQLPOINTER 0x0000000000000000
SQLSMALLINT 0
SQLSMALLINT * 0x000000B0FA9FE5E0
SQLPOINTER [Unknown attribute 32]
ffc3a1f5-16bf-4 1590-3c44 EXIT SQLColAttributeW with return code 0 (SQL_SUCCESS)
SQLHSTMT 0x000001C63339E8F0
SQLSMALLINT 5
SQLSMALLINT 32
SQLPOINTER 0x0000000000000000
SQLSMALLINT 0
SQLSMALLINT * 0x000000B0FA9FE5E0 (4)
SQLPOINTER [Unknown attribute 32]
ffc3a1f5-16bf-4 1590-3c44 ENTER SQLColAttributeW
SQLHSTMT 0x000001C63339E8F0
SQLSMALLINT 5
SQLSMALLINT 1006 <SQL_DESC_SCALE>
SQLPOINTER 0x0000000000000000
SQLSMALLINT 0
SQLSMALLINT * 0x000000B0FA9FE5D0
SQLPOINTER [Unknown attribute 1006]
ffc3a1f5-16bf-4 1590-3c44 EXIT SQLColAttributeW with return code 0 (SQL_SUCCESS)
SQLHSTMT 0x000001C63339E8F0
SQLSMALLINT 5
SQLSMALLINT 1006 <SQL_DESC_SCALE>
SQLPOINTER 0x0000000000000000
SQLSMALLINT 0
SQLSMALLINT * 0x000000B0FA9FE5D0 (2)
SQLPOINTER [Unknown attribute 1006]
ffc3a1f5-16bf-4 1590-3c44 ENTER SQLGetFunctions
HDBC 0x000001C63339A880
UWORD 1021
UWORD * 0x000000B0FA9FE630
ffc3a1f5-16bf-4 1590-3c44 EXIT SQLGetFunctions with return code 0 (SQL_SUCCESS)
HDBC 0x000001C63339A880
UWORD 1021
UWORD * 0x000000B0FA9FE630 (1)
ffc3a1f5-16bf-4 1590-3c44 ENTER SQLGetInfoW
HDBC 0x000001C63339A880
UWORD 81 <SQL_GETDATA_EXTENSIONS>
PTR 0x000001C6361364F0
SWORD 4
SWORD * 0x000000B0FA9FE52C
ffc3a1f5-16bf-4 1590-3c44 EXIT SQLGetInfoW with return code 0 (SQL_SUCCESS)
HDBC 0x000001C63339A880
UWORD 81 <SQL_GETDATA_EXTENSIONS>
PTR 0x000001C6361364F0 ( 0x0000000000000007)
SWORD 4
SWORD * 0x000000B0FA9FE52C (4)
ffc3a1f5-16bf-4 1590-3c44 ENTER SQLColAttributeW
SQLHSTMT 0x000001C63339E8F0
SQLSMALLINT 1
SQLSMALLINT 1013 <SQL_DESC_OCTET_LENGTH>
SQLPOINTER 0x0000000000000000
SQLSMALLINT 0
SQLSMALLINT * 0x000000B0FA9FE610
SQLPOINTER [Unknown attribute 1013]
ffc3a1f5-16bf-4 1590-3c44 EXIT SQLColAttributeW with return code 0 (SQL_SUCCESS)
SQLHSTMT 0x000001C63339E8F0
SQLSMALLINT 1
SQLSMALLINT 1013 <SQL_DESC_OCTET_LENGTH>
SQLPOINTER 0x0000000000000000
SQLSMALLINT 0
SQLSMALLINT * 0x000000B0FA9FE610 (4)
SQLPOINTER [Unknown attribute 1013]
ffc3a1f5-16bf-4 1590-3c44 ENTER SQLColAttributeW
SQLHSTMT 0x000001C63339E8F0
SQLSMALLINT 2
SQLSMALLINT 1013 <SQL_DESC_OCTET_LENGTH>
SQLPOINTER 0x0000000000000000
SQLSMALLINT 0
SQLSMALLINT * 0x000000B0FA9FE610
SQLPOINTER [Unknown attribute 1013]
ffc3a1f5-16bf-4 1590-3c44 EXIT SQLColAttributeW with return code 0 (SQL_SUCCESS)
SQLHSTMT 0x000001C63339E8F0
SQLSMALLINT 2
SQLSMALLINT 1013 <SQL_DESC_OCTET_LENGTH>
SQLPOINTER 0x0000000000000000
SQLSMALLINT 0
SQLSMALLINT * 0x000000B0FA9FE610 (4)
SQLPOINTER [Unknown attribute 1013]
ffc3a1f5-16bf-4 1590-3c44 ENTER SQLColAttributeW
SQLHSTMT 0x000001C63339E8F0
SQLSMALLINT 3
SQLSMALLINT 1013 <SQL_DESC_OCTET_LENGTH>
SQLPOINTER 0x0000000000000000
SQLSMALLINT 0
SQLSMALLINT * 0x000000B0FA9FE610
SQLPOINTER [Unknown attribute 1013]
ffc3a1f5-16bf-4 1590-3c44 EXIT SQLColAttributeW with return code 0 (SQL_SUCCESS)
SQLHSTMT 0x000001C63339E8F0
SQLSMALLINT 3
SQLSMALLINT 1013 <SQL_DESC_OCTET_LENGTH>
SQLPOINTER 0x0000000000000000
SQLSMALLINT 0
SQLSMALLINT * 0x000000B0FA9FE610 (4)
SQLPOINTER [Unknown attribute 1013]
ffc3a1f5-16bf-4 1590-3c44 ENTER SQLColAttributeW
SQLHSTMT 0x000001C63339E8F0
SQLSMALLINT 4
SQLSMALLINT 1013 <SQL_DESC_OCTET_LENGTH>
SQLPOINTER 0x0000000000000000
SQLSMALLINT 0
SQLSMALLINT * 0x000000B0FA9FE610
SQLPOINTER [Unknown attribute 1013]
ffc3a1f5-16bf-4 1590-3c44 EXIT SQLColAttributeW with return code 0 (SQL_SUCCESS)
SQLHSTMT 0x000001C63339E8F0
SQLSMALLINT 4
SQLSMALLINT 1013 <SQL_DESC_OCTET_LENGTH>
SQLPOINTER 0x0000000000000000
SQLSMALLINT 0
SQLSMALLINT * 0x000000B0FA9FE610 (4)
SQLPOINTER [Unknown attribute 1013]
ffc3a1f5-16bf-4 1590-3c44 ENTER SQLColAttributeW
SQLHSTMT 0x000001C63339E8F0
SQLSMALLINT 5
SQLSMALLINT 1013 <SQL_DESC_OCTET_LENGTH>
SQLPOINTER 0x0000000000000000
SQLSMALLINT 0
SQLSMALLINT * 0x000000B0FA9FE610
SQLPOINTER [Unknown attribute 1013]
ffc3a1f5-16bf-4 1590-3c44 EXIT SQLColAttributeW with return code 0 (SQL_SUCCESS)
SQLHSTMT 0x000001C63339E8F0
SQLSMALLINT 5
SQLSMALLINT 1013 <SQL_DESC_OCTET_LENGTH>
SQLPOINTER 0x0000000000000000
SQLSMALLINT 0
SQLSMALLINT * 0x000000B0FA9FE610 (4)
SQLPOINTER [Unknown attribute 1013]
ffc3a1f5-16bf-4 1590-3c44 ENTER SQLSetStmtAttrW
SQLHSTMT 0x000001C63339E8F0
SQLINTEGER 26 <SQL_ATTR_ROWS_FETCHED_PTR>
SQLPOINTER 0x0000000000000000
SQLINTEGER 0
ffc3a1f5-16bf-4 1590-3c44 EXIT SQLSetStmtAttrW with return code 0 (SQL_SUCCESS)
SQLHSTMT 0x000001C63339E8F0
SQLINTEGER 26 <SQL_ATTR_ROWS_FETCHED_PTR>
SQLPOINTER 0x0000000000000000
SQLINTEGER 0
ffc3a1f5-16bf-4 1590-3c44 ENTER SQLFetch
HSTMT 0x000001C63339E8F0
ffc3a1f5-16bf-4 1590-3c44 EXIT SQLFetch with return code 100 (SQL_NO_DATA_FOUND)
HSTMT 0x000001C63339E8F0
ffc3a1f5-16bf-4 1590-3c44 ENTER SQLMoreResults
HSTMT 0x000001C63339E8F0
ffc3a1f5-16bf-4 1590-3c44 EXIT SQLMoreResults with return code 100 (SQL_NO_DATA_FOUND)
HSTMT 0x000001C63339E8F0
ffc3a1f5-16bf-4 1590-3c44 ENTER SQLFreeHandle
SQLSMALLINT 3 <SQL_HANDLE_STMT>
SQLHANDLE 0x000001C63339E8F0
ffc3a1f5-16bf-4 1590-3c44 EXIT SQLFreeHandle with return code 0 (SQL_SUCCESS)
SQLSMALLINT 3 <SQL_HANDLE_STMT>
SQLHANDLE 0x000001C63339E8F0
ffc3a1f5-16bf-4 1590-3c44 ENTER SQLDisconnect
HDBC 0x000001C63339A880
ffc3a1f5-16bf-4 1590-3c44 EXIT SQLDisconnect with return code 0 (SQL_SUCCESS)
HDBC 0x000001C63339A880
ffc3a1f5-16bf-4 1590-3c44 ENTER SQLFreeHandle
SQLSMALLINT 2 <SQL_HANDLE_DBC>
SQLHANDLE 0x000001C63339A880
ffc3a1f5-16bf-4 1590-3c44 EXIT SQLFreeHandle with return code 0 (SQL_SUCCESS)
SQLSMALLINT 2 <SQL_HANDLE_DBC>
SQLHANDLE 0x000001C63339A880