Basic Preparation
[1] Download the new OpenLink SQL Server ODBC Driver version 8.0 Installer Package from our Download Page.
[2] Download a Free Evaluation License from the same Download Page,or purchase a non-expiring license from our Online Shop.
[3] Confirm that you have SQL Server up and running on Azure, including opening up firewall access for the IP Address used by your ODBC client application.
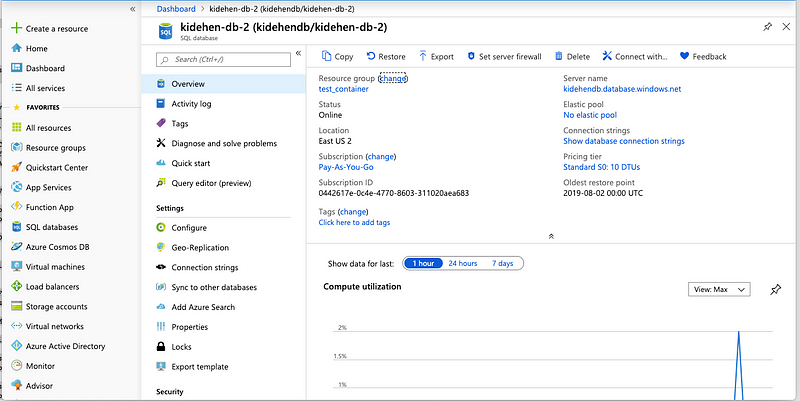
Azure Dashboard for Microsoft SQL Server — Properties sub-section
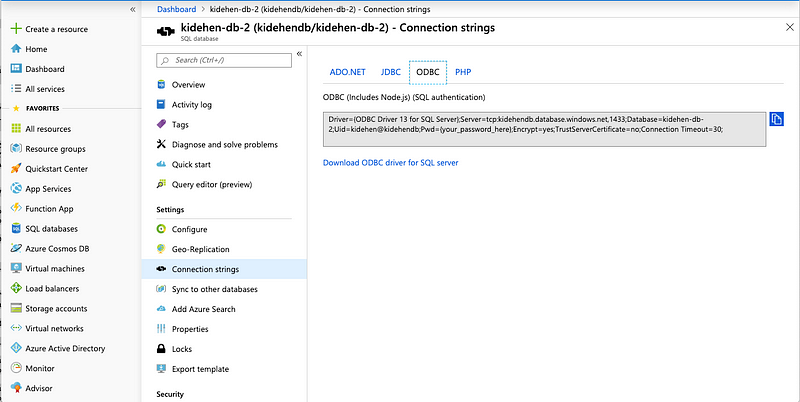
Azure Dashboard for Microsoft SQL Server — Connection strings sub-section
Information you need prior to setting up an ODBC connection
- Default Database — in this case, it is
kidehen-db - Server DNS Name or IP Address — in this case, it is
kidehendb.database.windows.net - Database Server Port — in this case, it is
1433
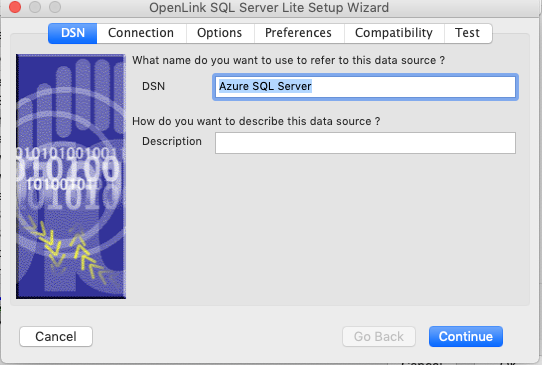
Setting up your ODBC Data Source Name (DSN) using the visual iODBC Administrator User Interface
Here are screenshots that cover the ODBC DSN setup process.
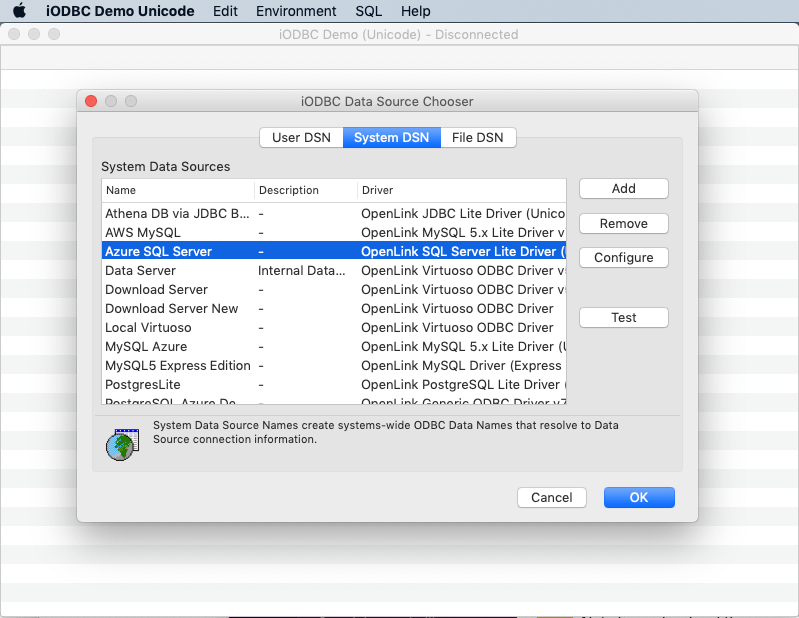
[1] Launch the iODBC Administrator.app or iODBC Administrator64.app (found in /Applications/iODBC/ )
[2] Assign a Literal Name that distinguishes this ODBC DSN from others.
[3] Provide Database Server Connection Information.
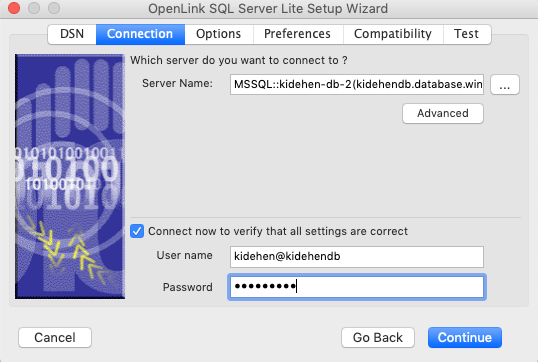
[4] Verify settings by making a simple connection to the target Database Server.
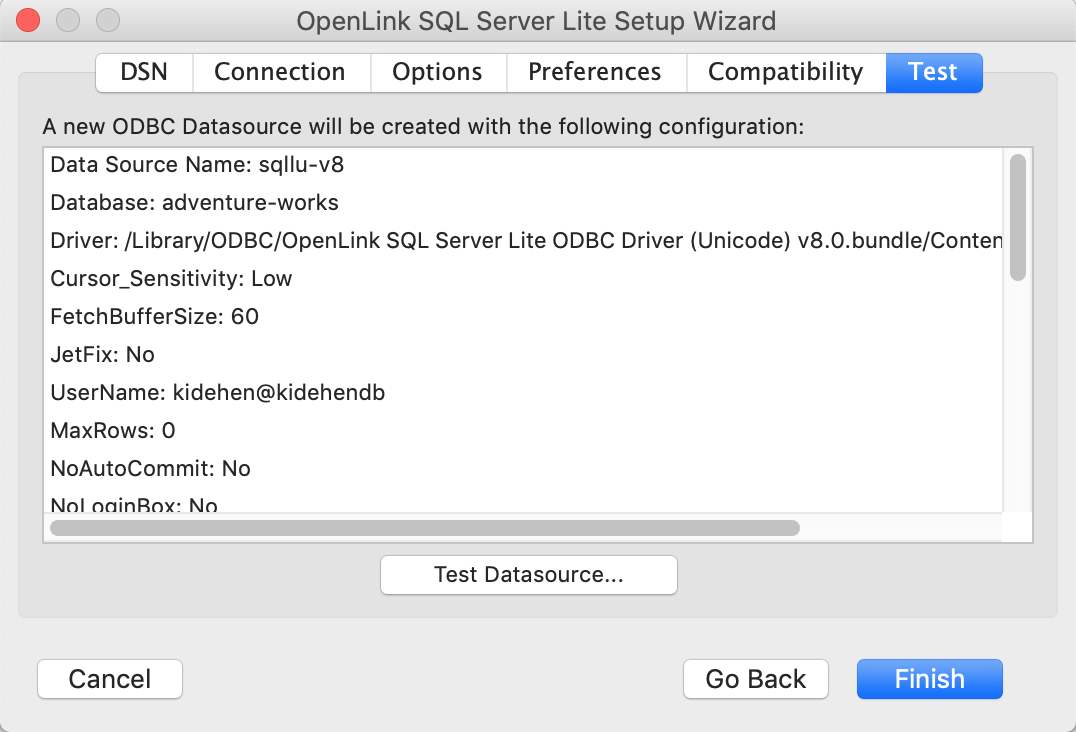
[5] Receive successful connection acknowledgement from Database Server.

[6] Save the newly created DSN for subsequent use by any ODBC compliant application.
Now that you have configured a DSN that has been confirmed as functional, proceed to making an ODBC connection using the iODBC Demo app (a simple ODBC-compliant application) that’s bundled with the driver installation.
ODBC-Compliant Application Test
[1] Start the iODBC Demo Unicode.app or iODBC Demo.app (found in /Applications/iODBC/ )
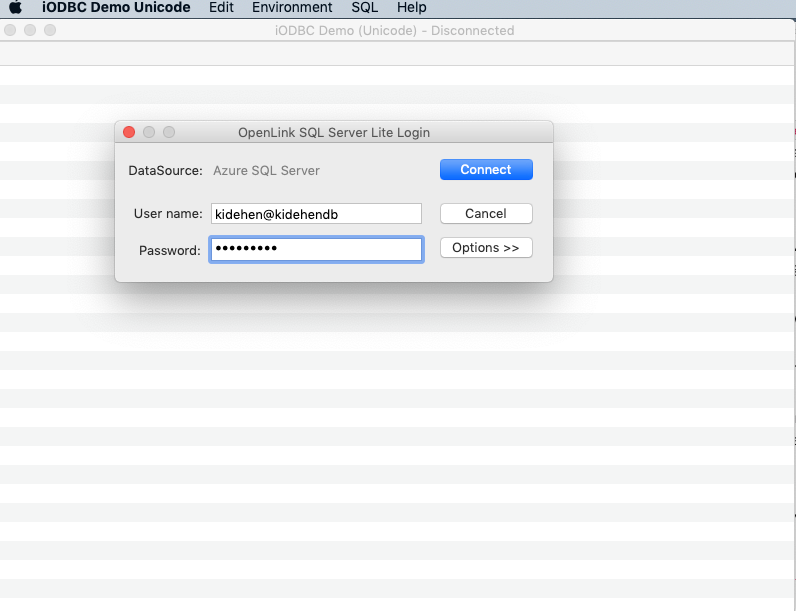
[2] Open a connection to your target Database Server via the Environment menu → Open Connection… .
[3] Provide your credentials for authentication.
[4] Choose Execute SQL… from the SQL menu.
[5] Enter a sample SQL Query.

[6] View query results.
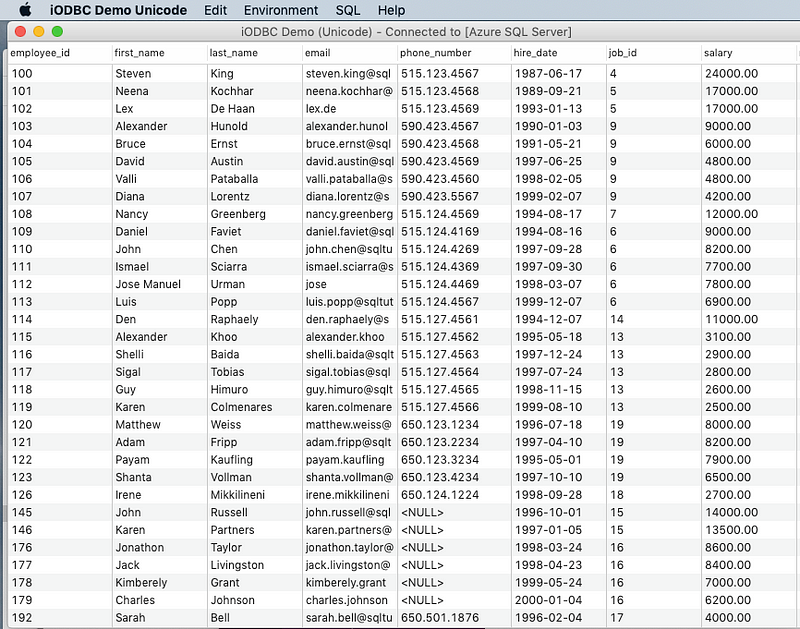
At this juncture, you have a working SQL Server Driver setup and a functioning DSN connecting you to a SQL Server instance running in the Azure Cloud.
Microsoft Excel Usage Example
The following steps and associated screenshots walk you through the process of retrieving data into Microsoft Excel (running on macOS) through your newly configured ODBC DSN associated with SQL Server running on Microsoft Azure.
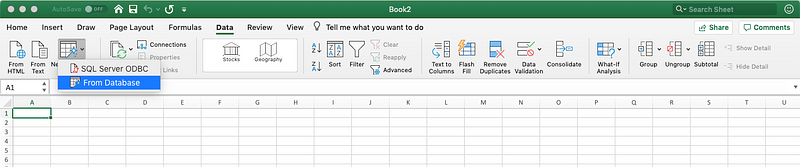
[1] Using the Data menu panel, select the From Databases menu item, and click to commence the ODBC DSN interaction process.
[2] Select the SQL Server DSN associated with your target Database Server.

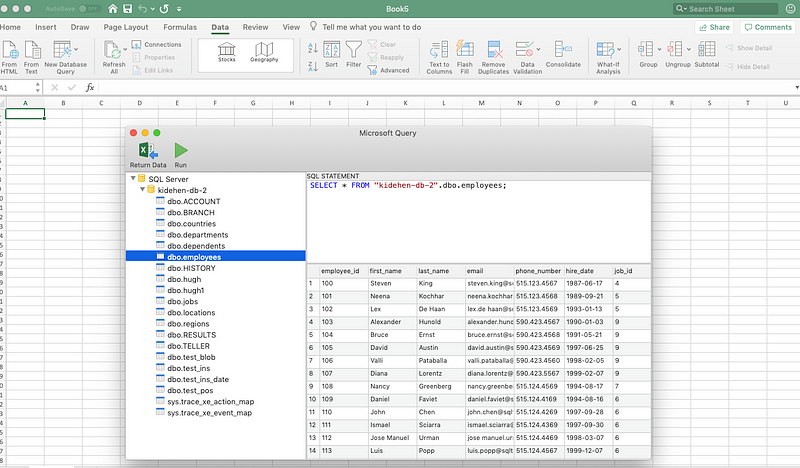
[3] The Microsoft Query applet bundled with Excel will now be initialized, en route to presenting you with an interface for query editing and execution. Enter your query, and click the Run button
[4] On completion of the query solution production process by the Database Server, you will be presented with a dialog for selecting query solution placement. Hit OK when you’ve selected the preferred spreadsheet location.
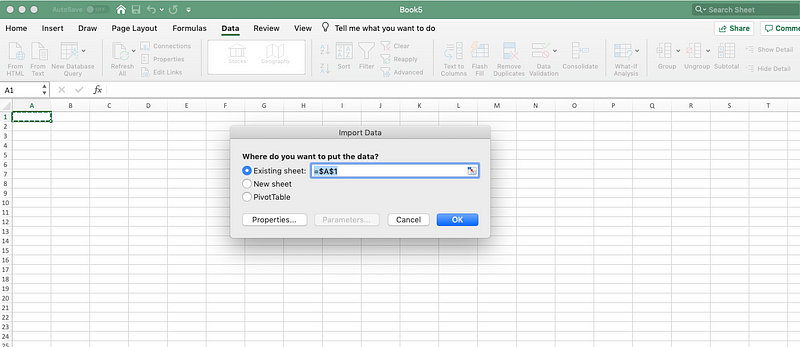
[5] Data is loaded into the selected spreadsheet location.

Conclusion
You have successfully configured an OpenLink ODBC Driver for SQL Server on macOS using the very same visual configuration pattern available to Windows users; i.e., you haven’t had to resort to manual configuration of initialization ( INI ) files which should only be necessary on macOS when there isn’t a visual ODBC Driver Administrator available for use — which should never be the case.