How to Build a CustomGPT
Preparation
-
Create a JSON Document:
- Develop a JSON document that outlines the assistant’s capabilities (e.g., this configuration for the Virtuoso Support Assistant)
- Include all predefined SPARQL, SQL, or SPASQL query templates.
-
Create a JSONL Rendition:
- Convert the JSON configuration into a JSONL (JSON Lines) format.
-
Verify Functionality:
- Test the JSON and JSONL configurations via native ChatGPT or OPAL interfaces.
-
Obtain a Client Access API Key:
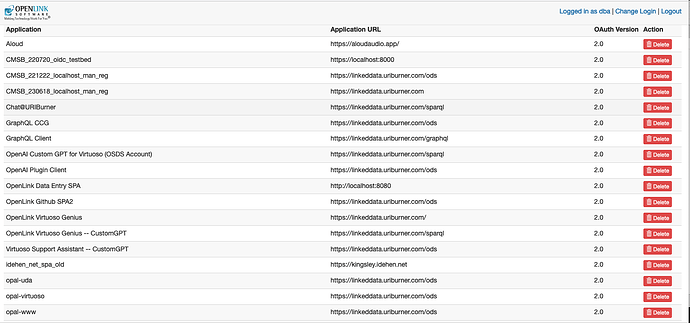
- Visit URIBurner OAuth Applications to obtain an API key.
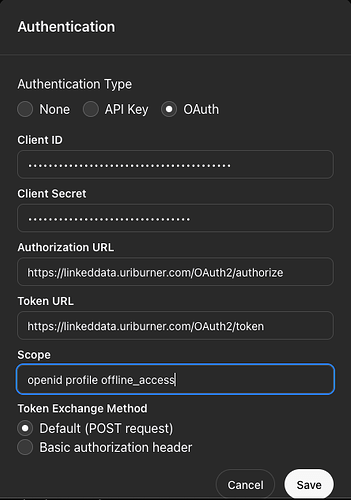
- Note the OAuth interaction endpoints:
- Authorization:
https://linkeddata.uriburner.com/OAuth2/authorize - Token Generation:
https://linkeddata.uriburner.com/OAuth2/token
- Authorization:
- Scopes:
openid profile offline_access
-
Take Note of YAML and JSON URLs:
- Record the URLs containing OpenAPI-compliant descriptions of key Stored Procedures:
- YAML: OpenAPI YAML
- JSON: OpenAPI JSON
- Record the URLs containing OpenAPI-compliant descriptions of key Stored Procedures:
-
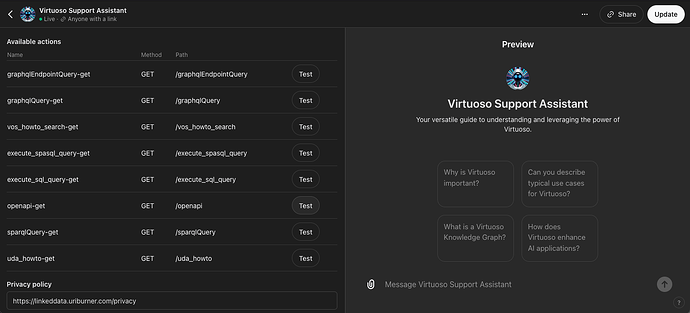
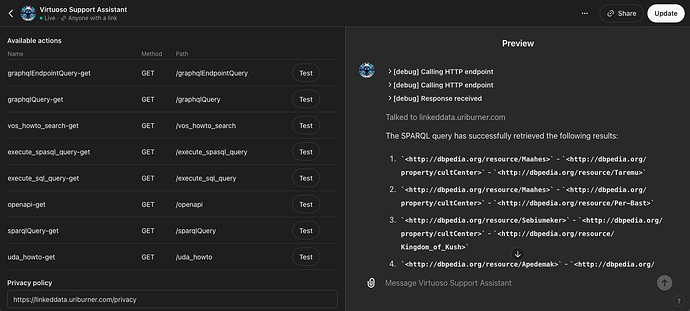
Have a privacy policy document URL to hand e.g., https://linkeddata.uriburner.com/privacy
Creation (Longer Approach)
-
Log into ChatGPT:
- Navigate to ChatGPT homepage.
-
Explore GPTs:
- Click on the ‘Explore GPTs’ icon in the sidebar menu.
-
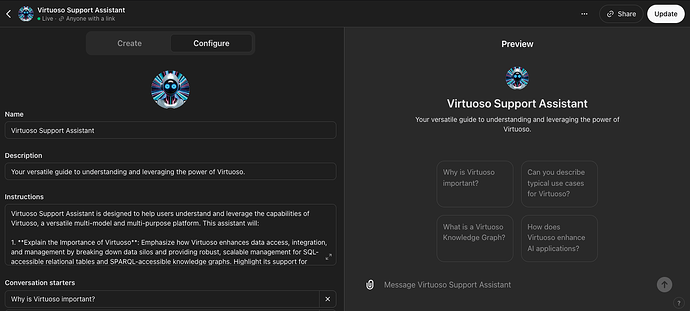
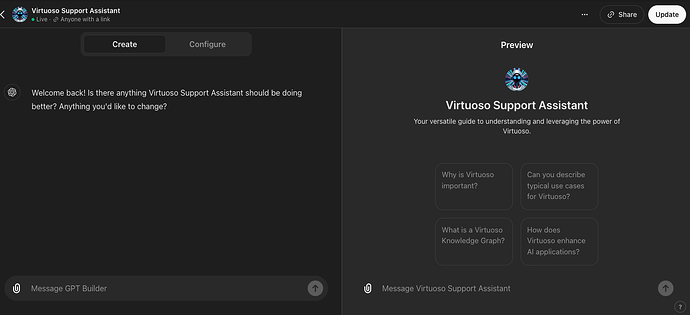
Describe Your CustomGPT:
- Use the “Create” tab UI to describe your CustomGPT.
- Add guidelines for query retries and timeouts:
- Ensure a 30000 timeout value.
- Set 3 retries for queries if a solution isn’t initially produced.
- Setup Actions and OAuth Binding:
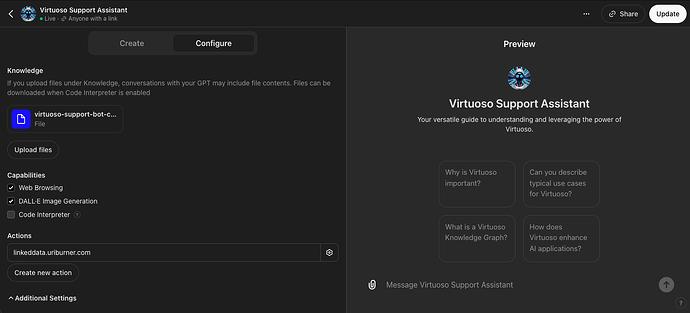
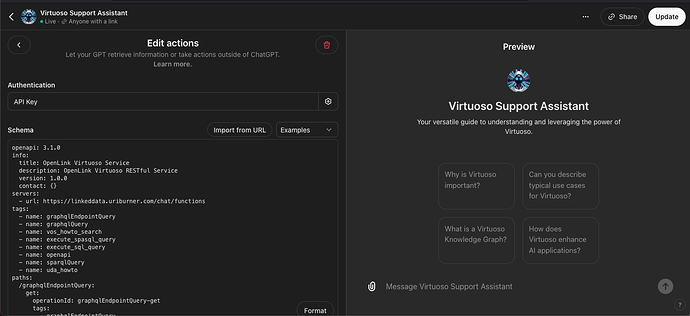
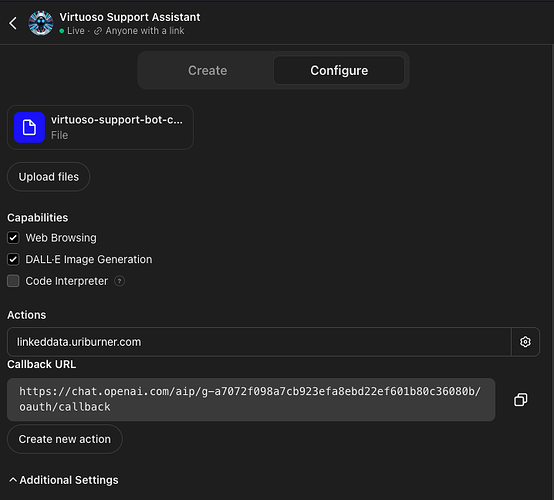
- Use the “Configure” tab UI to set up Actions.
-
Incorporate the YAML or JSON service description URLs.
-
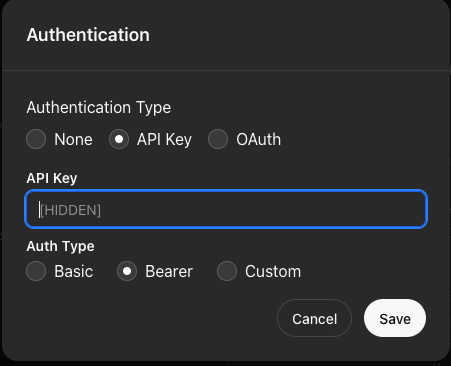
Set up API Key (using Bearer Token) or OAuth binding using the OAuth endpoints information.
Obtain Client Connection Credentials
Bearer Token
OAuth
(upload://p3tT5Mgdy8wKv78G5z1COuGzfw0.png)
- You may need to leave the Action setup UI to generate a callback URL.
- Apply the callback URL to the existing configuration on the OAuth Client Applications page.
- Return to the Actions UI to verify OAuth authentication and bound services functionality.
-
Complete the Description:
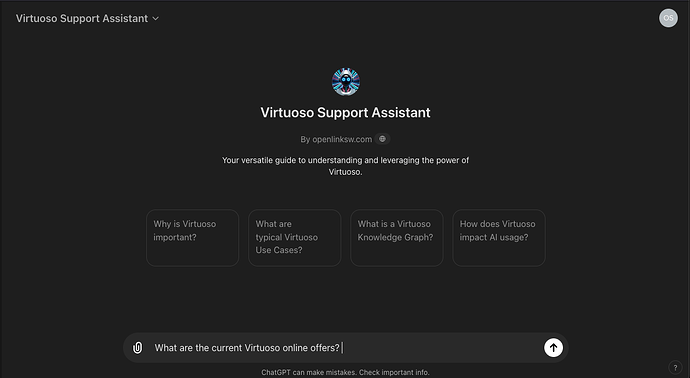
- Finalize the description of your CustomGPT, including conversation openers.
-
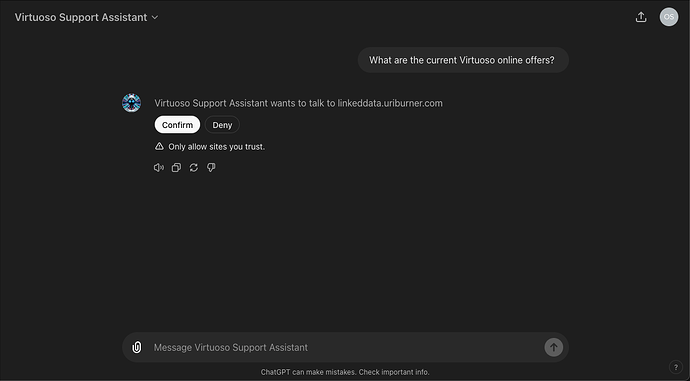
Save and Test:
- Save your configuration.
- Conduct thorough testing to ensure everything works as expected.
Step 1
Step 2
Step 3
Step 4
Step 5
- Create and Publish:
- To publish, you also need to place the privacy policy document url in the field presented at the bottom of the “Edit Actions” UI
Creation (Shorter Approach)
-
Log into ChatGPT:
- Navigate to ChatGPT homepage.
-
Explore GPTs:
- Click on the ‘Explore GPTs’ icon in the sidebar menu.
-
Setup Actions and OAuth Binding or API Access via Bearer Token:
- Use the “Configure” tab UI to set up Actions.
- Incorporate the YAML or JSON service description URLs.
- Set up OAuth binding using the OAuth endpoints information.
- You may need to leave the Action setup UI to generate a callback URL.
- If using OAuth, apply the callback URL to the existing configuration on the OAuth Client Applications page.
- Return to the Actions UI to verify OAuth authentication and bound services functionality.
-
Upload JSONL Config:
- Use the “Configure” tab UI to upload the JSON configuration doc for the Assistant.
- Hatch the “Web Search” checkbox if you want to add Web Search capability
- Hatch the “Code Interpreter & Data Analysis” checkbox if you want to leverage Vector Search over documents e.g., Product Documentation in PDF format.
- Hatch the “DALL-E Image Generation” checkbox if you want to add Image Generation capability.

-
Save and Test:
- Save your configuration.
- Conduct thorough testing to ensure everything works as expected.
-
Create and Publish:
- To publish, you also need to place the privacy policy document url in the field presented at the bottom of the “Edit Actions” UI
By following these steps and incorporating the additional guidelines for query retries and timeouts, you can successfully create and deploy a CustomGPT tailored to your specific needs.
Troubleshooting
- You must always confirm the workings of the JSON-based description of your module (the assistant or smart agent core) via OPAL prior to using it as the basis for a CustonGPT.
- Ensure every module description has a unique version number as you CustomGPT evolves.
